
Chocolate Peanut Butter Cookies

Deep chocolate cookies swirled with creamy peanut butter — crisp edges, soft centers, and a sparkling sugar crust. A beloved, make-ahead treat for any occasion.
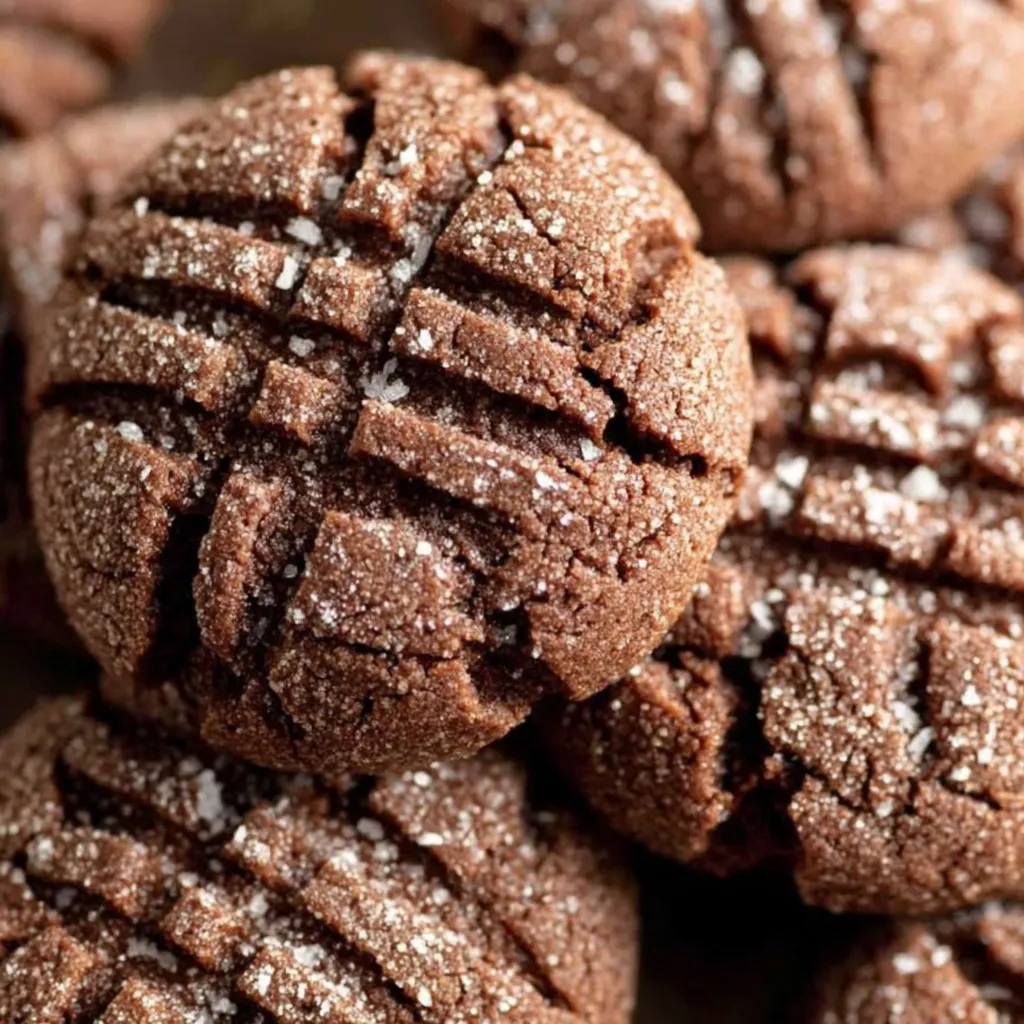
This recipe for Chocolate Peanut Butter Cookies has been in heavy rotation in my kitchen ever since a rainy Saturday taught me how comforting a simple batch of cookies can be. I first pulled this combination together when my pantry held more peanut butter than bread and I wanted something bold enough to satisfy both a chocolate craving and a nostalgic, peanut-butter sweetness. The result was a cookie with a tender, fudgy interior and a thin crackled top, rimmed by slightly crisp edges that hold up to dunking. Friends and family often call them the best store-bought look-alike I’ve ever made — they’re indulgent without being overly sweet.
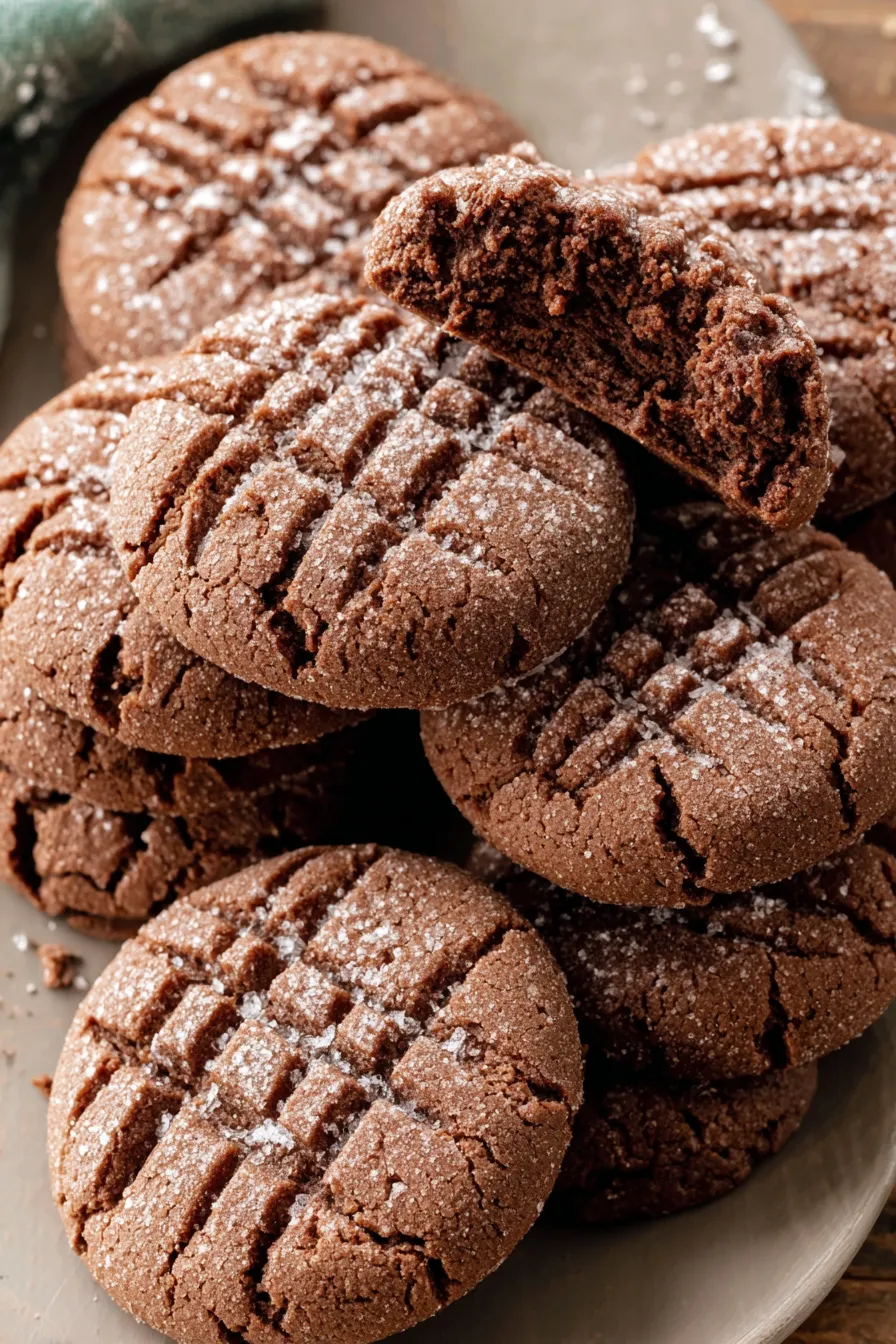
What makes these especially memorable is the contrast of textures: a rich cocoa backbone balanced by creamy peanut butter, brightened with vanilla and anchored by eggs and butter for structure. I love that the dough benefits from an hour in the refrigerator, which deepens the flavors and makes the dough easier to handle. These cookies are the kind I bring to potlucks because they travel well, and they disappear fast at holiday gatherings when people get a taste of that sugar-sparkled crust and fudgy center.
Why You'll Love This Recipe
- Versatile and forgiving: the dough chills for one hour so you can make it ahead and bake fresh batches as needed, perfect for parties or last-minute guests.
- Accessible ingredients: everything is pantry-friendly — all-purpose flour, cocoa, peanut butter, and staples you likely have on hand.
- Fast to bake: once chilled, cookies take just 8 to 10 minutes in a 350°F oven, so you can feed a crowd with minimal oven time.
- Texture contrast: crisp around the edges, soft and fudgy at the center thanks to the combined use of butter, peanut butter and the precise balance of sugars.
- Kid-approved and crowd-pleasing: the sugar-rolled exterior adds sparkle and a slight crunch that makes these irresistible at bake sales and school events.
- Make-ahead friendly: dough freezes well for future baking, and baked cookies stay fresh in an airtight container for days.
In my experience these cookies are consistently greeted with enthusiasm — neighbors ask for the recipe, and my teenagers request them for study sessions. I discovered that rolling in extra sugar before baking not only creates an attractive sheen but also prevents the fork from sticking when you press the criss-cross pattern, a small trick that looks impressive on a platter.
Ingredients
- All-purpose flour (2 1/4 cups): Use a reliable brand like King Arthur or Gold Medal. Measure with a dry measuring cup and level with a knife for accurate structure and texture.
- Unsweetened cocoa powder (2/3 cup): Do not pack; spoon into the measuring cup and level. Natural or Dutch-processed both work, but flavor will shift slightly — Dutch will be smoother and less acidic.
- Baking powder & baking soda (1 tsp each): These leaveners give a controlled lift and slight chew — ensure your baking soda is fresh for best rise.
- Granulated sugar (1 1/2 cups total): Reserve 1/2 cup for rolling. The remaining sugar is combined with brown sugar for softness and spread control.
- Unsalted butter (1 cup, softened): Room temperature butter creams with sugars for a light texture — avoid melting it or cookies will spread too thin.
- Creamy peanut butter (1 cup): A standard brand like Jif or Skippy gives consistent texture. Natural peanut butter can be used but stir well and expect subtle oil separation during chilling.
- Light brown sugar (1 1/4 cups, packed): Adds moisture and caramel notes that deepen the cookie’s centre; pack firmly into the measuring cup.
- Eggs (2): Large eggs at room temperature bind and add tenderness; add them one at a time for even emulsion.
- Vanilla extract (1 tsp): Use a pure extract for the cleanest flavor; it brightens the chocolate and peanut butter notes.
Instructions
Line the pan: Prepare a cookie sheet with parchment paper or a silicone baking mat. This ensures even baking and prevents sticking. Preheat the oven later to 350°F once dough has chilled. Sift dry ingredients: Sift together the flour, cocoa powder (spooned, not packed), baking soda, and baking powder into a bowl. Sifting prevents lumps and distributes leavening evenly; set aside. Reserve rolling sugar: Measure out 1/2 cup of the granulated sugar and set aside in a shallow bowl or quart-size zipper bag. This will coat the dough balls to create the signature glisten and prevent the fork from sticking. Cream fats and peanut butter: Using a stand mixer or hand mixer, cream the softened butter and creamy peanut butter on medium speed until smooth and well combined, about 1 to 2 minutes. Proper creaming creates air pockets that make cookies tender. Add sugars: Mix in the light brown sugar and remaining granulated sugar until the mixture is fluffy, roughly 2 to 3 minutes. Scrape the bowl as needed so everything is evenly incorporated. Incorporate eggs and vanilla: Add the eggs one at a time, mixing just until combined after each; then stir in the vanilla. Overmixing once eggs are added can develop gluten and toughen the cookies. Fold in dry mix: Slowly add the sifted flour and cocoa mixture to the wet ingredients on low speed, mixing just until no streaks of flour remain. Do not overwork the dough; a few small streaks are okay and will hydrate during chilling. Chill the dough: Cover the bowl and refrigerate for 1 hour. Chilling firms the fats, concentrates flavors, and prevents excessive spread while baking. Portion and roll: Scoop dough with a small cookie scoop or tablespoon and roll into balls between your palms to 1 to 1 1/2 inches. Place balls in the reserved sugar and roll until completely coated. Using a zipper bag keeps hands tidy and evenly coats each ball. Space and pattern: Arrange sugared balls about 2 inches apart on the prepared sheet. Dip a fork in the sugar to prevent sticking and press a light criss-cross pattern into each cookie so the fork tines leave a shallow design without flattening completely. Bake and rest: Bake in a preheated 350°F oven for 8 to 10 minutes. Allow cookies to rest on the baking sheet for 2 to 3 minutes to set before transferring to a wire rack to cool completely.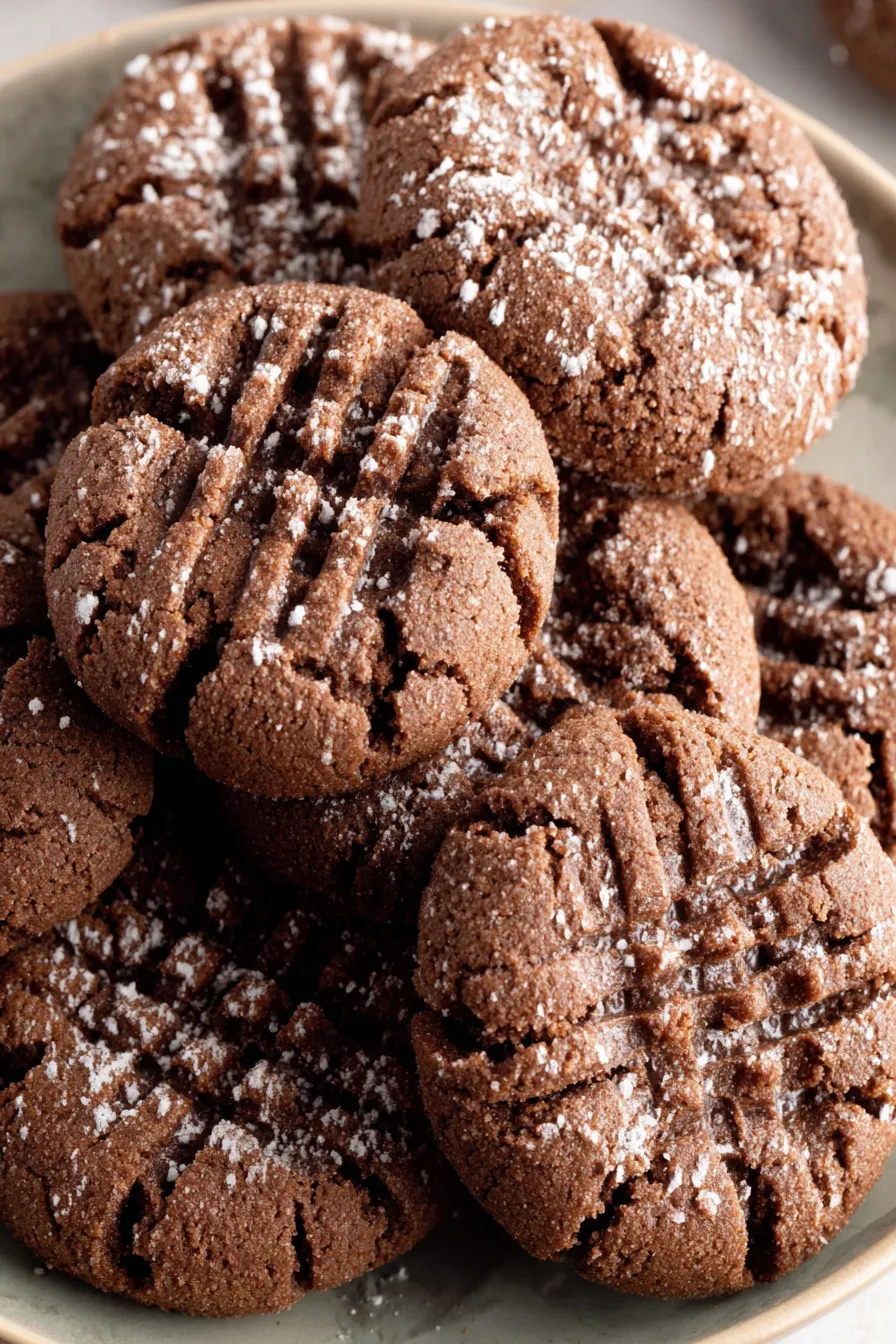
You Must Know
- These cookies freeze well as unbaked dough balls for up to 3 months; bake from frozen adding 1 to 2 extra minutes to the bake time.
- High in protein relative to many cookies because of peanut butter and eggs, but also calorie-dense — about 200 to 230 kcal per cookie depending on size.
- Store baked cookies in an airtight container at room temperature for up to 4 days, or refrigerate up to one week for longer freshness.
- For best texture, do not overbake; remove when edges are set and centers still appear slightly soft.
My favorite part of this recipe is the ritual of rolling each ball in sugar — it makes the cookies look finished and festive with minimal effort. Family members will often argue over who gets the crackliest top, and I’ve learned to bake a small test batch first when I change oven racks or try a new silicone mat. The simple fork pattern makes them look homemade and intentional, which always earns compliments.
Storage Tips
To keep cookies at peak texture, store them in an airtight container layered with parchment to prevent sticking. At room temperature they remain soft and flavorful for up to 4 days; for longer storage refrigerate up to 7 days. To freeze baked cookies, flash-freeze on a tray, then transfer to a freezer-safe bag for up to 3 months; thaw at room temperature for 30 to 60 minutes before serving. For unbaked dough balls, freeze on a tray until solid, then store in a labeled bag and bake directly from frozen, adding 1–2 minutes to the bake time.
Ingredient Substitutions
If you need to swap ingredients, use natural peanut butter but expect increased oil separation — stir well and chill slightly longer so dough firms. To make them dairy-free, replace butter with an equal amount of a vegan stick butter and verify peanut butter contains no dairy additives; texture will be similar but slightly softer. For a lower-sugar version, reduce granulated sugar by up to 1/4 cup and compensate with an extra tablespoon of brown sugar for moisture. Gluten-free options work with a 1:1 all-purpose gluten-free flour blend; expect a slightly crumblier crumb.
Serving Suggestions
Serve these with a tall glass of cold milk or a scoop of vanilla ice cream for a retro dessert feel. For a more sophisticated presentation, plate with dark chocolate shavings and a sprinkle of flaky sea salt to contrast the sweetness. They pair beautifully with coffee for brunch or as an after-school snack. For parties, arrange on a platter with seasonal garnishes like toasted peanuts, cocoa dusting, or fresh berries for color and acidity.
Cultural Background
The combination of chocolate and peanut butter is a modern American classic, rooted in 20th-century candy innovations and home baking creativity. Peanut butter rose to widespread popularity in the United States during the early 1900s; pairing it with chocolate became common in confections and home baking. These cookies are an example of home bakers adapting candy flavors into portable treats — marrying the comfort of peanut butter with the indulgence of cocoa.
Seasonal Adaptations
In winter, stir in 1/2 cup chopped roasted peanuts and a pinch of cinnamon for warmth. For the holidays, press a small dollop of raspberry jam into the cooled center of some cookies for a festive thumbprint variation. In summer, reduce bake time slightly to keep centers extra soft and serve chilled alongside ice cream. Swap the granulated rolling sugar for coarse sparkling sugar when you want a festive crunch and extra shine.
Meal Prep Tips
Make a double batch of dough and portion into 1-inch balls on a baking sheet, freeze until solid, then transfer to labeled bags for on-demand baking. This approach makes it easy to bake 12 fresh cookies in about 15 minutes whenever you need them. Use quart-size zipper bags for rolling sugar to speed coating; this keeps hands cleaner and yields a consistent coating. For school lunches, pack cookies in a small airtight container with a sheet of parchment to keep them from sticking together.
These cookies are the kind of recipe that invites experimentation but rewards restraint — a faithful technique and good-quality peanut butter give consistently excellent results. Share a plate, and you’ll likely be asked to make more.
Pro Tips
Chill dough for at least 1 hour to prevent excessive spread and deepen flavor.
Dip the fork in sugar before stamping to prevent sticking and create a clean criss-cross.
Use a small cookie scoop for uniform sizes and even baking.
To bake from frozen dough balls, add 1–2 minutes to the bake time.
Store baked cookies in an airtight container with parchment between layers to maintain texture.
This nourishing chocolate peanut butter cookies recipe is sure to be a staple in your kitchen. Enjoy every moist, high protein slice — it is perfect for breakfast or as a wholesome snack any time.
Tags
Chocolate Peanut Butter Cookies
This Chocolate Peanut Butter Cookies recipe makes perfectly juicy, tender, and flavorful steak every time! Serve with potatoes and a side salad for an unforgettable dinner in under 30 minutes.
Ingredients
Main
Instructions
Prepare pan and sift dry ingredients
Line a cookie sheet with parchment paper or a silicone baking mat. Sift together the flour, cocoa powder, baking powder, and baking soda into a bowl and set aside to ensure even distribution.
Reserve rolling sugar
Measure out 1/2 cup granulated sugar and set aside for rolling dough balls. Use a shallow bowl or a quart-size zipper bag to keep the process tidy.
Cream butter and peanut butter
Using a stand mixer or hand mixer, cream the softened butter and creamy peanut butter until smooth and well combined, about 1 to 2 minutes.
Add sugars and eggs
Add the light brown sugar and remaining granulated sugar, creaming until fluffy. Add eggs one at a time, mixing just until combined, then stir in vanilla extract.
Incorporate dry mixture
Slowly add the sifted flour and cocoa mixture on low speed, mixing just until the flour is incorporated. Avoid overmixing to keep cookies tender.
Chill the dough
Cover and refrigerate the dough for 1 hour. Chilling firms the fats and concentrates flavors, making the dough easier to handle and preventing over-spread.
Portion, roll and pattern
Scoop 1 to 1 1/2-inch dough balls, roll each in the reserved sugar until completely coated, place 2 inches apart on the sheet, and press a light criss-cross with a fork dipped in sugar.
Bake and cool
Bake at 350°F for 8 to 10 minutes. Let rest on the baking sheet for 2 to 3 minutes before transferring to a wire rack to cool completely.
Last Step: Please leave a rating and comment letting us know how you liked this recipe! This helps our business to thrive and continue providing free, high-quality recipes for you.
Nutrition
Did You Make This?
Leave a comment & rating below or tag
@epicula on social media!
Categories:
You might also like...

Mississippi Mud Brownies
Ultra-fudgy brownies crowned with toasted mini marshmallows and warm cocoa icing, with molten chocolate pockets in every bite.

Buttery Pecan Pie Bars
Buttery shortbread crust topped with a gooey brown sugar pecan filling. Just 10 minutes to prep for bakery-worthy bars with irresistible crunch.

Crack-Free Pumpkin Cheesecake
Ultra-creamy pumpkin cheesecake with a graham crust, bakes without cracks, and shines with caramel and rum-kissed whipped cream.
Did You Make This?
Leave a comment & rating below or tag @epicula on social media!
Rate This Recipe
Share This Recipe
Enjoyed this recipe? Share it with friends and family, and don't forget to leave a review!
Comments (1)
This recipe looks amazing! Can't wait to try it.
Comments are stored locally in your browser. Server comments are displayed alongside your local comments.

Hi, I'm Olivia!
What's Popular

30-Minute Meals!
Join to receive our email series which contains a round-up of some of our quick and easy family favorite recipes.