
>>

A creamy, oven-baked macaroni layered with sharp cheddar and a golden, crunchy breadcrumb topping — a comfort classic with a crisp finish.
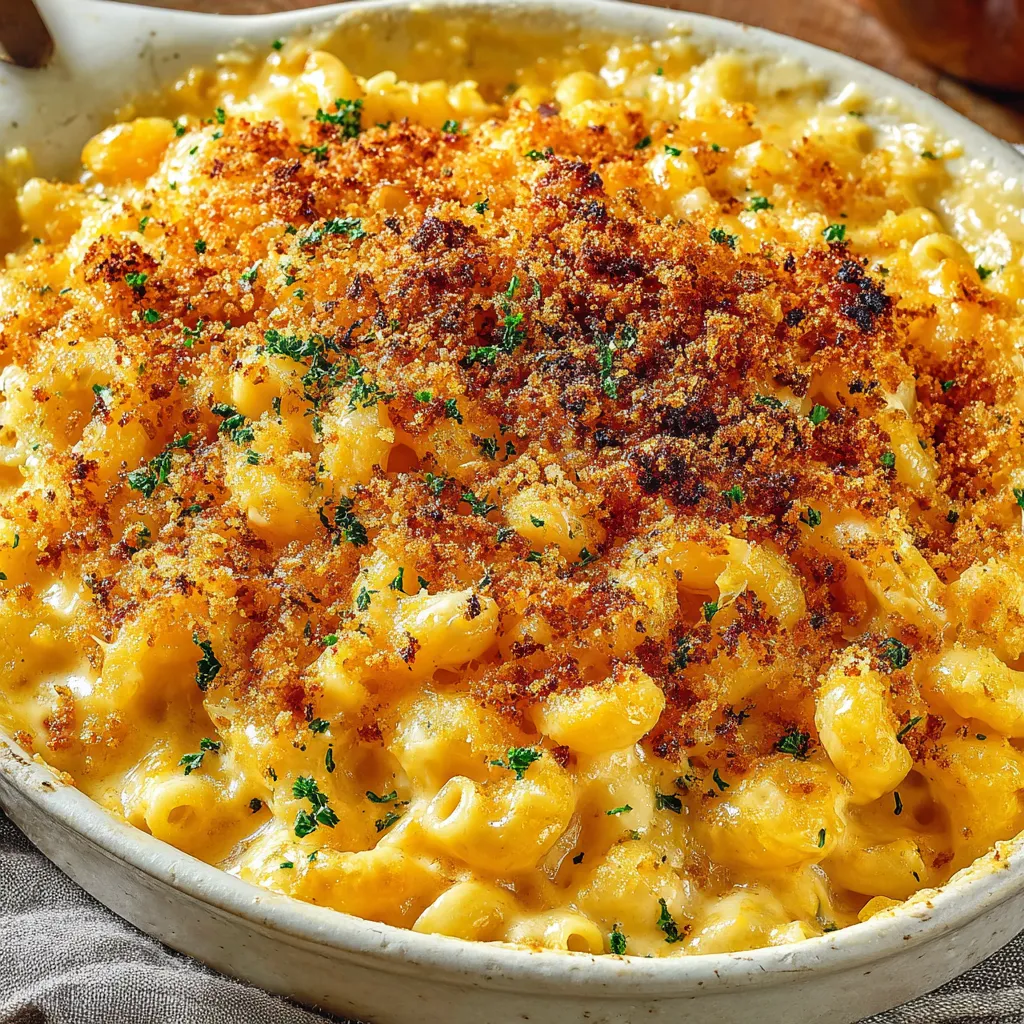
This baked mac and cheese with a crunch has been my go-to comfort dish since the day I learned how to coax the silkiest cheese sauce from a simple roux. I first made it on a rainy Sunday when pantry staples and a block of sharp cheddar salvaged a family dinner — the kind of meal that turned strangers into friends at our table. Every spoonful balances a velvet, cheesy interior with a toasted, fragrant topping that snaps delightfully against the fork. The texture contrast is what makes this version special: creamy pasta hugging a bold cheese flavor, finished with a nutty Parmesan-breadcrumb crust that holds up perfectly for reheating.
I discovered that small technique changes — a little smoked paprika for depth, a hot milk addition to the roux, and tossing the breadcrumbs with olive oil instead of melted butter — transformed an ordinary casserole into something memorable. This rendition is straightforward enough for weeknight cooks but impressive enough for a potluck. It’s also flexible: scale it up for a crowd, add roasted veggies for color, or fold in browned sausage for an indulgent main. The recipe below shows my preferred proportions and step-by-step technique so you get reliably creamy results every time.
Personally, my family’s happiest memories are around this casserole. My partner once declared it 'restaurant-level' after a lazy Sunday lunch, and our kids always race to the crunchy edge pieces. Small tweaks over the years have made this my signature version — reliable, comforting, and just a little bit elegant.
My favorite aspect of this dish is the edge pieces — where the cheese caramelizes against the sides of the baking dish and the breadcrumbs form a toasted crust. It’s what guests fight over and what I save for myself when serving family-style. The smoked paprika is a quiet but powerful addition that lifts the cheesy richness without making the flavor smoky; it’s subtle and mature.
Store leftovers in an airtight container in the refrigerator for up to 4 days. For best texture, reheat in the oven at 325°F covered with foil for 15–20 minutes, removing the foil for the last 5 minutes to re-crisp the topping. To freeze, assemble the dish without baking, cover tightly with plastic wrap and foil, and freeze for up to 3 months. When ready to bake, thaw overnight in the refrigerator, then bake at 350°F for 30–40 minutes until heated through and bubbling. If reheating individual portions in the microwave, add a splash of milk to restore creaminess and avoid drying out.
If you need to adapt the recipe, swap whole milk for 2 cups of milk plus 2 cups of half-and-half for extra richness, or use 3 cups milk and 1 cup heavy cream. For a lighter version, replace part of the cheddar with low-fat cheese and use 2% milk, though the sauce will be less luxurious. Gluten-free pasta and gluten-free breadcrumbs work well; be sure to use a gluten-free flour blend or cornstarch (2 tablespoons) to thicken if avoiding all-purpose flour. For a dairy-free adaptation, use a plant-based milk with a neutral flavor, dairy-free butter, and a high-quality vegan cheddar alternative designed for melting, acknowledging the final flavor will differ slightly from the original.
Serve this mac and cheese as a hearty side with roasted chicken, barbecued ribs, or alongside a crisp green salad to cut the richness. For a main, top with pan-seared sausage slices, shredded rotisserie chicken, or roasted mushrooms for added protein and texture. Garnish with chopped parsley for brightness and a squeeze of lemon if you’d like a subtle acidity to balance the cheese. For entertaining, present in the baking dish with small ramekins for individual portions and label any dietary variations so guests can choose.
Macaroni and cheese has deep roots in American comfort cooking but traces back to pasta-and-cheese dishes in Europe. In the U.S., it became a beloved staple in the early 20th century and evolved into countless regional variations. The baked, breadcrumb-topped version nods to classic casseroles served in Southern kitchens and holiday tables, where the crunchy crown is prized. Over generations, families have added their own touches — smoked meats, different cheeses, and spice blends — turning an economical pantry meal into a centerpiece of celebrations and home dining alike.
Seasonally, you can fold in autumn roasted squash or Brussels sprouts for fall, or mix in spring peas and blanched asparagus for a lighter springtime edition. For summer gatherings, serve smaller portions with a bright tomato cucumber salad. During colder months, add warming spices like a pinch of nutmeg to the sauce or stir in shredded slow-cooked pork for a heartier winter dish. Adjust the breadcrumb topping by mixing in toasted nuts or seeds during harvest season to add a rustic crunch.
To streamline weeknight cooking, prepare the sauce and cook the pasta up to a day ahead; cool, cover separately, and refrigerate. Combine and top with breadcrumbs the next day before baking. For office meal prep, portion into individual oven-safe containers; freeze or refrigerate and reheat in a toaster oven for a quick, satisfying lunch. Use heavyweight aluminum trays if transporting to potlucks — they retain heat and hold up to reheating. Label with reheating instructions to ensure consistent results.
Make this baked mac and cheese your own: tweak the cheeses, try different breadcrumb mixes, and don’t be afraid to add a crunchy finish that becomes your signature. There’s great comfort in a familiar recipe that still surprises with texture and depth of flavor — enjoy sharing it with people you love.
Shred cheese from a block instead of buying pre-shredded for smoother melting and better flavor.
Under-cook the pasta by about 1 minute to avoid a mushy final texture after baking.
Whisk in milk gradually to the roux to prevent lumps and ensure a silky sauce.
Toss breadcrumbs with olive oil rather than butter for a crisper, less greasy topping.
Let the dish rest for 5–10 minutes after baking so the sauce firms up slightly and slices hold together.
This nourishing baked mac and cheese with a crunch recipe is sure to be a staple in your kitchen. Enjoy every moist, high protein slice — it is perfect for breakfast or as a wholesome snack any time.
Yes. Assemble the dish and refrigerate for up to 24 hours, then bake as directed, adding a few extra minutes if chilled through.
Use gluten-free pasta and gluten-free breadcrumbs or crushed gluten-free crackers. Replace flour in the roux with a gluten-free blend or use 2 tablespoons cornstarch.
Reheat covered in a 325°F oven until warm, about 15–20 minutes for a full dish. For individual portions, microwave with a splash of milk to restore creaminess.
This Baked Mac and Cheese with a Crunch recipe makes perfectly juicy, tender, and flavorful steak every time! Serve with potatoes and a side salad for an unforgettable dinner in under 30 minutes.
Preheat oven to 350°F (175°C). Bring a large pot of salted water to a rolling boil and cook macaroni for about 1 minute less than package directions for al dente texture. Drain and set aside to prevent overcooking during baking.
In a large saucepan over medium heat, melt the butter. Add the flour and whisk constantly for about 2 minutes until the mixture becomes a light golden color and the raw flour taste cooks off.
Gradually whisk in the milk, adding a little at a time to prevent lumps. Bring to a gentle simmer and continue whisking until the sauce thickens enough to coat the back of a spoon, about 6–8 minutes.
Remove the pan from heat and stir in the shredded cheddar until fully melted. Season with salt, pepper, smoked paprika, and garlic powder. Taste and adjust seasoning as needed.
Fold the cooked macaroni into the cheese sauce until evenly coated. Transfer the mixture into a greased 9x13-inch baking dish and smooth the top so the breadcrumb layer will be even.
Mix breadcrumbs with grated Parmesan and olive oil until moistened, then sprinkle over the pasta. Bake at 350°F for 20–25 minutes until bubbly and the topping is golden brown. Let rest 5–10 minutes before serving.
Last Step: Please leave a rating and comment letting us know how you liked this recipe! This helps our business to thrive and continue providing free, high-quality recipes for you.
Leave a comment & rating below or tag
@epicula on social media!

Ultra-fudgy brownies crowned with toasted mini marshmallows and warm cocoa icing, with molten chocolate pockets in every bite.

Buttery shortbread crust topped with a gooey brown sugar pecan filling. Just 10 minutes to prep for bakery-worthy bars with irresistible crunch.

Ultra-creamy pumpkin cheesecake with a graham crust, bakes without cracks, and shines with caramel and rum-kissed whipped cream.
Leave a comment & rating below or tag @epicula on social media!
Enjoyed this recipe? Share it with friends and family, and don't forget to leave a review!
This recipe looks amazing! Can't wait to try it.
Comments are stored locally in your browser. Server comments are displayed alongside your local comments.

Join to receive our email series which contains a round-up of some of our quick and easy family favorite recipes.
