
Mississippi Mud Brownies

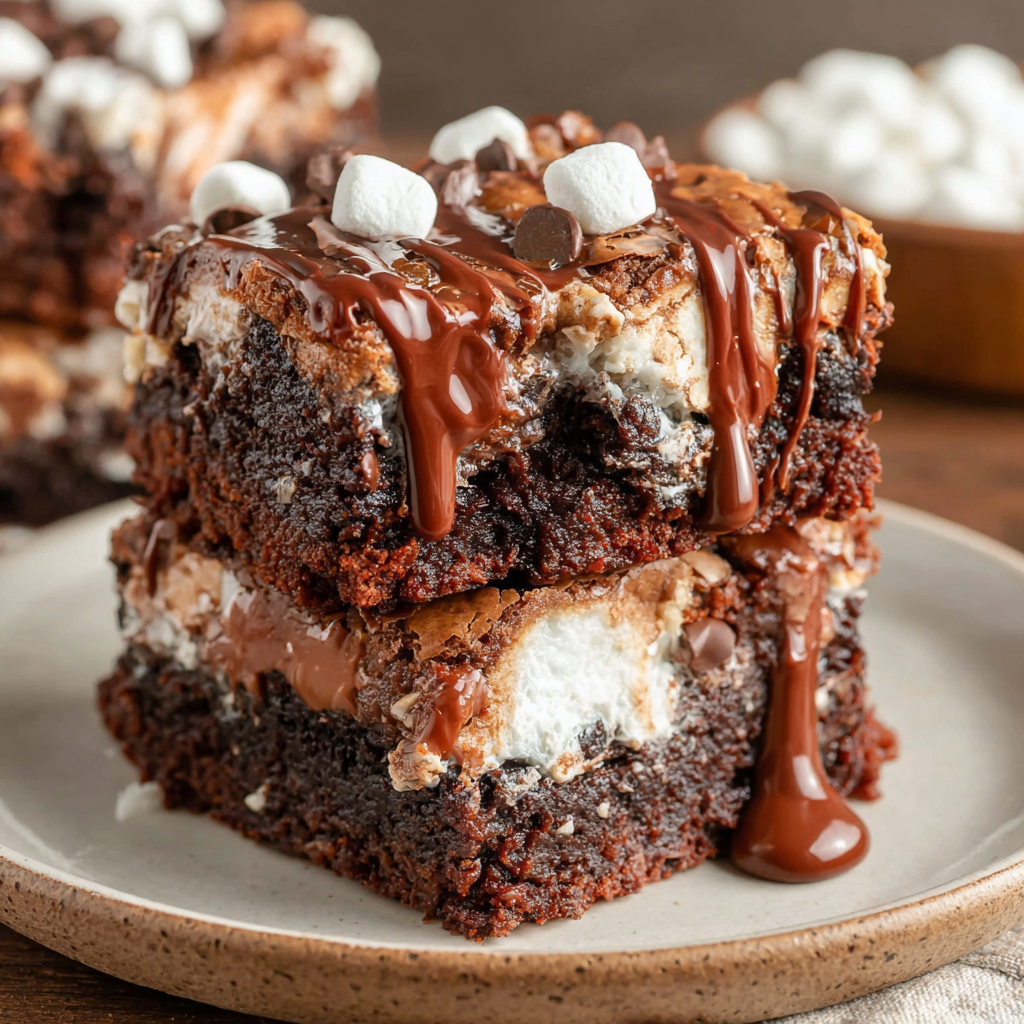
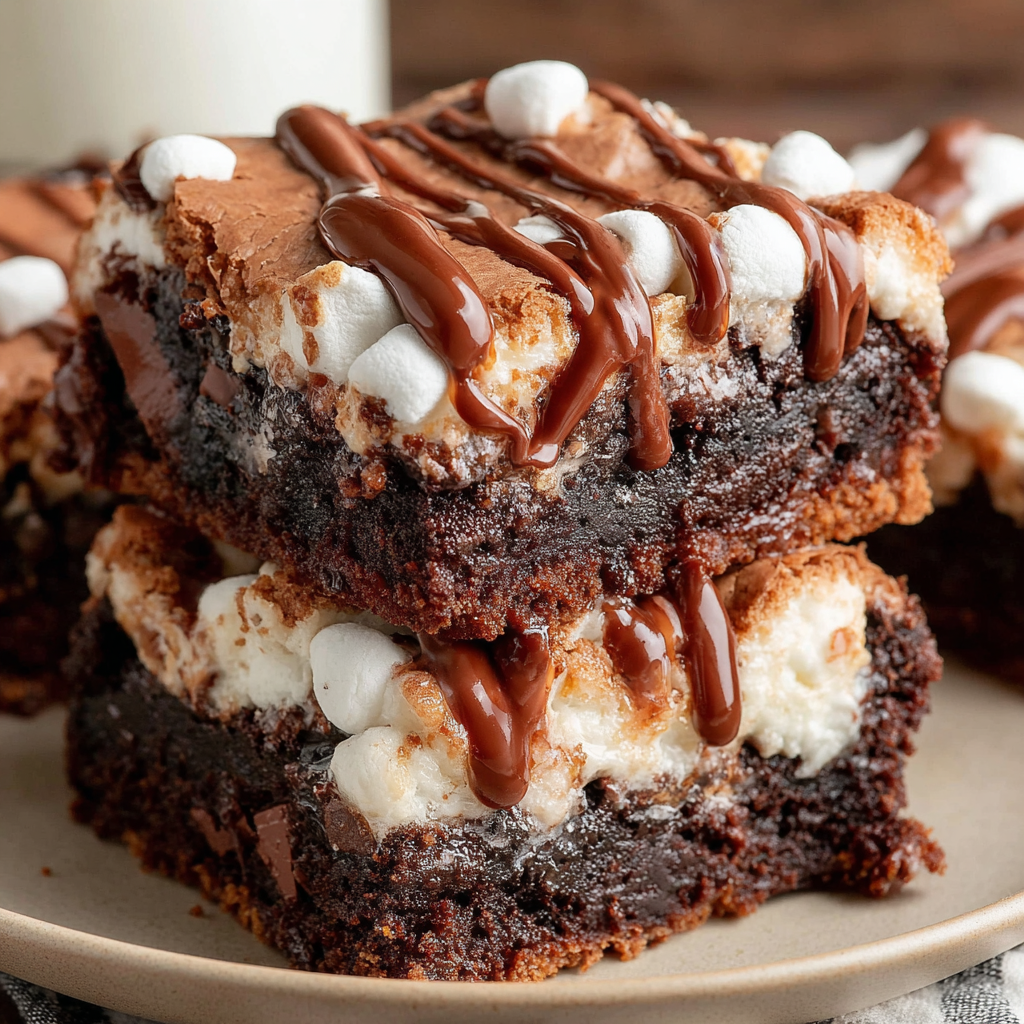
Ultra-fudgy brownies crowned with toasted mini marshmallows and warm cocoa icing, with molten chocolate pockets in every bite.

There is something wonderfully nostalgic about a pan of Mississippi Mud Brownies cooling on the counter, the marshmallow topping gently settling under a glossy cocoa icing. I first made these on a rainy Saturday when my pantry was heavy on baking staples and my family needed a cozy treat. One bite into that fudgy base with warm pockets of chocolate and the soft pull of toasted marshmallow, and it immediately earned a permanent spot in our dessert rotation. The texture is everything: dense and fudgy in the center, lightly crisp around the edges, pillowy on top, and finished with a thin, tender layer of icing that cracks just slightly when you slice.
What makes this version special is the deliberate emulsification of butter and sugar on the stovetop, which creates a glossy, bakery-style crumb without overmixing. I reach for Kerrygold butter for its richness, Domino sugar for consistency, King Arthur flour for structure, and Ghirardelli Dutch-process cocoa for deep chocolate flavor. Half of a Trader Joe’s Pound Plus bar chopped into generous chunks ensures ribbons of melty chocolate throughout. When the marshmallows puff in the oven and the warm icing cascades over them, the brownies transform into a crowd-pleasing, bake-sale-meets-birthday-party superstar. Every time I pull this pan out, it brings back memories of sharing squares with friends, sticky fingers and all.
Why You'll Love This Recipe
- Fudgy, not cakey: stovetop-emulsified butter and sugar create a dense, glossy crumb with a crackly top.
- Pantry-friendly: uses common staples like cocoa powder, flour, sugar, and mini marshmallows you likely have on hand.
- Extra chocolate pockets: chunky chopped chocolate melts into streaks, delivering bursts of gooey richness in every bite.
- Party-sized: bakes in a 9 by 13 inch pan and easily serves a crowd, perfect for birthdays and potlucks.
- Fast finish: base bakes in about 25 minutes, then marshmallow and icing go on in minutes for a quick, dramatic topping.
- Make-ahead friendly: sets beautifully and slices cleanly the next day, ideal for prepping the night before.
My family calls these the disappearing brownies because the pan never lasts more than a day. The first time I poured the warm icing over the puffed marshmallows, the kitchen went quiet, then everyone rushed in to watch that glossy layer set. It is the kind of dessert that turns an ordinary evening into a celebration.
Ingredients
- Unsalted butter: Choose a high-fat butter like Kerrygold for deeper flavor and a silkier crumb. Melt gently to avoid separating milk solids and clarify the batter’s texture.
- Granulated sugar: Domino dissolves smoothly and helps create that classic crackly top as it emulsifies with the butter over gentle heat.
- Canola oil: A touch of neutral oil keeps the brownies moist for days without overwhelming the chocolate flavor.
- Vanilla extract: Real vanilla rounds out cocoa’s bitterness and enhances the chocolate’s aromatic notes; use pure extract for best results.
- Large eggs: Add richness and structure. Incorporate one at a time to maintain a stable emulsion and prevent streaky batter.
- All-purpose flour: King Arthur provides reliable protein content for fudgy structure without turning cakey; measure accurately.
- Dutch-process cocoa powder: Ghirardelli Dutch cocoa gives deep color and smooth, intense chocolate flavor with lower acidity.
- Salt: Just enough to sharpen chocolate notes and balance sweetness; do not skip.
- Dark or milk chocolate: Chop a thick bar into penny-sized chunks for dramatic, melty pockets throughout.
- Mini marshmallows: They puff and adhere to the warm brownie surface, creating a pillowy layer that catches the icing.
- Salted butter (for icing): Adds a balanced salty-sweet note that keeps the icing from tasting flat.
- Powdered sugar: Sifts into a lump-free, pourable icing that sets with a soft sheen.
- Unsweetened cocoa powder (for icing): Reinforces chocolate flavor and deepens the icing’s color.
- Whole milk: Thins the icing to a pourable consistency that coats marshmallows evenly.
- Vanilla extract (for icing): Finishes the icing with warmth and aroma.
Instructions
Prep the pan and oven: Preheat the oven to 350°F. Line a 9 by 13 inch metal pan with parchment, creating overhang on two sides for lifting. Lightly spray the parchment and exposed sides. For tidy corners and easy removal, crisscross two sheets with the shorter sheet underneath. Emulsify butter and sugar: Melt the butter in a heavy-bottomed saucepan over low heat. Stir in the sugar until the mixture looks glossy and homogenous, with no separated butter. Remove from heat and stir for about 5 minutes to cool slightly while maintaining the emulsion. Add oil, vanilla, and eggs: Stir in the canola oil and vanilla until fully combined with no oily layer on top. Beat in the eggs one at a time with a spatula or fork, mixing thoroughly after each addition until smooth and cohesive. Fold in dry ingredients: Sift the flour, Dutch-process cocoa, and salt over the wet mixture. Fold gently with a spatula just until the dry streaks disappear. Overmixing introduces air and risks a cakier texture. Finish batter and bake: Fold in most of the chopped chocolate, reserving a small handful. Spread batter evenly into the prepared pan and scatter remaining chocolate on top. Bake for 25 minutes; the center should be set at the edges and slightly soft in the middle. Add marshmallows: Remove the pan and evenly cover the surface with mini marshmallows. Return to the oven for 3 minutes. The marshmallows will puff and gently fuse to the brownie base. Make the cocoa icing: In a saucepan over medium heat, melt the salted butter. Sift in powdered sugar and cocoa, whisking until smooth. Whisk in milk and vanilla to reach a pourable, glossy consistency. Do not boil; remove from heat. Pour and set: Immediately pour the warm icing over the marshmallows, using a spatula to nudge it into the corners. Let the pan cool until the icing is fully set before lifting out and slicing. Slice cleanly: For neat squares, use a plastic knife or a greased metal knife wiped between cuts. Cut into 24 pieces.
You Must Know
- Metal pans conduct heat evenly for fudgy centers and crisp edges; avoid glass for best texture.
- Let the icing set fully before slicing to keep layers intact and corners sharp.
- Brownies keep 3 to 4 days covered at room temperature; flavor deepens by day two.
- Freezes well for up to 3 months; thaw at room temperature still wrapped to prevent condensation.
My favorite moment is the pour: warm icing gliding over pillowy marshmallows, settling into a shiny, thin shell. It reminds me of bake sales at school where these were first to vanish. When I pack them for friends, I tuck parchment between layers, and I always save an edge piece for myself. That chewy corner with a marshmallow pull is pure bliss.
Storage Tips
Cool the brownies completely until the icing is set and no longer tacky. Store, cut or uncut, in an airtight container at room temperature for 3 to 4 days. If stacking, separate layers with parchment to protect the icing. For longer storage, wrap the slab tightly in plastic and then foil, or portion into squares and wrap individually before freezing for up to 3 months. Thaw wrapped at room temperature so condensation forms on the wrapping, not the icing. To refresh texture, briefly warm a square in a 300°F oven for 3 to 4 minutes; this softens the marshmallow and enlivens the chocolate without drying the crumb.
Ingredient Substitutions
No canola oil? Swap with vegetable or light olive oil in equal measure. If you only have natural cocoa, use the same amount; expect a slightly lighter color and a touch more bite in the chocolate flavor. Semi-sweet or milk chocolate both work; for milk, reduce sugar by 2 tablespoons if you prefer less sweetness. If you are out of mini marshmallows, cut standard marshmallows into quarters and lightly dust with powdered sugar to prevent sticking. Lactose-free adaptation: use lactose-free butter and milk for the icing; flavor stays rich. For a nutty twist, fold in 1 cup chopped toasted pecans with the chocolate.
Serving Suggestions
These brownies shine at room temperature, but for an indulgent dessert, warm a square until the marshmallow loosens and top with a scoop of vanilla ice cream. Garnish with a drizzle of warm fudge sauce or a sprinkle of flaky sea salt to sharpen the chocolate. For parties, cut into bite-size bars and serve on a parchment-lined board with bowls of toasted pecans and crushed graham crackers to channel s’mores vibes. A cup of strong coffee or a cold glass of milk pairs beautifully, and fresh berries on the side add a bright counterpoint.
Cultural Background
Mississippi Mud Brownies borrow their name from the rich, dark “mud” along the Mississippi River and evolved from Mississippi Mud Cake, a Southern classic. The hallmark trio remains the same: dense chocolate base, toasted marshmallows, and chocolate icing. This dessert traveled from church potlucks and community suppers to bake sales and family reunions, adored for its dramatic layers and generous yield. Today, regional variations include adding pecans, swapping in pecan praline icing, or flavoring the icing with espresso. No matter the tweaks, the spirit is the same: shareable chocolate comfort served in generous squares.
Seasonal Adaptations
In winter, add 1 teaspoon of instant espresso to the icing for depth and warmth. Spring calls for a handful of fresh raspberries on the plate to cut the richness. In summer, fold 1 cup chopped toasted pecans into the batter and serve with a scoop of vanilla ice cream. For fall gatherings, sprinkle the finished icing with a fine dusting of cinnamon or smoked salt for a cozy, campfire note. Around the holidays, swirl 1/2 teaspoon peppermint extract into the icing and scatter crushed peppermint candies before it sets.
Meal Prep Tips
For easy entertaining, bake the brownie base a day ahead and leave it covered in the pan. Right before serving, add the marshmallows, warm briefly to puff, then make and pour the icing so it sets fresh and glossy. If you need individual portions, cut once the icing is firm and store squares in a single layer with parchment separators. Pack for lunches by wrapping pieces in parchment and sliding them into reusable containers; they hold well at room temperature until afternoon without getting sticky.
Whether you serve them at a neighborhood potluck or as a sweet ending to a cozy family dinner, these brownies bring pure, nostalgic joy. Make them once, and they will become that beloved treat you are asked to bring again and again.
Pro Tips
Use a metal 9 by 13 inch pan for the best texture and even heat.
Emulsify butter and sugar fully; the mixture should look glossy with no pooled butter.
Chop a thick chocolate bar into penny-sized pieces for dramatic melty pockets.
Sift cocoa and powdered sugar for a lump-free batter and icing.
Pour icing while warm so it flows over the marshmallows and sets smoothly.
This nourishing mississippi mud brownies recipe is sure to be a staple in your kitchen. Enjoy every moist, high protein slice — it is perfect for breakfast or as a wholesome snack any time.
FAQs about Recipes
Can I use regular marshmallows instead of mini?
Yes. Cut standard marshmallows into quarters, toss lightly with powdered sugar to prevent clumping, and use the same total volume.
How do I know when the brownie base is done?
The base bakes about 25 minutes. Look for set edges and a slightly soft center; it will continue to set as it cools.
How do I get clean slices?
Let the icing set fully, then cut with a plastic knife or a greased metal knife, wiping clean between slices.
How should I store leftovers?
Store airtight at room temperature up to 4 days or freeze up to 3 months, well wrapped. Thaw wrapped at room temperature.
Tags
Mississippi Mud Brownies
This Mississippi Mud Brownies recipe makes perfectly juicy, tender, and flavorful steak every time! Serve with potatoes and a side salad for an unforgettable dinner in under 30 minutes.
Ingredients
Brownies
Topping and Icing
Instructions
Prep pan and oven
Preheat oven to 350°F. Line a 9 by 13 inch metal pan with parchment, leaving overhang for lifting, and lightly coat with cooking spray.
Emulsify butter and sugar
Melt butter over low heat in a heavy saucepan. Stir in granulated sugar until glossy and fully combined with no separated butter. Remove from heat and stir for 5 minutes to cool slightly.
Add oil, vanilla, and eggs
Stir in canola oil and vanilla until homogenous. Beat in eggs one at a time, mixing well after each until the batter is smooth and cohesive.
Fold in dry ingredients
Sift flour, Dutch-process cocoa, and salt over the wet mixture. Fold gently just until no dry streaks remain.
Add chocolate and bake base
Fold in most of the chopped chocolate and spread batter into the pan. Sprinkle remaining chocolate on top and bake 25 minutes, until edges are set and center is slightly soft.
Add marshmallows
Remove pan, evenly cover with mini marshmallows, and return to the oven for 3 minutes to puff and adhere.
Make icing
Melt salted butter over medium heat. Whisk in sifted powdered sugar and cocoa until smooth, then whisk in milk and vanilla to reach a pourable consistency. Do not boil.
Finish and set
Immediately pour warm icing over marshmallows, spreading to the corners. Cool completely until icing is set before lifting from the pan and slicing.
Last Step: Please leave a rating and comment letting us know how you liked this recipe! This helps our business to thrive and continue providing free, high-quality recipes for you.
Nutrition
Did You Make This?
Leave a comment & rating below or tag
@epicula on social media!
Categories:
You might also like...
Mississippi Mud Brownies
Ultra-fudgy brownies crowned with toasted mini marshmallows and warm cocoa icing, with molten chocolate pockets in every bite.

Buttery Pecan Pie Bars
Buttery shortbread crust topped with a gooey brown sugar pecan filling. Just 10 minutes to prep for bakery-worthy bars with irresistible crunch.

Crack-Free Pumpkin Cheesecake
Ultra-creamy pumpkin cheesecake with a graham crust, bakes without cracks, and shines with caramel and rum-kissed whipped cream.
Did You Make This?
Leave a comment & rating below or tag @epicula on social media!
Rate This Recipe
Share This Recipe
Enjoyed this recipe? Share it with friends and family, and don't forget to leave a review!
Comments (1)
This recipe looks amazing! Can't wait to try it.
Comments are stored locally in your browser. Server comments are displayed alongside your local comments.

Hi, I'm Olivia!
What's Popular

30-Minute Meals!
Join to receive our email series which contains a round-up of some of our quick and easy family favorite recipes.