
Best Ever Mini Cheesecake Bites

Tiny, creamy cheesecake bites with a warm cinnamon graham crust — perfect for parties, make-ahead treats, or a simple weeknight indulgence.

Why You'll Love This Recipe
- Ready in about 30 minutes of active time and bakes for roughly 16–20 minutes, making it ideal for last-minute entertaining or a quick dessert fix.
- Uses pantry staples — cinnamon graham crackers, butter, cream cheese, sugar, and eggs — so you rarely need a special trip to the store.
- Portable and perfectly portioned: 12 individual bites mean no slicing drama and easy serving at parties, potlucks, or school events.
- Make-ahead friendly: they chill overnight and actually taste better after the flavors meld; they also freeze well for up to 3 months.
- Customizable toppings — from fresh berries to salted caramel or a quick chocolate drizzle — so you can tailor them for any occasion or season.
- Beginner-friendly technique with clear visual cues (tops set, slight center jiggle) — great for cooks of all skill levels.
On the first night I served these, my neighbor popped by and taste-tested one while I was still plating. She came back with the entire box. My family's reaction—wide eyes, quiet chewing, then a chorus of "More!"—made it clear this was more than a test: it was a keeper. Over time I've tweaked the cinnamon level to be warming but not overpowering, and the result is a bite-sized dessert that consistently gets requests for seconds.
Ingredients
- Cinnamon Graham Crackers (for crust): Look for cinnamon-flavored graham crackers such as Nabisco or store-brand equivalents. You need 1 1/4 cups of crumbs (about 10 full sheets). The cinnamon in the crackers gives a warm base that pairs beautifully with the tang of the filling.
- Unsalted Butter: 3 tablespoons, melted. Use a high-quality butter like Plugra or Kerrygold if possible — it adds richness and helps the crumbs bind into a firm crust.
- Granulated Sugar (crust): 1/4 cup. This small amount enhances caramelization and helps the crust crisp up in the oven.
- Cream Cheese: 16 ounces (two 8-ounce packages), such as Philadelphia, at room temperature. Softened cream cheese whips to a silky texture that is crucial for the filling's creaminess.
- Granulated Sugar (filling): 1/2 cup. Balanced sweetness that complements the tang from the cream cheese without being cloying.
- Eggs: 2 large, at room temperature. Eggs provide structure and a set but tender texture; bring them to room temp to ensure a smooth batter.
- Vanilla Extract: 1 teaspoon. Pure vanilla extract rounds out the custard notes and deepens flavor complexity.
- Ground Cinnamon: 1/2 teaspoon. A gentle touch inside the filling ties the flavors to the crust without making the bites taste like a spice cake.
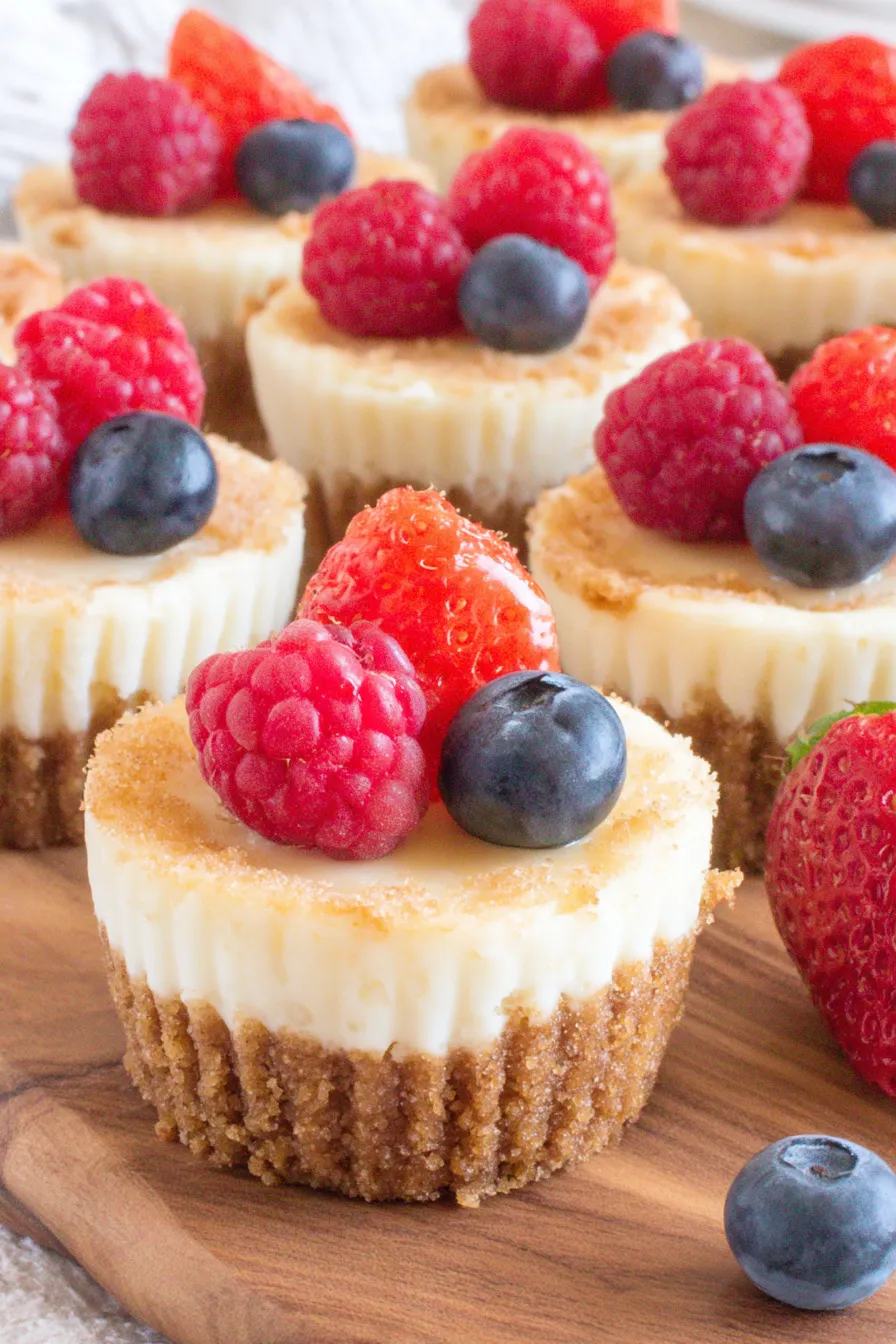
- Fresh Berries (optional): Raspberries, blueberries, or sliced strawberries for garnish. Their acidity and brightness lift each bite.
Instructions
Preheat and prepare the pan: Preheat the oven to 350°F. Line a regular 12-cup cupcake pan with paper liners. Using a regular (not mini) pan makes the baking time and portion size ideal for 12 servings. Lightly grease the inside of the liners if you're worried about sticking — parchment liners or standard paper liners both work well. Make the crust: In a food processor pulse 1 1/4 cups cinnamon graham crackers with 1/4 cup granulated sugar until you have fine crumbs. With the motor running, add 3 tablespoons melted unsalted butter until the mixture resembles damp sand. Evenly divide the crumb mixture among the 12 lined cups; each should have roughly 1 to 1 1/2 tablespoons of crumbs. Press firmly — I use the bottom of a spice jar or a small measuring cup to compact the crust into an even layer about 1/4 inch thick. A compact crust prevents crumbling and gives a satisfying crunch. Whip the filling: In a large mixing bowl beat 16 ounces softened cream cheese on medium speed until creamy and free of lumps, about 2 minutes. Scrape down the bowl, then add 1/2 cup granulated sugar and continue to beat until lightened, another 1–2 minutes. Add 2 large eggs one at a time, mixing on low speed until just combined to avoid overbeating. Stir in 1 teaspoon vanilla extract and 1/2 teaspoon ground cinnamon until evenly distributed. The batter should be smooth, glossy, and pourable but not runny. Assemble and bake: Use a tablespoon or small cookie scoop to spoon the filling evenly over each crust, filling cups nearly to the top but leaving a little headspace. Tap the pan gently on the counter to release any air bubbles. Bake at 350°F for 16–20 minutes, rotating the pan halfway through if your oven has hot spots. The centers should be set with a very slight jiggle; they will firm up as they cool. Avoid overbaking to keep the texture creamy. Cool and finish: Allow the cups to cool on a rack for about 30 minutes, then transfer to the refrigerator for at least 2 hours, preferably overnight. This chilling step improves texture and makes the bites easier to remove from liners. When ready to serve, peel off the liners and garnish with fresh berries or your preferred topping.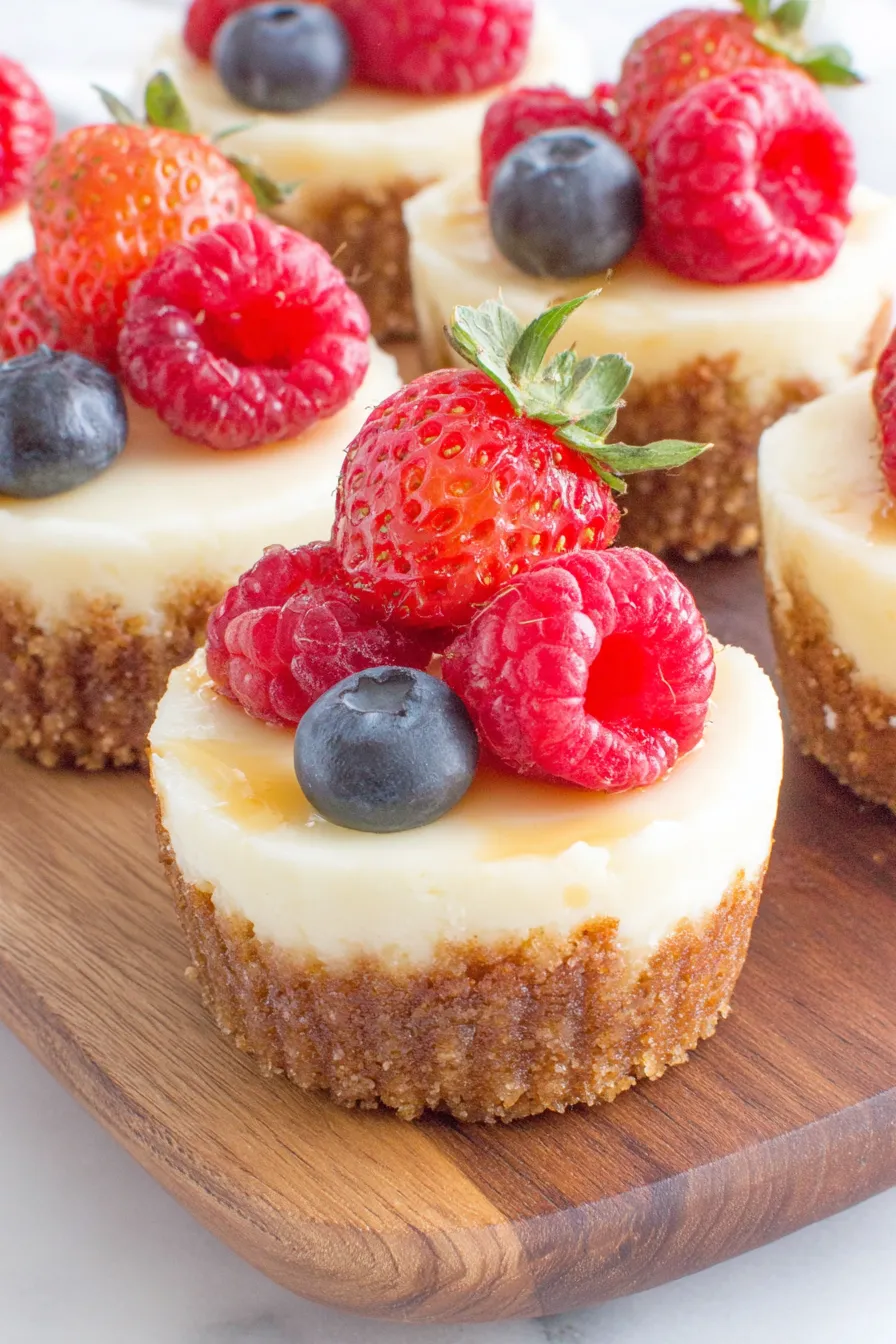
You Must Know
- These are best stored refrigerated in an airtight container for up to 4 days; they also freeze well for up to 3 months (thaw overnight in the fridge).
- Each bite is rich in dairy and eggs; they are vegetarian but not suitable for those with dairy or egg allergies, or for those avoiding gluten unless you swap the crust.
- Visual doneness: look for set edges and a gentle center jiggle; overbaking will make them grainy and dry.
- High protein and moderate carbs per serving — a small portion satisfies most sweet cravings without a heavy slice-size commitment.
My favorite thing about these is how reliably they please a crowd: they disappear at bake sales, family barbecues, and holiday brunches. The simplest toppings — a single raspberry or a light dusting of powdered sugar — often get the best reactions because they let the creamy filling shine. I love watching guests pick one up and pause, savoring that first crunchy-then-creamy moment.
Storage Tips
Store chilled in a single layer in an airtight container with parchment paper between layers if stacking is necessary. At room temperature they will soften and lose structure after more than two hours, so refrigeration is recommended for any leftover bites. To freeze, place on a baking sheet until firm, then transfer to a freezer-safe bag or container with layers separated by parchment to avoid sticking. Thaw in the refrigerator overnight and bring to cool-room temperature for 20 minutes before serving if you want the filling slightly less firm. Always check for off-odors or visible freezer burn before serving.
Ingredient Substitutions
If you need gluten-free options, substitute gluten-free cinnamon graham crackers or use crushed gluten-free gingersnaps. For a lower-sugar crust, reduce the crust sugar to 2 tablespoons or use a natural sweetener, though texture may change slightly. To make this dairy-free or vegan, use vegan cream cheese and a flax egg or store-bought egg substitute — note the texture will be slightly less creamy and you may need to adjust setting times. For a richer chocolate twist, swap a quarter cup of crumbs for finely crushed chocolate cookies or add 1 tablespoon of cocoa to the filling for a subtle chocolate note.
Serving Suggestions
Serve them on a tiered dessert tray for afternoon tea or arrange on a slate board with fresh citrus slices and assorted berries for color contrast. A light dusting of powdered sugar, a tiny spoon of caramel, or a drizzle of melted dark chocolate adds elegance. For brunch, pair with strong coffee or an espresso martini. These bites also make a lovely accompaniment to a bowl of poached pears or a scoop of vanilla bean ice cream for a composed dessert plate.
Seasonal Adaptations
In autumn, fold 1/4 cup canned pumpkin and 1/2 teaspoon pumpkin spice into the filling for a pumpkin-cheesecake variation. For summer, top with macerated strawberries or a warm berry compote. Holiday versions shine with candied orange peel and a ginger cookie crust or a spiced cranberry topping. Small adjustments—like adding citrus zest for brightness in spring—keep this template flexible for any season.
Success Stories
I once brought these to a neighborhood potluck where a guest confessed she never liked cheesecake. She tried one of these mini bites, closed her eyes, and asked for the recipe. Another time, I swapped the crust for crushed chocolate wafers and they were declared "small chocolate miracles" by my teenagers. These anecdotes remind me that texture, portion, and freshness matter more than fuss; little changes can make big impressions.
Meal Prep Tips
Make the crust and filling the night before and assemble the cups just before baking for the freshest texture. Baked and chilled, these hold for several days and are excellent for packing into lunchboxes or making ahead for events. Use silicone cupcake pans for easy release if you want to skip liners; just decrease baking time by a minute or two and keep a close eye on jiggling centers. Label containers with dates when freezing to maintain rotation and quality.
These mini cheesecake bites are one of those recipes that feel both effortless and impressive. They invite playful creativity with toppings while relying on simple technique and reliable ingredients. Try making a double batch — you’ll thank yourself when friends text to ask for more.
Pro Tips
Use room-temperature cream cheese and eggs to ensure a smooth, lump-free filling.
Press the crust firmly with the bottom of a small jar to create a compact base that won’t crumble when served.
Bake until the edges are set and the center has a slight jiggle; overbaking causes a grainy texture.
Chill at least 2 hours (overnight is best) to allow flavors to meld and for easy removal from liners.
This nourishing best ever mini cheesecake bites recipe is sure to be a staple in your kitchen. Enjoy every moist, high protein slice — it is perfect for breakfast or as a wholesome snack any time.
FAQs about Recipes
How long do these keep?
Yes — store chilled in an airtight container for up to 4 days or freeze for up to 3 months; thaw overnight in the refrigerator.
Can I make these gluten-free or vegan?
Use gluten-free graham crackers or crushed gluten-free cookies for a gluten-free base; dairy-free cream cheese substitutes make a vegan-friendly alternative though texture will vary.
Tags
Best Ever Mini Cheesecake Bites
This Best Ever Mini Cheesecake Bites recipe makes perfectly juicy, tender, and flavorful steak every time! Serve with potatoes and a side salad for an unforgettable dinner in under 30 minutes.
Ingredients
Cinnamon Graham Cracker Crust
Cheesecake Filling
Instructions
Preheat and Prepare
Preheat oven to 350°F. Line a 12-cup cupcake pan with paper liners and set aside.
Make the Crust
Combine cinnamon graham crackers and 1/4 cup sugar in a food processor until fine. Add melted butter and pulse until crumbs are damp. Press about 1 to 1 1/2 tablespoons into each lined cup using the bottom of a spice jar to compact.
Mix the Filling
Beat 16 ounces softened cream cheese until smooth, add 1/2 cup sugar and beat until light. Add eggs one at a time on low speed, then stir in vanilla and 1/2 teaspoon cinnamon until combined.
Fill and Bake
Spoon filling evenly over crusts. Bake at 350°F for 16–20 minutes until edges are set and centers have a slight jiggle. Avoid overbaking.
Cool and Chill
Cool on a rack for 30 minutes, then refrigerate for at least 2 hours or overnight. Remove liners and garnish with fresh berries before serving.
Last Step: Please leave a rating and comment letting us know how you liked this recipe! This helps our business to thrive and continue providing free, high-quality recipes for you.
Nutrition
Did You Make This?
Leave a comment & rating below or tag
@epicula on social media!
Categories:
You might also like...

Mississippi Mud Brownies
Ultra-fudgy brownies crowned with toasted mini marshmallows and warm cocoa icing, with molten chocolate pockets in every bite.

Buttery Pecan Pie Bars
Buttery shortbread crust topped with a gooey brown sugar pecan filling. Just 10 minutes to prep for bakery-worthy bars with irresistible crunch.

Crack-Free Pumpkin Cheesecake
Ultra-creamy pumpkin cheesecake with a graham crust, bakes without cracks, and shines with caramel and rum-kissed whipped cream.
Did You Make This?
Leave a comment & rating below or tag @epicula on social media!
Rate This Recipe
Share This Recipe
Enjoyed this recipe? Share it with friends and family, and don't forget to leave a review!
Comments (1)
This recipe looks amazing! Can't wait to try it.
Comments are stored locally in your browser. Server comments are displayed alongside your local comments.

Hi, I'm Olivia!
What's Popular

30-Minute Meals!
Join to receive our email series which contains a round-up of some of our quick and easy family favorite recipes.