
>>

A fudgy, crackly-top brownie baked in a 9-inch pie crust for an easy, crowd-pleasing dessert that serves 6 to 8.

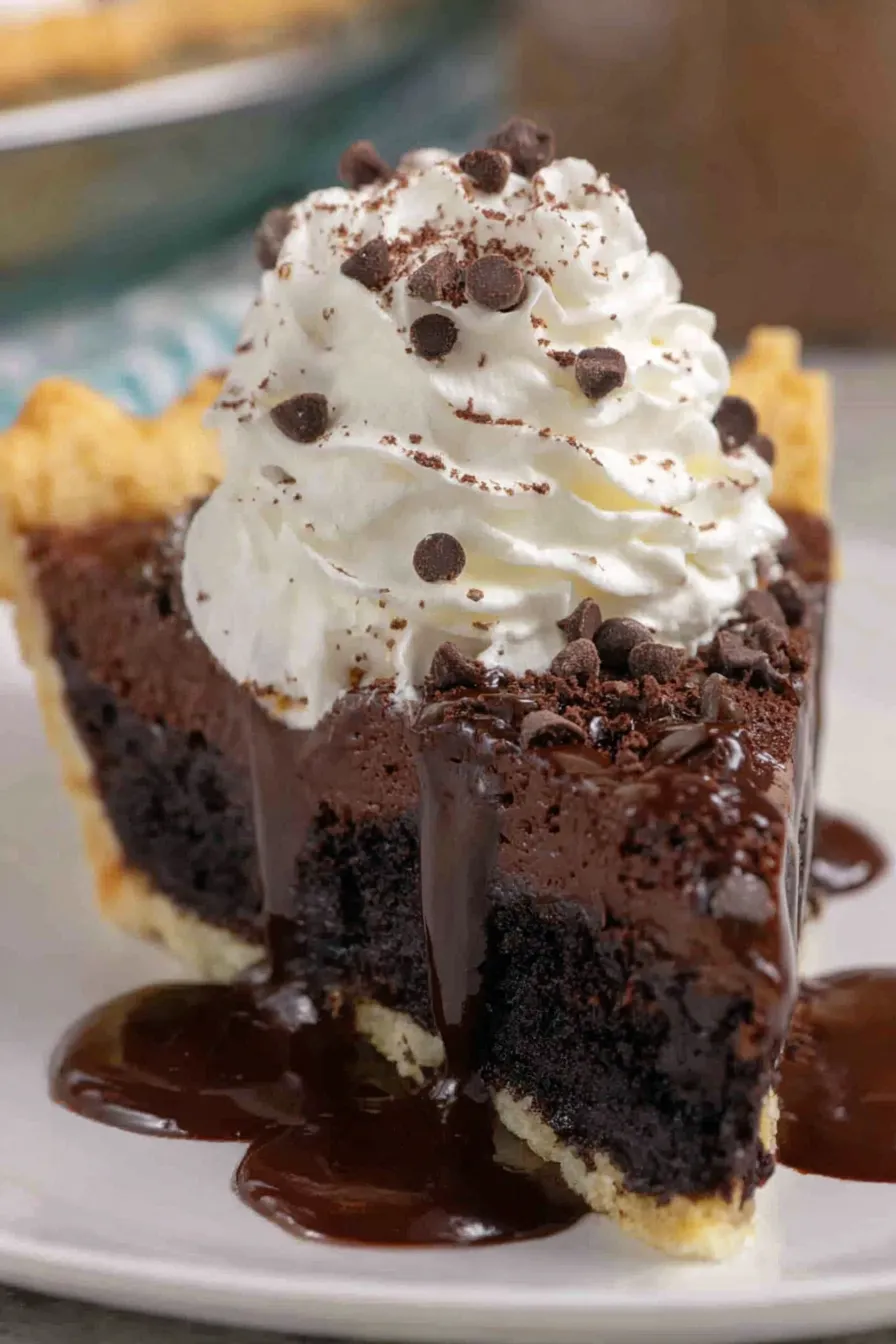
This brownie pie has been my go-to for last-minute dessert requests and relaxed Sunday dinners. I first made it when I found a frozen 9-inch unbaked pie crust in the freezer and a craving for something chocolatey that did not require complicated layering or molding. The result was a cross between a brownie and a pie: fudgy, glossy in the center with a thin crackly top and a buttery, flaky edge where the crust meets the chocolate. It quickly became the dessert I bring to potlucks because it travels well and always disappears.
I love how forgiving the method is. The batter comes together in one bowl, and the trick of pouring hot melted butter over sugar gives the topping a professional, shiny crackle without tempering chocolate or melting sugar on the stove. It is a recipe for people who want rich chocolate flavor without fuss. Warm from the oven with a scoop of vanilla ice cream, this pie creates the kind of small celebration that turns an ordinary evening into something to remember.
My family reaction the first time I served this was immediate: forks paused midair and everyone asked for seconds. After that, this dessert earned a permanent spot in my recipe rotation because it requires little prep and delivers a lot of chocolate satisfaction.
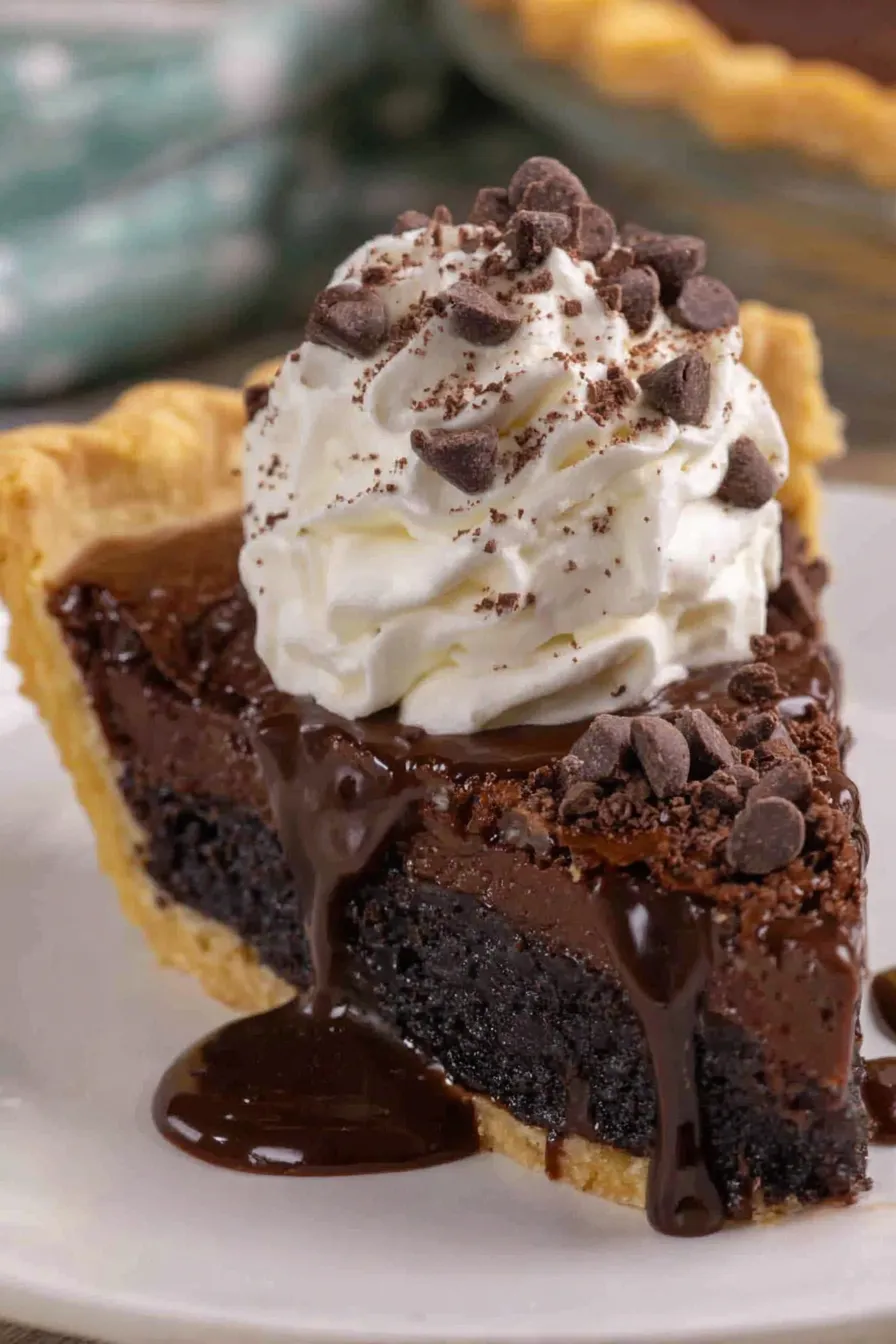
My favorite part is the contrast between the tender, brownie-like interior and the flaky crust edge. Family members have told me they prefer this version to a standard pan brownie because the crust adds a little savory balance to the richness.
Store leftovers covered at room temperature for up to two days for a softer texture. For longer storage keep it in the refrigerator wrapped tightly or in an airtight container for up to five days. To freeze, wrap the whole pie or individual slices in plastic wrap, then foil, and place in a freezer-safe container for up to three months. Reheat slices from chilled in a 325 degrees Fahrenheit oven for 8 to 10 minutes or microwave briefly for a warm, soft bite; frozen slices thaw overnight in the fridge before reheating.
Swap semisweet chips for milk chocolate for a sweeter result or for dark chocolate if you prefer a more bittersweet profile. Use pecans instead of walnuts if that is your preference. For a gluten-free version, select a certified gluten-free pie crust and a gluten-free 1-to-1 flour blend; expect a slightly different crumb but similar flavor. To reduce sweetness slightly, use 1/4 cup less granulated sugar and select dark chips. These swaps will change texture subtly, so adjust bake time if the filling feels notably looser.
Serve warm with a scoop of vanilla ice cream and a drizzle of chocolate sauce for a classic presentation. For a more elegant plate, top with a small dollop of whipped cream and a sprinkle of chopped toasted walnuts or a pinch of flaky sea salt. Pair slices with espresso or a rich, dark coffee to balance sweetness. This is a versatile dessert suitable for casual family meals, holiday gatherings, or when you want an easy but impressive finish to dinner.
Brownies are an American classic originating in the late 19th and early 20th centuries when cooks began experimenting with chocolate in baked goods. This pie hybrid riffs on that tradition by placing a dense chocolate mixture into a pie shell, which adds texture and portability. Variations with nuts and different chocolate types have been common in American home baking, making this style a natural fusion that nods to both the brownie and the pie traditions in home kitchens.
In winter add a teaspoon of instant espresso powder to intensify chocolate flavor and consider serving with salted caramel. In summer serve chilled with fresh berries and a light whipped cream. For the holidays fold in 1/4 teaspoon ground cinnamon and a pinch of nutmeg, or add orange zest for a bright winter citrus note. These small seasonal additions change the character of the dessert without altering the method.
Make the batter the day before and keep it refrigerated in a covered bowl for up to 24 hours; bring to room temperature briefly before baking and expect an extra minute or two of bake time. You can also prebake the crust slightly if you like a crisper bottom; dock the crust and blind-bake at 375 degrees Fahrenheit for 8 minutes. For portable servings, bake in a disposable aluminum pie pan and wrap after cooling for easy transport to potlucks.
Whether you are baking for a crowd or making a quiet treat at home, this brownie pie is simple to prepare, easy to adapt, and reliably delicious. Try it once and I expect it will become a recipe you return to when you want chocolate done right.
Let the melted butter sit with granulated sugar for 5 minutes before whisking to encourage a glossy, crackly top.
Use room-temperature eggs to incorporate more evenly and reduce mixing time.
Tent the pie with foil instead of pressing it directly onto the batter to avoid marred surfaces.
Chill the pie if you need clean slices for plating or transport.
This nourishing brownie pie recipe is sure to be a staple in your kitchen. Enjoy every moist, high protein slice — it is perfect for breakfast or as a wholesome snack any time.
Yes. For a fudgier center, remove the pie closer to 20 to 25 minutes after removing the foil. For a firmer set, bake toward the 30-minute mark uncovered.
Chill it overnight; cold slices are firmer and easier to slice cleanly. Rewarm briefly if you prefer it warm.
This Brownie Pie recipe makes perfectly juicy, tender, and flavorful steak every time! Serve with potatoes and a side salad for an unforgettable dinner in under 30 minutes.
Preheat the oven to 350 degrees Fahrenheit and position a rack in the lower third. Keep the frozen 9-inch unbaked crust ready in its pan.
In a large bowl combine granulated sugar and just-melted warm unsalted butter. Stir briefly, then let sit for 5 minutes to allow some sugar to dissolve. Whisk vigorously for 30 seconds.
Whisk in the large egg, egg yolk, water, and vanilla for about 30 seconds until combined. Remove the whisk and tap off excess batter.
Sprinkle cocoa powder, powdered sugar, flour, and kosher salt over the butter mixture. Stir with a rubber spatula until glossy and uniform.
Stir in chocolate chips and chopped walnuts if using, distributing them evenly through the batter.
Pour the batter into the frozen pie crust and smooth the top. Lightly spray a sheet of foil and tent it over the pie without pressing the foil onto the batter.
Bake covered in the lower third of the oven for 25 minutes. Remove foil carefully and continue baking uncovered for 20 to 30 minutes depending on desired set. For fudgy center aim for the lower end of the time range.
Place the pie on a wire rack to cool. Serve slightly warm, at room temperature, or chilled for firmer slices. Top with ice cream or whipped cream as desired.
Last Step: Please leave a rating and comment letting us know how you liked this recipe! This helps our business to thrive and continue providing free, high-quality recipes for you.
Leave a comment & rating below or tag
@epicula on social media!

Ultra-fudgy brownies crowned with toasted mini marshmallows and warm cocoa icing, with molten chocolate pockets in every bite.

Buttery shortbread crust topped with a gooey brown sugar pecan filling. Just 10 minutes to prep for bakery-worthy bars with irresistible crunch.

Ultra-creamy pumpkin cheesecake with a graham crust, bakes without cracks, and shines with caramel and rum-kissed whipped cream.
Leave a comment & rating below or tag @epicula on social media!
Enjoyed this recipe? Share it with friends and family, and don't forget to leave a review!
This recipe looks amazing! Can't wait to try it.
Comments are stored locally in your browser. Server comments are displayed alongside your local comments.

Join to receive our email series which contains a round-up of some of our quick and easy family favorite recipes.
