
>>

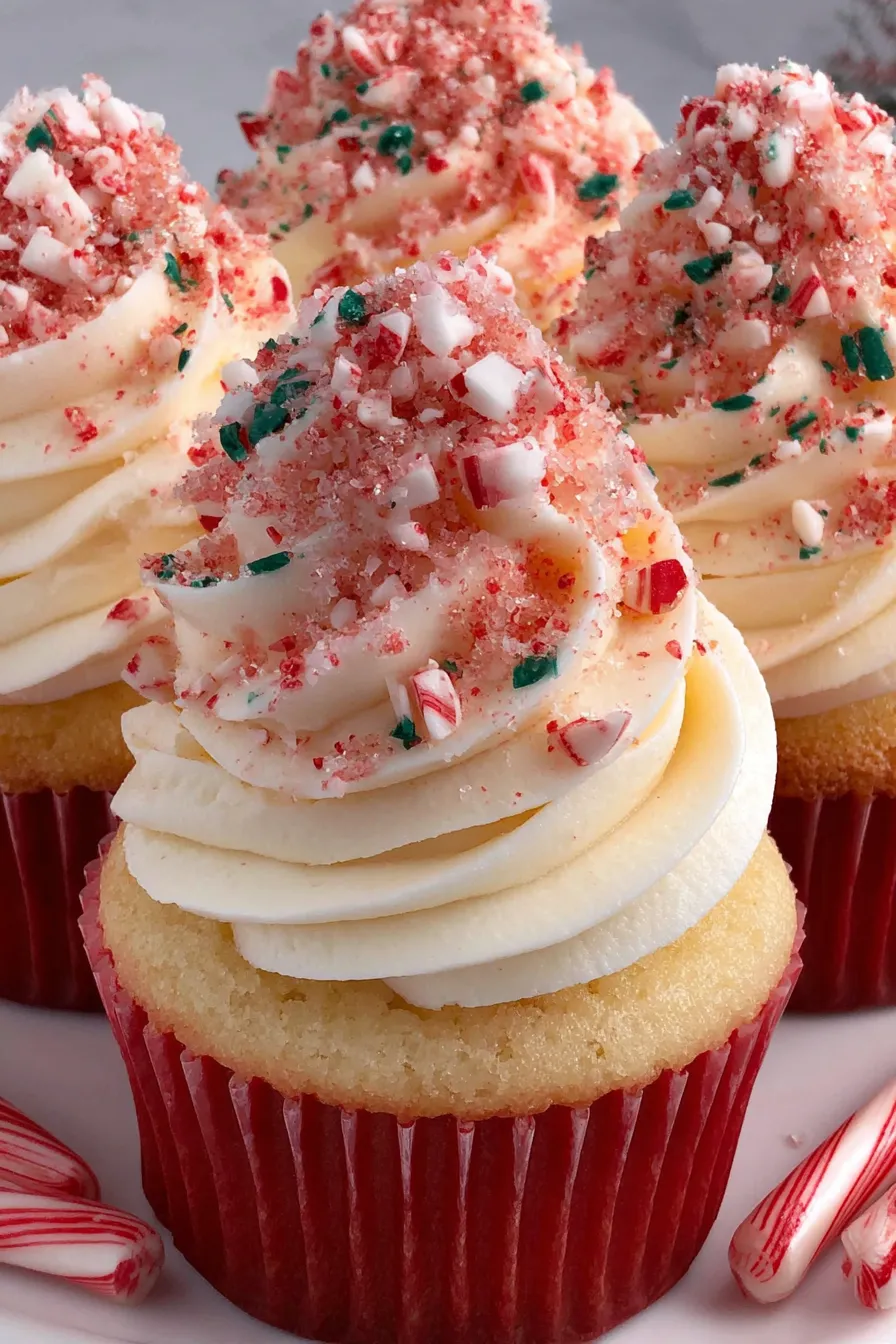
Light, festive cupcakes with swirled red-and-white cake and a peppermint buttercream—finished with mini candy canes or coarse peppermint sugar for a holiday touch.

This Candy Cane Peppermint Cupcake recipe is my holiday happy place: bright, minty, and just a little bit showy without being fussy. I first made these on a chilly December afternoon when friends were dropping by for last-minute cookie exchanges. I wanted something that felt seasonal but not heavy—something that would deliver peppermint clearly without overpowering the cake’s delicate crumb. The alternating red and white batter gives each bite a playful look, and the peppermint buttercream ties the flavors together with a cool finish that reminds me of childhood candy cane mornings.
I discovered the trick of painting red gel inside the piping bag the year my niece asked for striped frosting to match the cupcakes' interior. That small visual flourish transformed them from pretty to unforgettable. Texturally, the crumb is soft and tender from using a simple white mix and careful folding; the buttercream is silky and light because of the measured beating and a splash of heavy cream. These cupcakes have become my go-to for holiday gatherings: they’re easy to scale, love to be dressed up, and somehow feel special even when whipped up at the last minute.
Personally, every time I bring a tray of these to a potluck someone asks for the recipe. My family’s reaction—especially my niece’s delight at seeing the striped frosting—reminded me how small details can make a simple recipe feel celebratory. The combination of visual charm and straightforward assembly is what keeps me coming back to these each season.
My favorite aspect of this recipe is how it balances straightforward techniques with an elevated final look. Family members repeatedly compliment the frosting stripes and the tender crumb. Over the years I’ve learned that cooling completely before piping is the single most important step to prevent frosting melt—apply that, and you’ll have bakery-style results every time.
For short-term storage, place cupcakes in a single layer in an airtight container and refrigerate up to four days. If you prefer room-temperature service, let chilled cupcakes sit 30–45 minutes before serving—this softens the buttercream and returns the texture to its ideal state. For longer storage, freeze unfrosted cupcakes on a tray until firm, then transfer to a freezer-safe bag for up to three months. Thaw in the refrigerator overnight, then bring to room temperature and pipe fresh frosting. Use opaque containers for the fridge to prevent odor transfer and line containers with parchment to protect frosting decorations.

If you need dairy-free, substitute plant-based butter and use full-fat coconut cream instead of heavy cream; flavor will skew slightly coconutty. For an egg-free option, choose an eggless white cake mix or follow a vegan white mix instruction. If you prefer a lighter frosting, swap half the butter for whipped shortening (stabilizes in warm environments) and reduce confectioners’ sugar by 1/4 cup, adding a touch more cream for consistency. To tone down peppermint, halve the extract and add 1 teaspoon finely grated orange zest for a festive twist.
Serve these as a centerpiece dessert on holiday dessert tables, paired with hot cocoa or a peppermint mocha for theme continuity. Garnish with a small sprig of fresh mint or a dusting of cocoa for contrast. They work beautifully with simple biscotti or a cheese board for a party spread—offer small plates so guests can enjoy multiple sweets without overloading. For children’s parties, add edible glitter or sprinkle colored sugar for extra fun.
While the concept of flavored cakes is global, candy-cane inspired sweets became popular in North America as mass-produced candy canes grew in the early 20th century. The peppermint-and-vanilla pairing conjures classic holiday flavors—candy canes were often used as festive decorations before they became frequent flavorings in confections. These cupcakes nod to that seasonal nostalgia while using modern piping and decorating techniques to make the handheld dessert contemporary and versatile.
For winter parties, add a teaspoon of cocoa to the red batter for a muted burgundy swirl and a hint of chocolate. In spring, replace peppermint with 1/2 teaspoon pure almond extract and swap red gel for pastel pink for a spring holiday look. For a New Year’s iteration, fold a tablespoon of champagne reduction into a stabilized buttercream for grown-up sparkle. Adjust decorations—use silver dragees for New Year’s or edible holly leaves for Christmas—to match the season.
Make the cake bases in advance and freeze unfrosted; prepare the buttercream the day before and keep chilled. On the day you plan to serve, thaw cupcakes in the refrigerator, bring the buttercream to piping consistency by beating 1 minute, then stripe the bag and pipe. Use disposable piping bags for quick cleanup. Portion cupcakes in single-serve containers for gift-giving or events—place a peppermint candy gently into the frosting and close the lid for a polished presentation.
Bring these cupcakes to your next holiday gathering and watch them disappear—simple to make, endlessly adaptable, and always a festive crowd-pleaser. I hope you enjoy making them as much as my family and friends do.
Ensure cupcakes are completely cool before frosting to prevent the buttercream from melting.
Use gel food coloring for vivid red without altering batter consistency.
Start with 1/2 teaspoon peppermint extract and adjust in 1/8-teaspoon increments to avoid a medicinal taste.
Chill the frosting briefly if it becomes too soft while piping; a 10-minute chill firms the texture.
This nourishing candy cane peppermint cupcakes recipe is sure to be a staple in your kitchen. Enjoy every moist, high protein slice — it is perfect for breakfast or as a wholesome snack any time.
Yes—unfrosted cupcakes freeze well for up to 3 months. Thaw in the refrigerator overnight before frosting.
Use a small pastry brush to paint gel inside the bag, then pipe slowly; the stripes appear more pronounced if you pipe in a single continuous swirl.
This Candy Cane Peppermint Cupcakes recipe makes perfectly juicy, tender, and flavorful steak every time! Serve with potatoes and a side salad for an unforgettable dinner in under 30 minutes.
Preheat oven to 350°F and line 18 cupcake cups across two muffin tins with paper liners. Position oven racks in the upper and lower thirds for even baking.
Prepare the white cake mix according to package directions. Divide batter into two bowls and color one with red gel until desired hue is reached.
Alternate spooning red and white batter into each liner until about half full (about 3–4 tablespoons each). Avoid overfilling to prevent spills while baking.
Bake for 18–20 minutes, rotating tins halfway. Test with a toothpick; it should come out clean. Cool on a wire rack completely before frosting.
Beat softened butter and salt until creamy. Gradually add sifted confectioners' sugar, then heavy cream, vanilla, and peppermint. Beat until light and fluffy.
Paint two red gel lines inside a piping bag fitted with a 1/2-inch round tip. Fill with frosting and pipe onto cooled cupcakes. Garnish with mini candy canes or peppermint sugar.
Last Step: Please leave a rating and comment letting us know how you liked this recipe! This helps our business to thrive and continue providing free, high-quality recipes for you.
Leave a comment & rating below or tag
@epicula on social media!

Ultra-fudgy brownies crowned with toasted mini marshmallows and warm cocoa icing, with molten chocolate pockets in every bite.

Buttery shortbread crust topped with a gooey brown sugar pecan filling. Just 10 minutes to prep for bakery-worthy bars with irresistible crunch.

Ultra-creamy pumpkin cheesecake with a graham crust, bakes without cracks, and shines with caramel and rum-kissed whipped cream.
Leave a comment & rating below or tag @epicula on social media!
Enjoyed this recipe? Share it with friends and family, and don't forget to leave a review!
This recipe looks amazing! Can't wait to try it.
Comments are stored locally in your browser. Server comments are displayed alongside your local comments.

Join to receive our email series which contains a round-up of some of our quick and easy family favorite recipes.
