
>>

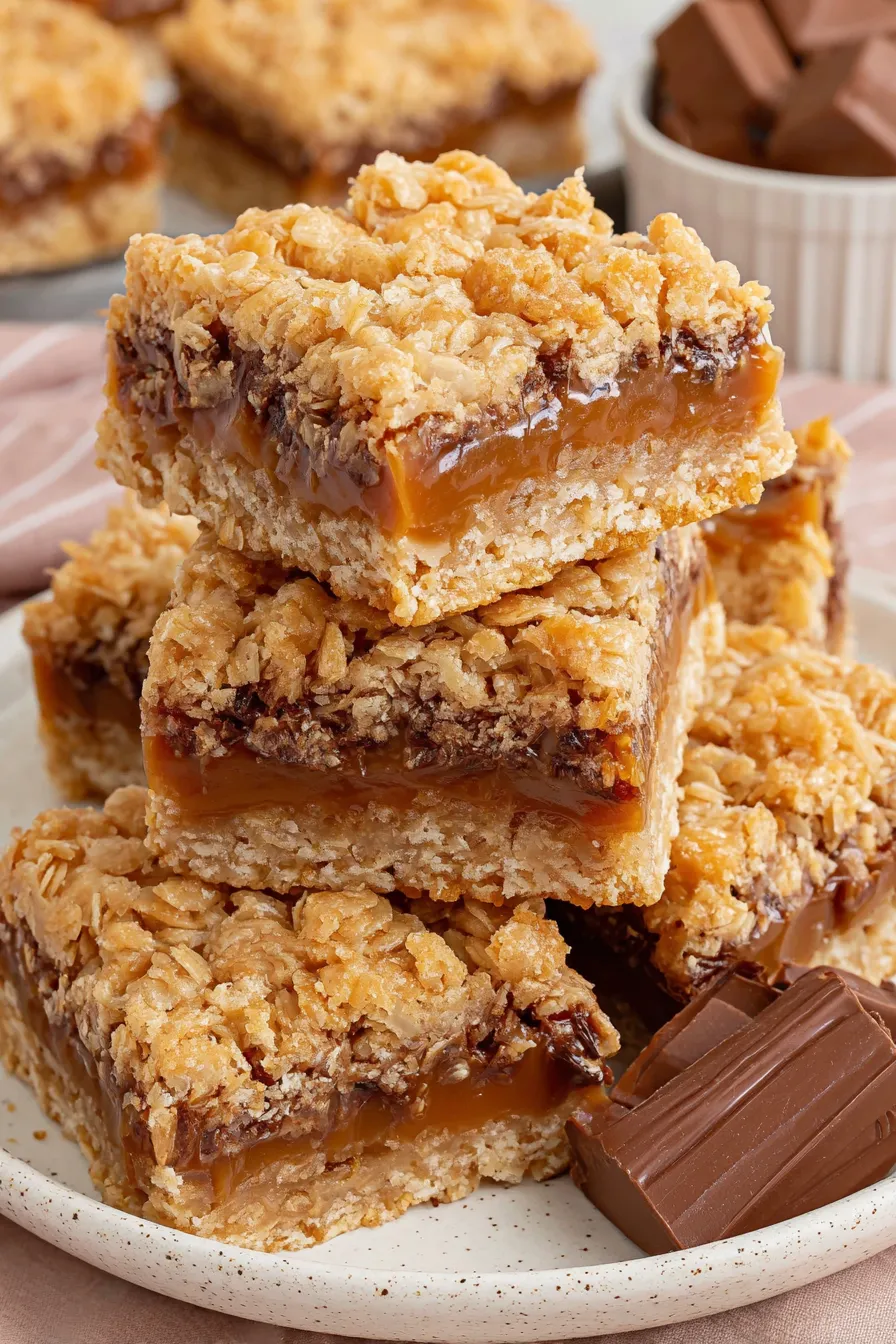
Chewy oat cookie bars layered with milk chocolate and a silky caramel sauce — a nostalgic, crowd-pleasing treat for any occasion.

This recipe for carmelitas has been a staple in my kitchen for years — the kind of bar that disappears from the cookie tin before you can finish pouring the coffee. I first encountered a version of this while helping a neighbor at a holiday swap; the combination of an oat-cookie base, glossy milk chocolate, and a warm ribbon of caramel tasted like a childhood memory you couldn't place. I adapted it to be easy enough for a weeknight bake but special enough for guest-worthy dessert: buttery, nutty oats, pockets of chewy caramel, and a chocolate layer that melts into the sauce while the top crust crisps.
What makes these bars so special is the textural contrast. The bottom layer is slightly crisp and buttery, the caramel layer is gooey but set, and the top oat crumble browns and gives you that comforting chew. I use individually wrapped caramels and finish them with a touch of heavy cream for the smoothest sauce — no candy thermometer required. Over the years I've made small technique tweaks: melt the butter fully before mixing, press the base firmly, and chill thoroughly before slicing to avoid dragging the caramel. Serve them slightly chilled or at room temperature for the perfect bite.
I've brought these to potlucks, school events, and family brunches; the bars always draw a crowd. My kids call them "the caramel squares," and at one holiday brunch a friend asked for the recipe before she'd even finished her second piece — a sign you have a keeper.
My favorite part about these bars is how everyone has a different preference: some take them straight from the fridge for a firm, chewy bite; others prefer them at room temperature when the caramel relaxes and the chocolate is silky. The recipe has become our go-to for bake sales because it travels and stores well, and kids always ask for the corner pieces first.
Store cooled bars in an airtight container at room temperature for up to 48 hours. For longer storage, refrigerate in a single layer separated by parchment sheets for up to 5 days. To freeze, wrap the whole slab tightly in plastic wrap and then foil, or freeze individual squares in a single layer on a baking sheet then transfer to a zip-top freezer bag for up to 3 months. Thaw overnight in the fridge and bring to room temperature for 20–30 minutes before serving for the best texture. Reheat briefly in a 300°F oven for 5–8 minutes if you like the caramel softer.
If you don’t have milk chocolate chips, use semi-sweet or dark chocolate for a less sweet contrast; reduce the heavy cream to 1/3 cup if using dark chocolate to keep sweetness balanced. For a nutty variation, stir 1 cup toasted pecans or walnuts into the oat mixture and press half into the base; this adds crunch and complexity. For a gluten-free option, replace all-purpose flour with a 1:1 gluten-free baking flour and be sure to use certified gluten-free oats. For lower-sugar bars, use fewer caramels or a sugar-free caramel alternative, though the texture will be slightly different.
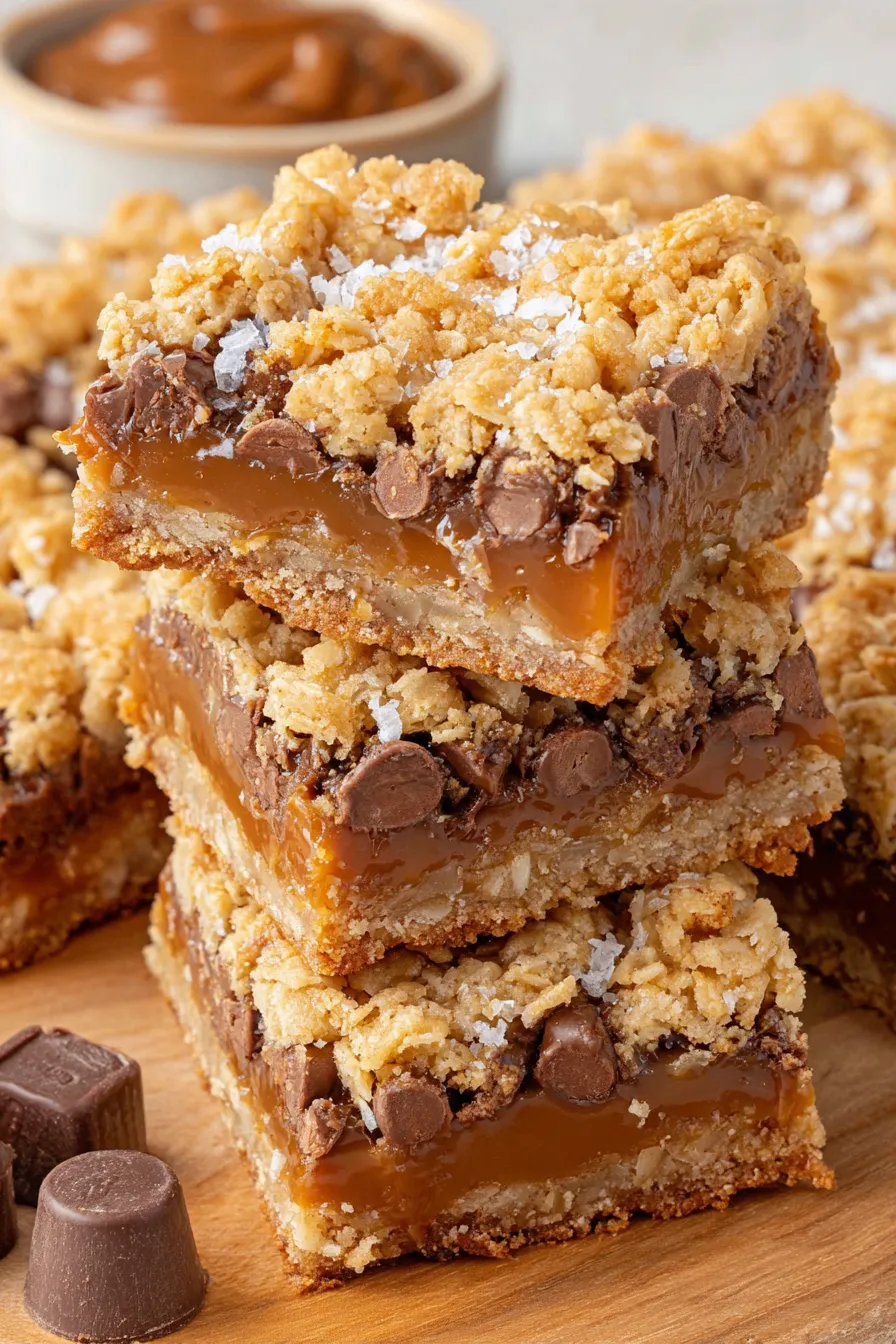
Serve these squares slightly chilled for neat slices or at room temperature for gooier caramel. Garnish with a light dusting of flaky sea salt to brighten the flavors — it’s particularly lovely if you used dark chocolate. Pair with strong coffee, espresso, or a glass of cold milk. For a festive touch, serve with whipped cream and seasonal berries or alongside scoopable vanilla ice cream for a decadent dessert plate.
The concept of layered oat bars with caramel and chocolate is rooted in classic American home baking where convenience (wrapped caramels) met pantry staples (oats, flour, butter). Variations of layered bars have been popular at church socials, potlucks, and bake sales since the mid-20th century, evolving from simple squares into richer interpretations with chocolate and salted caramel. The combination celebrates American comfort flavors: brown sugar, butter, and chocolate—familiar in cookies and candies across generations.
In autumn, add 1 teaspoon ground cinnamon and ½ teaspoon ground nutmeg to the oat mixture and swap milk chocolate for spiced toffee chips. For winter holidays, fold in ½ cup dried cranberries and top with white chocolate drizzle. In summer, serve chilled with a tangy lemon or raspberry coulis to cut through the sweetness. Small changes in spices, mix-ins, and chocolate type can tailor the bars for any season without altering the core technique.
Make the slab up to 48 hours ahead and refrigerate; slice just before serving for the best presentation. To portion for lunches, individually wrap squares in parchment or wax paper and refrigerate — they travel well. If you’re prepping for a bake sale or gifting, wrap stacks of two or three squares with a ribbon and refrigerated, they stay intact and resist sticking. When transporting, place on a flat tray with a cooled ice pack underneath if traveling in warm weather.
These carmelitas are one of those reliable treats you’ll return to again and again. They’re forgiving, flexible, and endlessly shareable — a recipe to tuck into your collection and bring out whenever you want to impress without fuss. Enjoy the buttery oats, the glossy caramel, and the smiles they bring.
Press the base firmly into the pan to ensure sturdy bars that won’t crumble after slicing.
Warm your knife under hot water and dry it before slicing to get clean edges on each square.
Chill the slab completely before cutting; chilling solidifies the caramel and gives neat slices.
If the caramel seems grainy, warm gently and stir continuously to smooth it out; avoid boiling.
This nourishing carmelitas recipe is sure to be a staple in your kitchen. Enjoy every moist, high protein slice — it is perfect for breakfast or as a wholesome snack any time.
Yes — the bars chill for 1½–2 hours in the refrigerator until fully set. For clean slices, refrigerate the whole slab before cutting.
You can microwave the caramels and cream in 20–30 second bursts, stirring between intervals until smooth instead of using a saucepan.
This Carmelitas recipe makes perfectly juicy, tender, and flavorful steak every time! Serve with potatoes and a side salad for an unforgettable dinner in under 30 minutes.
Preheat oven to 350°F. Line a 9×9-inch baking dish with parchment paper leaving an overhang and lightly grease. This makes it easy to lift the bars out once chilled.
In a bowl combine flour, oats, brown sugar, baking soda, and salt. Add melted butter and vanilla; stir until a cohesive, crumbly mixture forms. Press half the mixture firmly into the prepared pan.
Bake the pressed base for 10 minutes at 350°F until set and beginning to color at the edges. This prevents a soggy bottom once the caramel is added.
Sprinkle chocolate chips over the hot base. In a small saucepan over medium heat, combine unwrapped caramels and heavy cream; stir continuously until smooth. Alternatively microwave in short bursts, stirring between intervals.
Pour the caramel evenly over the chocolate chips so the heat helps them melt. Sprinkle the remaining oat mixture over the caramel, pressing lightly — gaps will close while baking.
Bake for 20 minutes or until the top is golden and firm to the touch. Cool 10–15 minutes, then refrigerate 1½–2 hours until fully set. Lift out using the parchment overhang and slice into 16 squares.
Last Step: Please leave a rating and comment letting us know how you liked this recipe! This helps our business to thrive and continue providing free, high-quality recipes for you.
Leave a comment & rating below or tag
@epicula on social media!

Ultra-fudgy brownies crowned with toasted mini marshmallows and warm cocoa icing, with molten chocolate pockets in every bite.

Buttery shortbread crust topped with a gooey brown sugar pecan filling. Just 10 minutes to prep for bakery-worthy bars with irresistible crunch.

Ultra-creamy pumpkin cheesecake with a graham crust, bakes without cracks, and shines with caramel and rum-kissed whipped cream.
Leave a comment & rating below or tag @epicula on social media!
Enjoyed this recipe? Share it with friends and family, and don't forget to leave a review!
This recipe looks amazing! Can't wait to try it.
Comments are stored locally in your browser. Server comments are displayed alongside your local comments.

Join to receive our email series which contains a round-up of some of our quick and easy family favorite recipes.
