
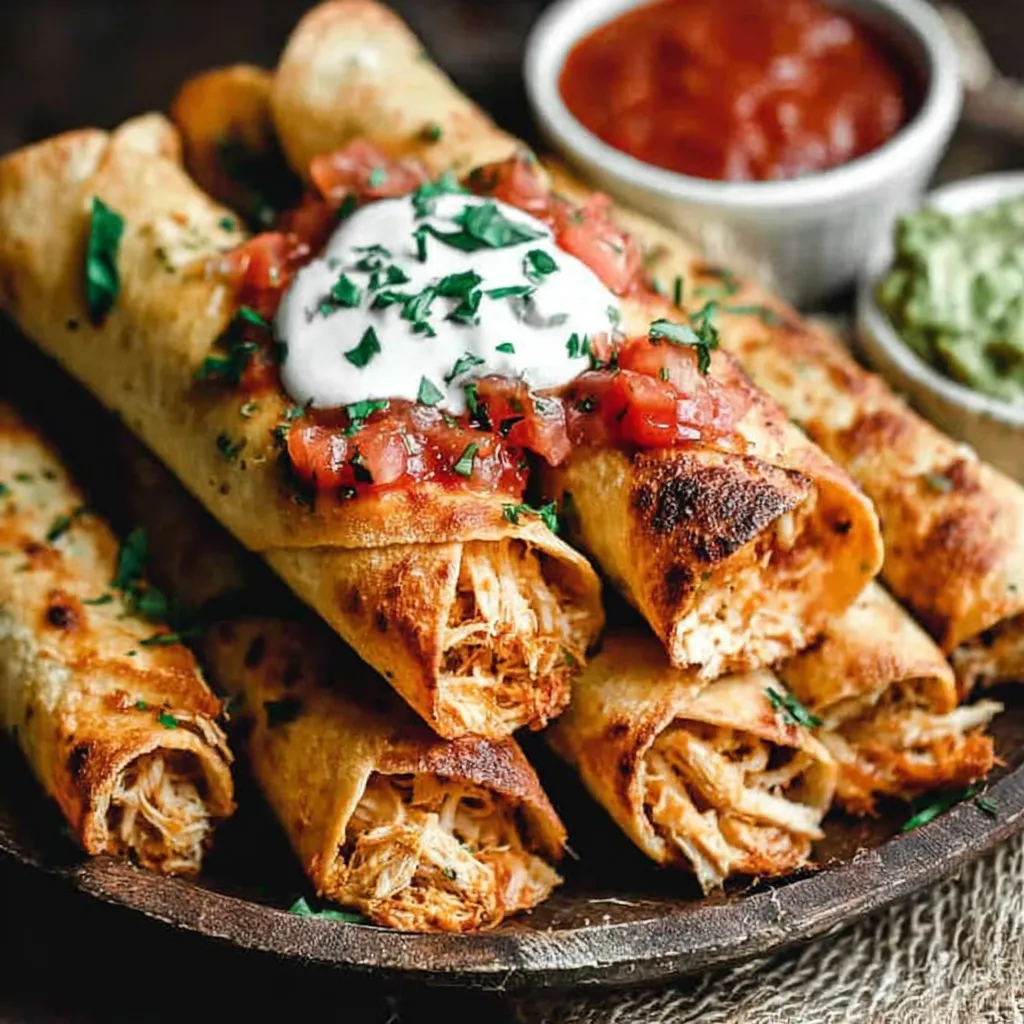
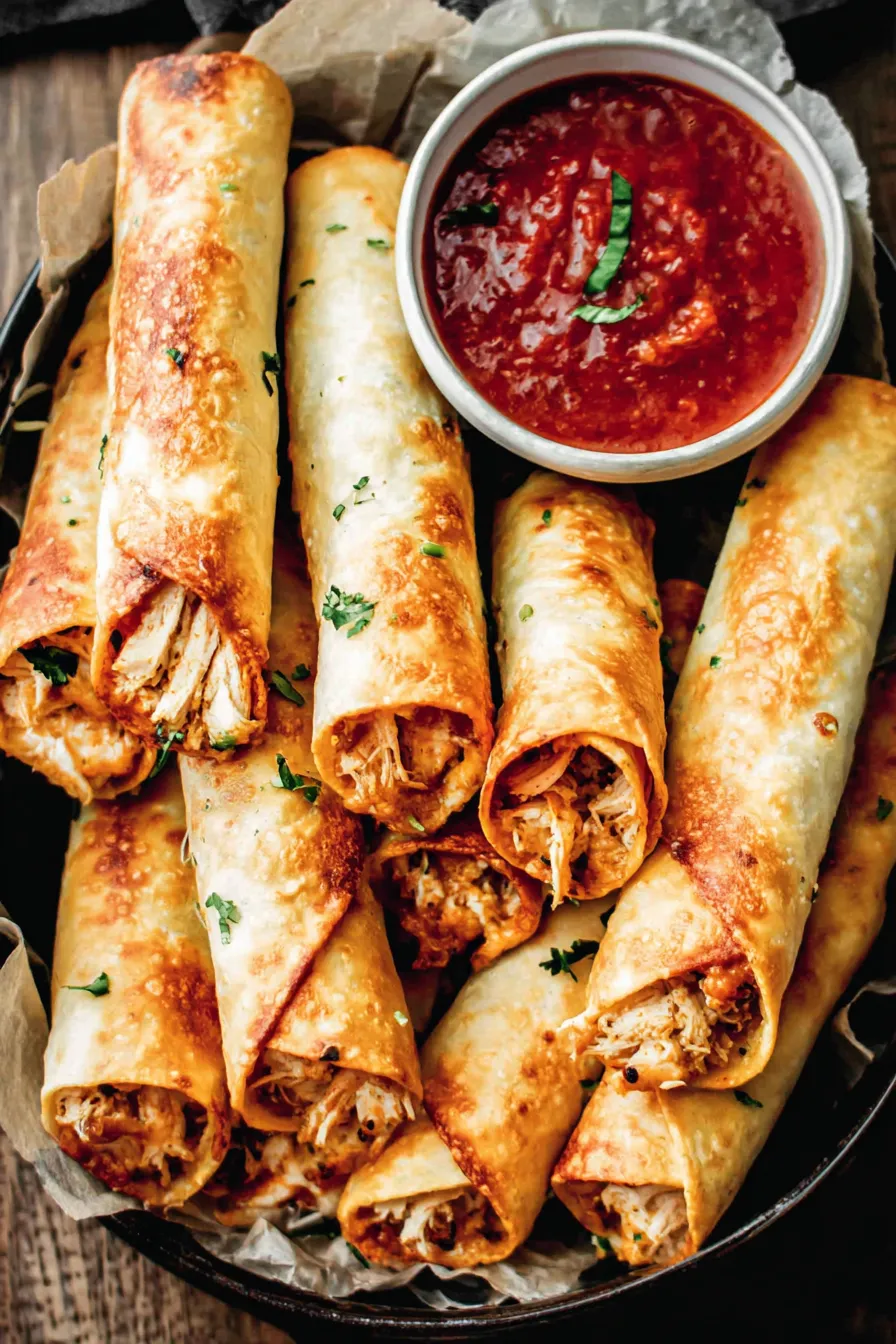
Chicken Taquitos

Crunchy, cheesy chicken taquitos filled with shredded rotisserie chicken, cream cheese, salsa and spinach. Baked or fried options for a weeknight dinner or party snack.
Why You'll Love This Recipe
- This comes together in about 35 minutes using cooked chicken and pantry staples, which means fast weeknight dinners when time is short.
- Flexible finish: bake for a lighter dish in about 15 to 20 minutes at 425 degrees F or fry for an authentic, extra-crispy shell in a few minutes.
- Mild, crowd-pleasing flavors that can be spiced up easily for adults or toned down for kids using your preferred salsa and seasonings.
- Make-ahead friendly: assemble and refrigerate for up to 24 hours before baking, or freeze raw for up to 3 months and bake from frozen with a few extra minutes.
- Uses rotisserie chicken to save time and add deep savory flavor while keeping the filling moist and tender.
- Pairings are simple and versatile: guacamole, extra salsa, and crisp slaw make it a complete meal.
When I served these to a group of friends the first time, everyone asked for the recipe. My son declared them the new family party staple, and I’ve since made them for late-night cravings, casual dinner parties, and holiday game days. They disappear faster than I can plate them, which is always the best kind of compliment.
Ingredients
- 2 cups cooked shredded chicken: Rotisserie chicken is my go-to for the best balance of flavor and convenience. If you buy packaged cooked chicken, choose a low-sodium option to control seasoning. Shred into bite-sized pieces so the filling rolls easily.
- 6 ounces cream cheese, softened: Full-fat cream cheese gives the creamiest texture and helps bind the filling. Let it sit at room temperature for 20 minutes to soften for easy mixing.
- 1/4 cup salsa: Use your favorite store-bought jar or fresh pico for brightness. A medium heat level works well with kids and adults; opt for chunkier salsa if you like more texture.
- 1/4 cup sour cream: Adds tang and loosens the filling so it spreads and rolls without falling apart. Greek-style will make the filling a touch thicker.
- 1 cup shredded cheddar cheese: Sharp cheddar melts nicely and adds a salty, savory note. You can substitute Monterey Jack for a milder flavor and creamier melt.
- 1 cup baby spinach leaves, chopped: Adds color and a hint of freshness. Spinach wilts quickly when mixed into the warm filling and disappears into the cheese for a sneaky veggie boost.
- 1/4 teaspoon cumin, 1/4 teaspoon garlic powder, 1/4 teaspoon chili powder: These three spices build a balanced, warm flavor base. Taste and adjust, adding up to another 1/4 teaspoon of chili powder if you want more heat.
- Salt and freshly ground black pepper: Season to taste; I usually start with 1/4 teaspoon salt and adjust after mixing.
- 15 to 20 corn or flour tortillas: Small 6-inch tortillas work best for hand-held taquitos. Corn gives a more authentic crisp; flour is more forgiving during rolling. Heat corn tortillas briefly to avoid cracking.
- For serving: Guacamole, extra sour cream, salsa, and your favorite hot sauce are recommended to round out the dish.
Instructions
Prepare the Filling: In a mixing bowl, combine the softened cream cheese, salsa, and sour cream. Stir until smooth and well blended to create a cohesive base. Add the shredded chicken, shredded cheddar, chopped baby spinach, cumin, garlic powder, chili powder, and a pinch of salt and pepper. Toss gently until everything is evenly coated. Taste and add more salt, pepper, or salsa to suit your preference. The filling should be moist but not runny so it holds together when rolled. Soften the Tortillas: If using corn tortillas, heat a non-stick griddle or skillet over medium-high. Cook each tortilla 15 to 30 seconds per side until soft and pliable, being careful not to brown them. Stack wrapped in foil to keep warm and flexible. If using flour tortillas, you can warm them in a dry skillet or microwave for 10 to 15 seconds wrapped in a damp paper towel to make rolling easier. Assemble the Taquitos: Spoon about 2 tablespoons of filling in a line along each tortilla, leaving room at the edges. Roll tightly from one edge to form a compact cylinder. Secure with a toothpick if needed, but try to pinch the seam so the filling does not leak. Place assembled taquitos seam-side down on a baking sheet or a plate while you work. Baked Option: Preheat the oven to 425 degrees F. Arrange taquitos seam-side down on a baking sheet lined with parchment. Lightly spray the tops with cooking spray or brush them with a little oil to encourage browning. Bake 15 to 20 minutes until the shells are golden and crisp. Rotate the pan once halfway through for even color. Let cool 2 to 3 minutes before serving so the filling sets slightly. Fried Option: For an extra-crispy finish, pour 1 1/2 inches of neutral oil into a large skillet and heat to medium-high. The oil is ready when a small piece of tortilla sizzles immediately. Fry in small batches, turning constantly with tongs, until evenly golden, usually 30 to 60 seconds per side depending on size. Drain on paper towels. Watch closely to avoid overbrowning; frying is fast. Serve: Remove toothpicks, arrange on a platter, and serve with guacamole, salsa, sour cream, and hot sauce for topping. These are best served hot and fresh but reheat well in a 375 degrees F oven for 6 to 8 minutes to crisp them back up.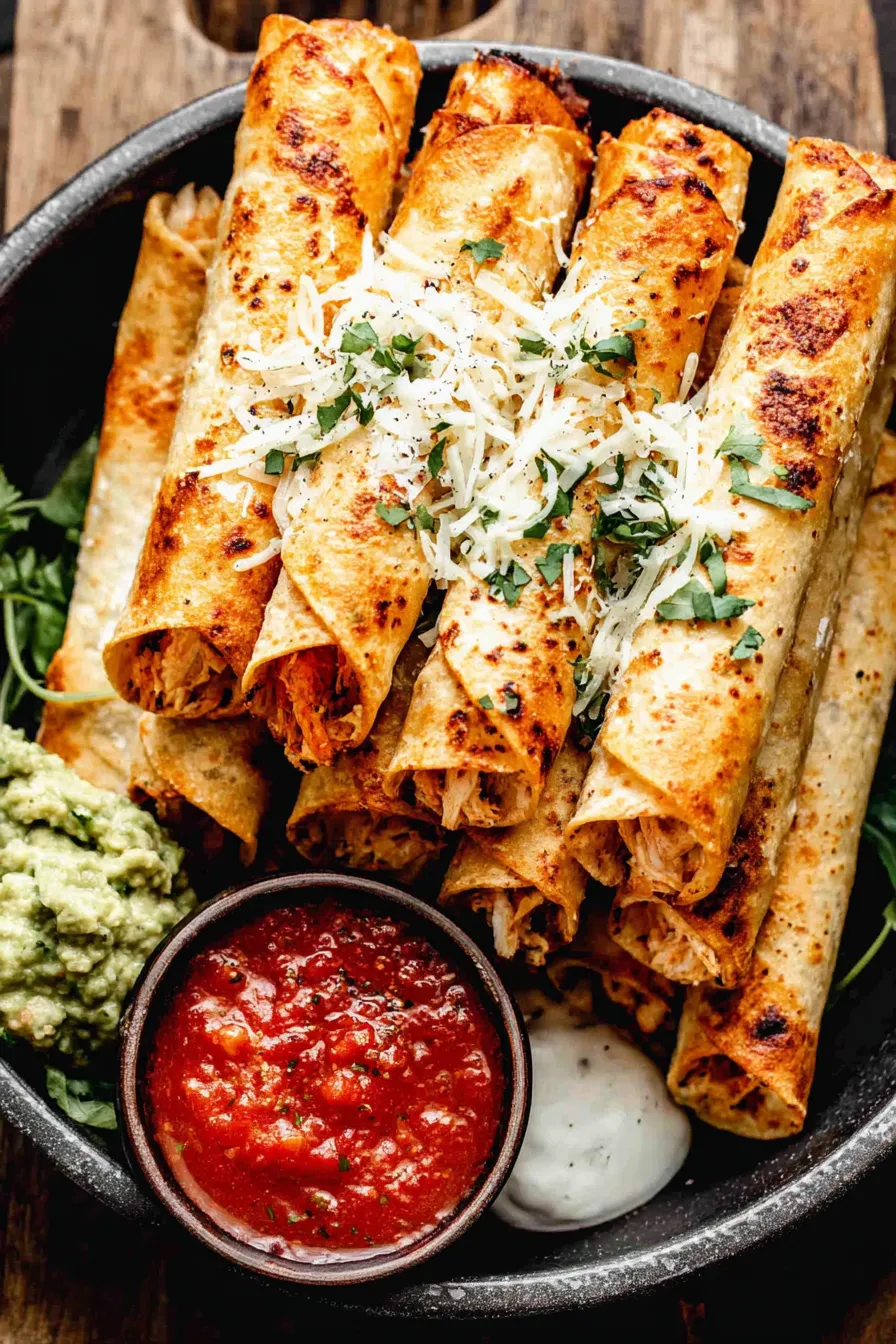
You Must Know
- These hold well in the refrigerator for up to 3 days in an airtight container. Re-crisp in a 375 degrees F oven for 6 to 8 minutes before serving.
- If freezing, place assembled but uncooked taquitos on a tray to freeze solid before transferring to a freezer bag. Bake from frozen adding 5 to 10 minutes to the bake time. They will keep well for up to 3 months.
- High in protein thanks to the chicken and cheese; adjust portions for calorie control by using low-fat cheese and light cream cheese or Greek yogurt.
- Use corn tortillas for a naturally gluten-free option, but verify all other ingredients if strict gluten-free is required. Flour tortillas add pliability and are less likely to crack when rolling.
My favorite part is how forgiving the filling is. I once made a double batch for a potluck and accidentally forgot the salsa. A squeeze of lime and a pinch more chili powder fixed it, and they still vanished within minutes. The little improvisations you make become part of the dish’s story.
Storage Tips
Store cooled taquitos in an airtight container in the refrigerator for up to three days. Separate layers with parchment to prevent sticking. To reheat, arrange them on a wire rack over a baking sheet at 375 degrees F for 6 to 8 minutes until heated through and crisp. For freezing, flash-freeze on a tray, then transfer to a labeled freezer bag; bake from frozen at 425 degrees F for 20 to 25 minutes. Avoid microwaving if you want to maintain crispness; a quick oven re-crisp is best.
Ingredient Substitutions
If you need dairy-free options, swap the cream cheese for a plant-based cream cheese and choose dairy-free sour cream and cheese alternatives. Use shredded cooked turkey or mashed black beans for a different protein profile. For lower fat, substitute light cream cheese and reduced-fat cheddar, though texture will be slightly less rich. For extra heat, add 1 to 2 tablespoons of chopped pickled jalapenos or increase chili powder by 1/4 teaspoon.
Serving Suggestions
Serve on a large platter with bowls of guacamole, pico de gallo, lime wedges, and a cool cabbage slaw for crunch. They work well as an appetizer at parties or stacked with a side salad and black beans for a weeknight meal. Garnish with chopped cilantro, crumbled cotija, or a drizzle of crema to make the presentation pop. Pair with a crisp lager or a light margarita for a festive touch.
Cultural Background
Taquitos are a popular handheld from Mexican and Tex-Mex traditions, traditionally made by tightly rolling small corn tortillas around a filling and frying until crisp. They evolved into many regional variations, often called flautas when made with flour tortillas. The version here blends convenience and tradition by using shredded rotisserie chicken and a creamy binder that nods to American-style party fare while keeping the classic rolled presentation.
Seasonal Adaptations
In summer, swap in fresh grilled corn and diced vine-ripened tomato for added brightness. Fall and winter call for heartier sides such as roasted sweet potato wedges or a warm bean salad. For holiday gatherings, make mini versions as finger food by cutting tortillas into smaller rounds and rolling very tightly; they are perfect for cocktail parties and travel well.
Meal Prep Tips
Make the filling ahead and store it in the refrigerator for up to 24 hours. Warm the tortillas just before rolling to avoid cracks. If you assemble a large batch to freeze, freeze them uncooked on a tray then transfer to a freezer bag; this maintains shape and prevents sticking. Label with the date and bake from frozen adding 5 to 10 minutes to the baking time. Keep dipping sauces separate until serving to avoid sogginess.
These taquitos combine weeknight ease with party-ready crunch. They are the kind of simple recipe that grows into a beloved staple because you can tweak it endlessly and everyone asks for seconds. Give them a try and make them your own with the spice level and accompaniments you prefer.
Pro Tips
Warm corn tortillas briefly on a skillet or microwave wrapped in a damp paper towel to prevent cracking when rolling.
For extra crisp in the oven, brush a little oil on each taquito or spray with cooking spray before baking.
If filling seems dry, stir in 1 to 2 tablespoons of sour cream or salsa to loosen without making it runny.
This nourishing chicken taquitos recipe is sure to be a staple in your kitchen. Enjoy every moist, high protein slice — it is perfect for breakfast or as a wholesome snack any time.
FAQs about Recipes
Can I make these gluten-free?
Use corn tortillas for a gluten-free version, but check labels of other ingredients. Reheat in the oven to keep them crispy.
How do I freeze the taquitos?
Yes. Assemble and freeze raw on a baking sheet, then transfer to a freezer bag. Bake from frozen adding 5 to 10 minutes at 425 degrees F.
Tags
Chicken Taquitos
This Chicken Taquitos recipe makes perfectly juicy, tender, and flavorful steak every time! Serve with potatoes and a side salad for an unforgettable dinner in under 30 minutes.
Ingredients
For serving
Instructions
Prepare the Filling
Combine softened cream cheese, salsa, and sour cream until smooth. Add shredded chicken, cheddar, chopped spinach, cumin, garlic powder, chili powder, salt and pepper. Mix until evenly combined and taste to adjust seasoning.
Soften the Tortillas
Heat corn tortillas 15 to 30 seconds per side in a hot non-stick skillet to make them pliable. Wrap in foil or a towel to keep warm. If using flour tortillas, microwave wrapped in a damp towel for 10 to 15 seconds.
Assemble
Place about 2 tablespoons of filling in a line on each tortilla, roll tightly and secure with a toothpick if necessary. Arrange seam-side down on a baking sheet or plate.
Bake (Optional)
Preheat oven to 425 degrees F. Place taquitos seam-side down on a parchment-lined baking sheet. Lightly spray or brush with oil and bake 15 to 20 minutes until golden and crisp, rotating once for even browning.
Fry (Optional)
Heat 1 1/2 inches of neutral oil in a large skillet to medium-high. Fry taquitos in small batches, turning frequently, until golden and crispy, about 30 to 60 seconds per side. Drain on paper towels.
Serve
Remove toothpicks and serve hot with guacamole, sour cream, salsa, and hot sauce. Reheat leftovers in a 375 degrees F oven for 6 to 8 minutes to restore crispness.
Last Step: Please leave a rating and comment letting us know how you liked this recipe! This helps our business to thrive and continue providing free, high-quality recipes for you.
Nutrition
Did You Make This?
Leave a comment & rating below or tag
@epicula on social media!
Categories:
You might also like...

Mississippi Mud Brownies
Ultra-fudgy brownies crowned with toasted mini marshmallows and warm cocoa icing, with molten chocolate pockets in every bite.

Buttery Pecan Pie Bars
Buttery shortbread crust topped with a gooey brown sugar pecan filling. Just 10 minutes to prep for bakery-worthy bars with irresistible crunch.

Crack-Free Pumpkin Cheesecake
Ultra-creamy pumpkin cheesecake with a graham crust, bakes without cracks, and shines with caramel and rum-kissed whipped cream.
Did You Make This?
Leave a comment & rating below or tag @epicula on social media!
Rate This Recipe
Share This Recipe
Enjoyed this recipe? Share it with friends and family, and don't forget to leave a review!
Comments (1)
This recipe looks amazing! Can't wait to try it.
Comments are stored locally in your browser. Server comments are displayed alongside your local comments.

Hi, I'm Olivia!
What's Popular

30-Minute Meals!
Join to receive our email series which contains a round-up of some of our quick and easy family favorite recipes.