
>>

Decadent fudgy brownies topped with a cloudlike chocolate mousse and a drizzle of chocolate syrup. A show-stopping dessert that stays easy enough for weeknights and special occasions.
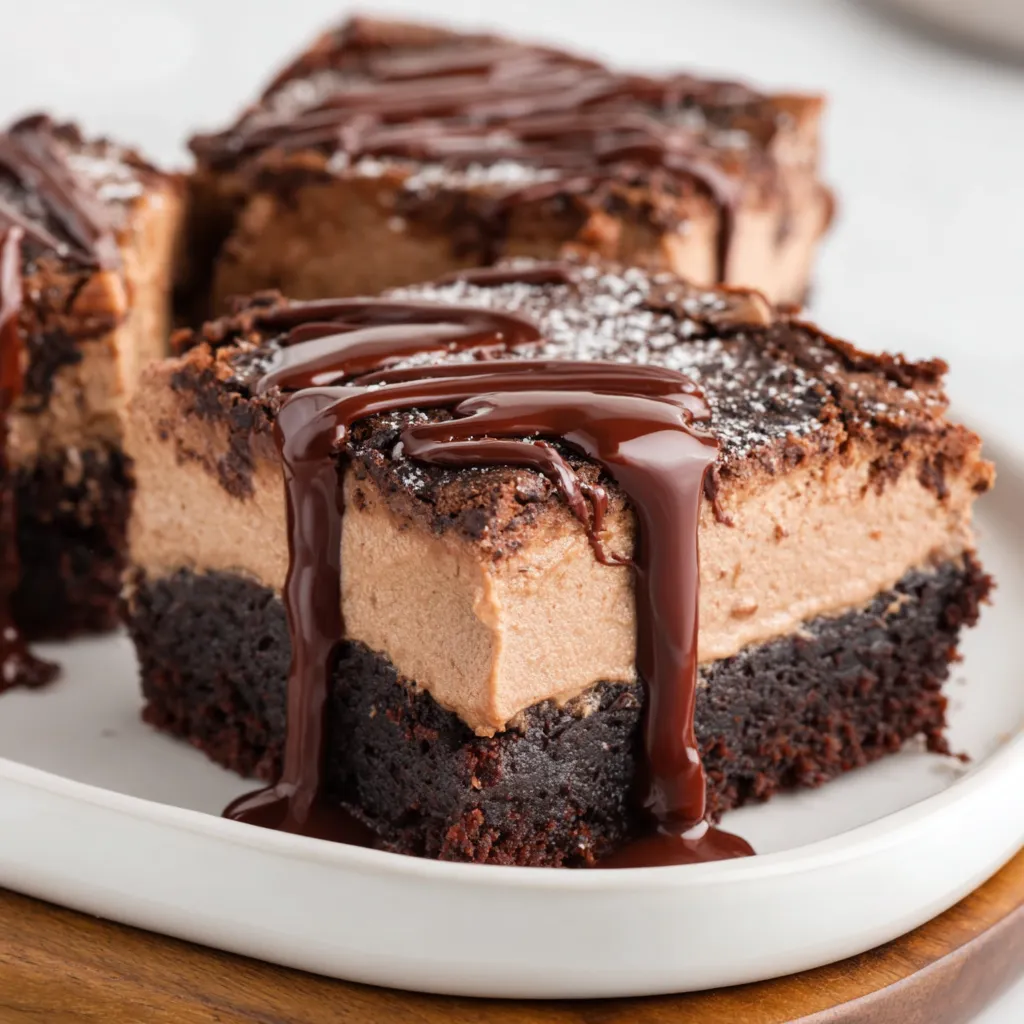
This Chocolate Mousse Brownies combination has been one of my most requested sweets for family gatherings and weekend visitors. I first developed this layered treat on a rainy afternoon when I wanted a dessert that felt indulgent but relied on pantry staples. The result was a dense, fudgy base with an airy, light mousse on top, finished with a glossy chocolate drizzle. The contrast between the chewy brownie and the tender mousse creates a perfect bite every time.
I discovered that adding mini marshmallows to the warm chocolate for the mousse created a silkier texture and stabilized the mixture just enough so the whipped cream holds firm without getting grainy. This dessert keeps well chilled and travels nicely to potlucks, which made it my go-to for holidays and birthday parties. Every time I bring a pan, people ask for the recipe and tell stories of their favorite childhood brownies. It is rich, comforting, and always disappears fast.
On the first time I served these, my partner closed their eyes after the first bite and said they tasted like a chocolate cloud. Family members keep a permanent place in line for seconds. I learned to let the mousse cool completely before folding it into whipped cream after a small kitchen mishap early on where warmth deflated the cream. That cooling step makes all the difference and is now nonnegotiable for me.
My favorite part is how the mousse lightens the intensity of the brownie without making the dessert feel insubstantial. I once made this for a dinner party where guests declared it the best thing they had eaten all evening. It is a dessert that travels well to potlucks and keeps its structure when stored properly. The combination of textures makes it memorable and repeatable.
Store the squares in an airtight container in the refrigerator for up to three days. Place parchment between layers to prevent sticking. For longer storage, freeze uncut pan wrapped tightly in plastic wrap then aluminum foil for up to three months. Thaw overnight in the refrigerator before slicing to prevent the mousse from becoming waterlogged. To reheat a single square for a slightly softer bite, warm at 200°F for 5 to 7 minutes, watching carefully so the mousse does not melt.
If you need to adjust ingredients, use equal weight or volume swaps. Replace semisweet chocolate with bittersweet for a deeper profile or milk chocolate for a sweeter, creamier result. For a dairy free version, choose dairy free chocolate, coconut cream whipped to stiff peaks and vegan marshmallows. Swap vegetable oil for melted coconut oil for a subtle coconut note. If you only have natural cocoa rather than dutch processed, omit the baking powder and use 1/4 teaspoon baking soda instead to balance acidity.
Serve chilled with a drizzle of chocolate syrup, a sprinkle of flaky sea salt, or a scattering of toasted hazelnuts. For a celebration, add a dollop of chilled whipped cream and fresh raspberries on the side to cut richness. Pair with a scoop of vanilla ice cream and espresso for an elegant dessert course. These squares are also excellent alongside coffee for brunch or with a dessert wine for evening gatherings.
Brownies are an American classic originating in the late 19th century as a handheld chocolate treat. Topping a dense brownie with mousse blends two traditions, the all-American brownie and European style chocolate mousse. This hybrid approach reflects contemporary dessert layering trends where texture plays a starring role. The marshmallow addition draws on classic American candy techniques for achieving smooth, stabilized chocolate fillings.
In winter, add a pinch of ground cinnamon and a teaspoon of instant espresso to the brownie batter for warmth and deeper chocolate notes. For summer, top with macerated berries or a citrus compote to add brightness. Around holidays, fold in 1/2 cup chopped peppermint bark or swap in orange zest and candied peel. The mousse can also be tinted with a teaspoon of flavored liqueur for adult gatherings.
Make the brownie base a day ahead and keep it covered at room temperature. Prepare and cool the chocolate marshmallow mixture separately, then whip the cream and assemble on the day you plan to serve for freshest texture. If transporting, freeze assembled pan for 30 minutes to firm up the mousse, then pack in a cooler with ice packs. Slice after chilling fully to maintain clean edges and even portions.
These squares are a joy to share and easy to adapt to any occasion. Try making one change at a time so you can appreciate how each ingredient affects the final texture and flavor. I encourage you to make it your own and enjoy the reactions when you bring it to the table.
Use room temperature eggs to help incorporate evenly and produce a smoother texture.
Cool the chocolate-marshmallow mixture completely before adding it to whipped cream to avoid deflation.
Spoon and level flour when measuring to prevent a cakier result; too much flour will change the fudgy texture.
Chill mixing bowl and whisk in the freezer for 10 minutes to speed up whipping the cream and help it hold peaks.
This nourishing chocolate mousse brownies recipe is sure to be a staple in your kitchen. Enjoy every moist, high protein slice — it is perfect for breakfast or as a wholesome snack any time.
Chill the assembled pan for at least 2 hours. You can make the base 24 hours ahead and store covered at room temperature before adding the mousse.
Let the chocolate-marshmallow mixture cool to room temperature before folding into whipped cream, otherwise the cream will deflate.
Freeze the uncut pan wrapped tightly for up to three months. Thaw in the refrigerator overnight and slice the next day.
This Chocolate Mousse Brownies recipe makes perfectly juicy, tender, and flavorful steak every time! Serve with potatoes and a side salad for an unforgettable dinner in under 30 minutes.
Preheat the oven to 350°F and line a 9x9 inch pan with parchment, leaving an overhang for removal.
Melt 4 ounces chopped chocolate with 1/4 cup butter, then whisk in 1/3 cup oil until smooth.
Whisk the warm chocolate into 1 1/2 cups sugar, then add eggs one at a time and stir in vanilla until just combined.
Sift flour, cocoa, baking powder and salt over the wet mix and fold gently. Spread into the pan and bake 22 to 25 minutes until edges are set and center is slightly underbaked. Cool completely.
Melt 4 ounces chocolate with 1 cup mini marshmallows and 1/4 cup plus 1 tablespoon milk over low heat until smooth. Cool to room temperature. Whip 1 1/4 cups cold heavy cream to soft peaks and fold in cooled chocolate mixture to stiff peaks.
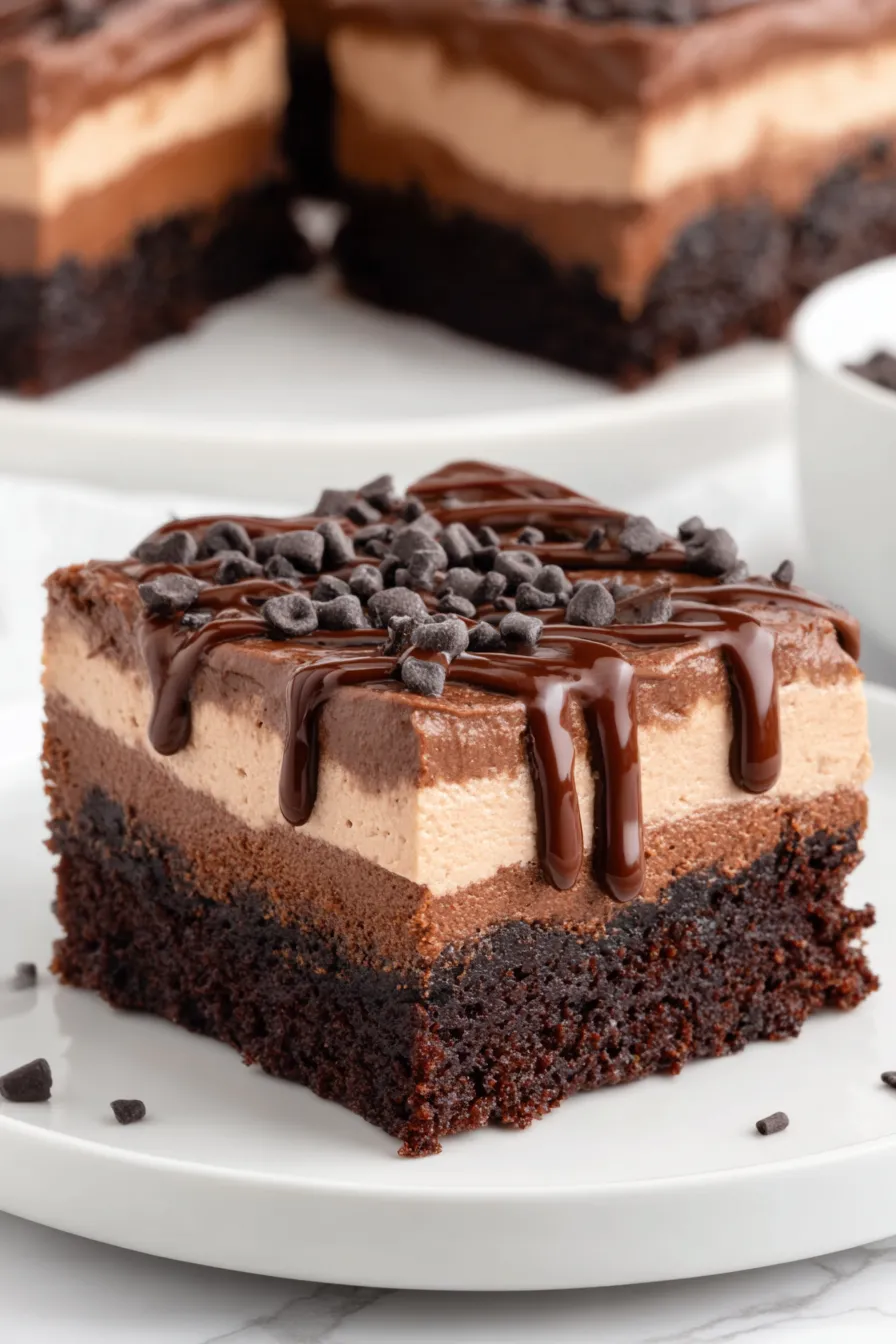
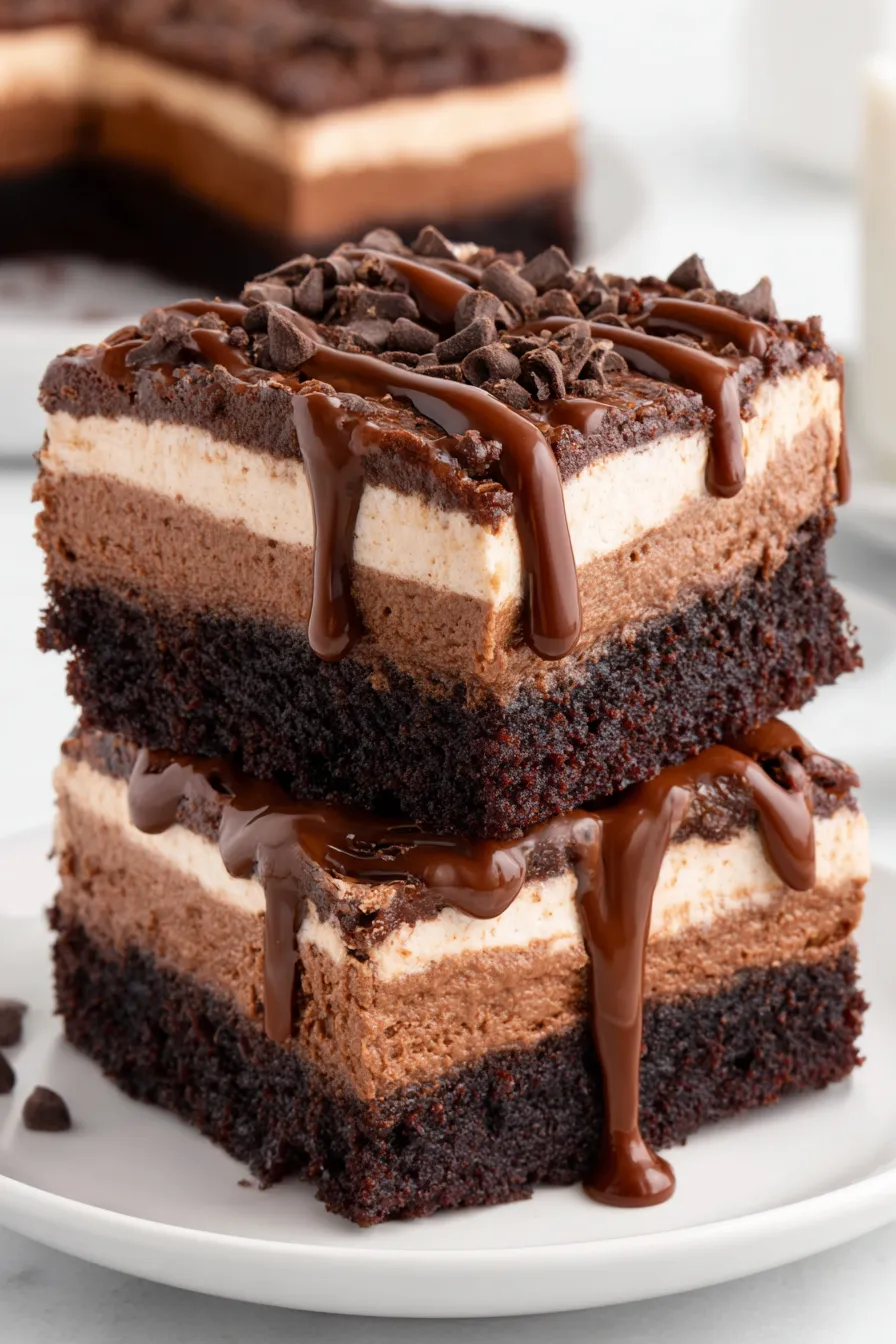
Spread mousse over cooled brownies, cover and chill 2 hours. Slice into 12 squares and garnish with chocolate syrup if desired.
Last Step: Please leave a rating and comment letting us know how you liked this recipe! This helps our business to thrive and continue providing free, high-quality recipes for you.
Leave a comment & rating below or tag
@epicula on social media!

Ultra-fudgy brownies crowned with toasted mini marshmallows and warm cocoa icing, with molten chocolate pockets in every bite.

Buttery shortbread crust topped with a gooey brown sugar pecan filling. Just 10 minutes to prep for bakery-worthy bars with irresistible crunch.

Ultra-creamy pumpkin cheesecake with a graham crust, bakes without cracks, and shines with caramel and rum-kissed whipped cream.
Leave a comment & rating below or tag @epicula on social media!
Enjoyed this recipe? Share it with friends and family, and don't forget to leave a review!
This recipe looks amazing! Can't wait to try it.
Comments are stored locally in your browser. Server comments are displayed alongside your local comments.

Join to receive our email series which contains a round-up of some of our quick and easy family favorite recipes.
