
>>

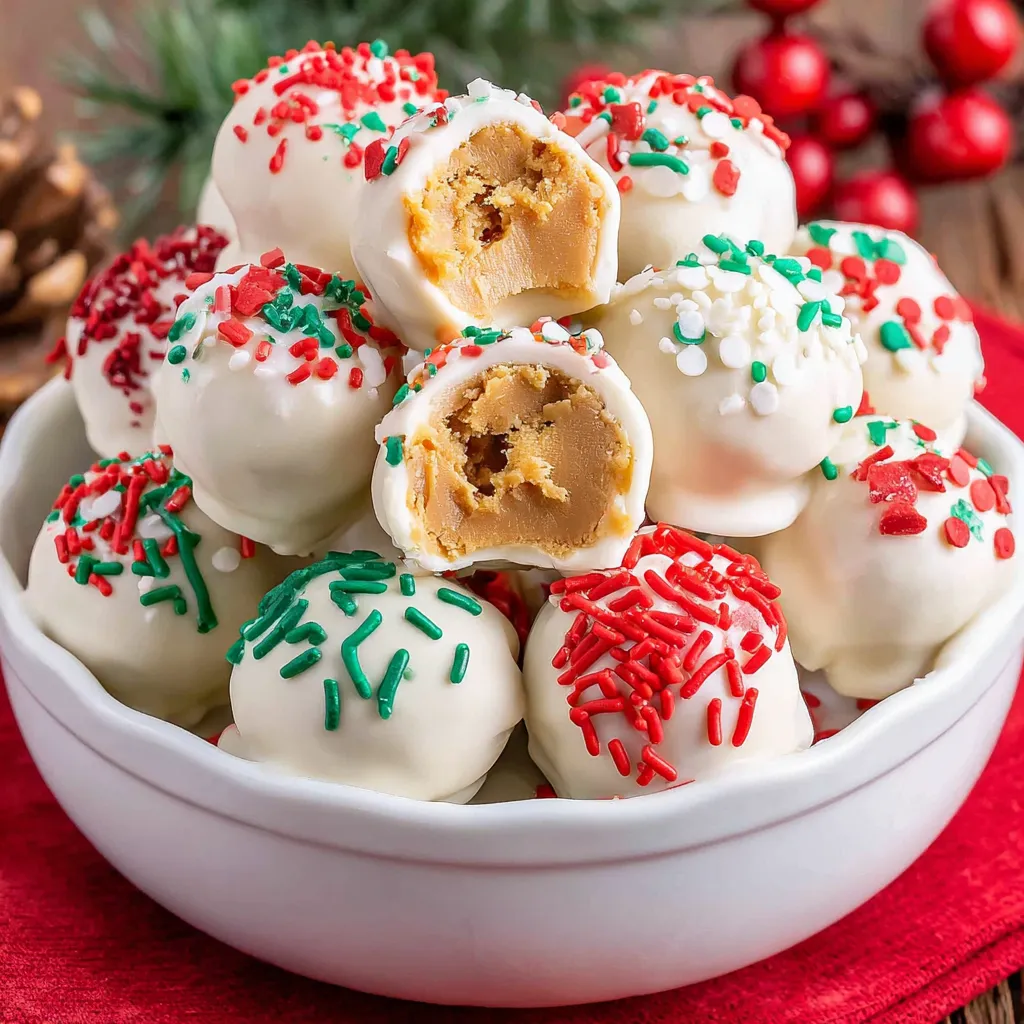
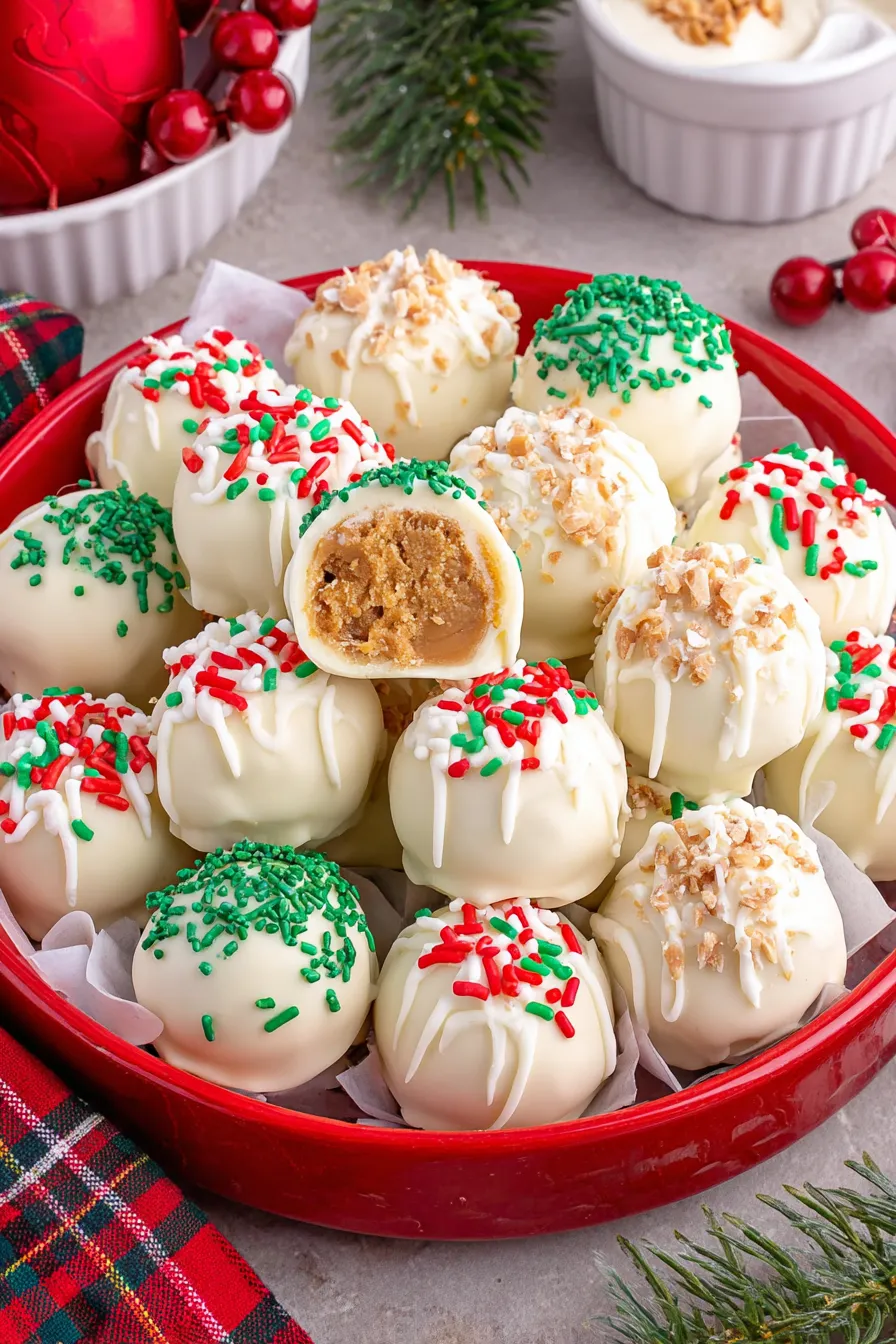
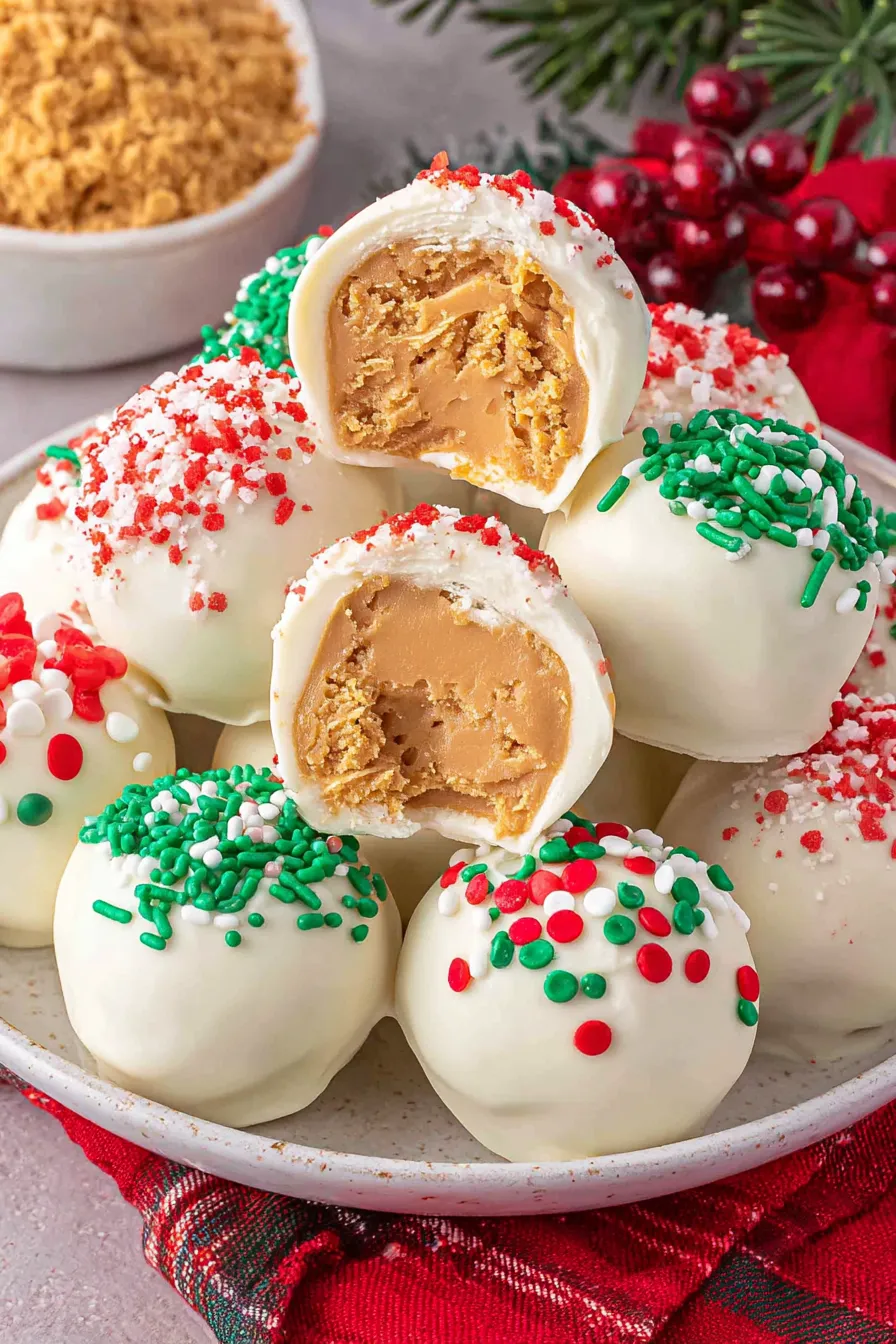
Creamy peanut butter and powdered sugar centers dipped in white chocolate, finished with festive sprinkles — a simple, make-ahead holiday treat.
This little holiday indulgence has been my go-to since the first year I tried to simplify cookie baking for a busy December. These Christmas truffles marry the creamy, slightly salty comfort of peanut butter with the sweet, melt-in-your-mouth crunch of white chocolate. I discovered the basic proportions during a frantic gift-baking weekend when my oven was already claimed by gingerbread; the truffles required no baking, minimal cleanup, and still delivered that special festive flair children and adults both adore. They became the edible gift I tucked into tins and the quick treat I brought to potlucks when time was short.
What makes these truffles so special is their contrast of textures and flavors: the slightly grainy, powder-sweet center cuts through the glossy white chocolate, and a sprinkle of holiday confetti on top gives a cheerful crunch. The recipe is forgiving — swap crunchy for creamy peanut butter, adjust the size of the bites, and even swap coatings to suit dietary needs. Because they don’t require an oven, these are perfect for apartment dwellers or anyone who needs an easy, crowd-pleasing sweet during the holiday rush.
Personally, these truffles rescued several December evenings when I wanted homemade treats without a full baking session. One year my toddler and I spent an afternoon forming the centers and dusting them with red-and-green sprinkles; the neighbors still talk about the jar I left at their door.
My favorite aspect is how versatile these bites are at gatherings: they disappear faster than frosted cookies. Once I brought a tin to a school event and returned to find only a note saying, “Left for Santa — accepted by all.” The simplicity and speed make them one of my most-requested holiday treats.
To keep the coating glossy and the centers fresh, store truffles in an airtight container lined with parchment. At room temperature they last 24–48 hours in a cool kitchen; refrigeration extends shelf life to roughly two weeks. For longer storage, arrange truffles in a single layer or with parchment between layers and freeze for up to three months. Thaw in the refrigerator overnight to prevent moisture condensation. If the coating loses shine after refrigeration, let them sit at room temperature for 10–15 minutes before serving to soften slightly and regain a pleasant mouthfeel.
If peanuts are a concern, swap peanut butter for almond butter, sunflower seed butter, or cashew butter in a 1:1 ratio. For a dairy-free version, use vegan butter and dairy-free white coating or white candy melts. To make the centers less sweet, reduce powdered sugar by up to 2 tablespoons and add a pinch more salt, but keep an eye on texture — too little sugar yields a softer center that’s harder to dip. For a darker contrast, dip in milk or dark chocolate instead of white for a bolder flavor profile.
Present these truffles on a festive platter with seasonal garnishes like rosemary sprigs or cinnamon sticks for aroma and color. They pair beautifully with strong coffee or a glass of sweet dessert wine. For parties, arrange different toppings in rows — crushed candy cane, chopped toasted pecans, and red-and-green sprinkles — so guests can sample a variety. Tins lined with parchment and ribbon make charming edible gifts for neighbors and teachers.
No single country claims exclusive ownership of the no-bake peanut butter sweet but many cultures have similar confections that combine nuts, sugar, and chocolate. In American holiday traditions, bite-sized candies coated in chocolate are ubiquitous — think buckeyes from the Midwest, which are essentially peanut butter truffles dipped in chocolate. These sweets echo that tradition while using white chocolate to nod toward winter holidays and snow-white decor.
For winter, use peppermint extract (1/4 teaspoon) in the center and crush candy canes for a sparkling topping. In spring, swap sprinkles for finely grated citrus zest to brighten the flavor. Swap white chocolate for dark chocolate during colder months for a richer, more decadent experience, and add a pinch of cinnamon or nutmeg for warming notes. Holiday-themed molds can also transform these into shaped candies for special events.
Make the centers up to three days in advance and keep them chilled; dip on the day you plan to serve for the freshest coating. For gifting or large gatherings, form and freeze centers on a tray, then transfer to a zip-top bag. When ready to coat, dip from frozen — this shortens setting time and yields a tight chocolate shell. Label containers with the date and use clear packaging so recipients can see the festive toppings.
These truffles are proof that thoughtful homemade gifts don’t need to be complicated. Whether you’re packing tins for neighbors or arranging a small dessert board for family, the simple combination of peanut butter, sugar, and chocolate is timeless. Make a batch, experiment with toppings, and enjoy the smiles that follow.
Chill the centers until firm — this prevents the coating from soaking in and gives a clean finish.
If white chocolate seizes while melting, add a teaspoon of neutral oil and stir off heat to smooth it out.
Work in small batches when dipping to keep the coating warm and fluid; reheat in 10-second bursts if necessary.
This nourishing christmas peanut butter truffles recipe is sure to be a staple in your kitchen. Enjoy every moist, high protein slice — it is perfect for breakfast or as a wholesome snack any time.
Yes — centers can be frozen for up to three months. Thaw overnight in the refrigerator before dipping or eating.
Use a small cookie scoop about 1 tablespoon in size to make uniform truffles; chilled centers are easier to dip and will have a smoother finish.
This Christmas Peanut Butter Truffles recipe makes perfectly juicy, tender, and flavorful steak every time! Serve with potatoes and a side salad for an unforgettable dinner in under 30 minutes.
In a medium bowl, combine 1 cup powdered sugar, 1/2 cup peanut butter, and 3 tablespoons room-temperature butter. Mix with a spatula until a pliable dough forms. Adjust moisture with tiny amounts of milk if needed.
Scoop into 1-tablespoon portions and roll into 1-inch balls. Place on parchment and refrigerate for 15–30 minutes until firm.
Melt 16 ounces white melting chocolate in 30-second microwave bursts, stirring between each until smooth. Thin with 1 teaspoon neutral oil if necessary.
Dip chilled centers into melted chocolate, tap off excess, and place on parchment. Immediately add sprinkles or toppings while coating is wet.
Allow coating to harden at room temperature or chill for 10–15 minutes. Store in airtight containers in the refrigerator for up to two weeks or freeze up to three months.
Last Step: Please leave a rating and comment letting us know how you liked this recipe! This helps our business to thrive and continue providing free, high-quality recipes for you.
Leave a comment & rating below or tag
@epicula on social media!

Ultra-fudgy brownies crowned with toasted mini marshmallows and warm cocoa icing, with molten chocolate pockets in every bite.

Buttery shortbread crust topped with a gooey brown sugar pecan filling. Just 10 minutes to prep for bakery-worthy bars with irresistible crunch.

Ultra-creamy pumpkin cheesecake with a graham crust, bakes without cracks, and shines with caramel and rum-kissed whipped cream.
Leave a comment & rating below or tag @epicula on social media!
Enjoyed this recipe? Share it with friends and family, and don't forget to leave a review!
This recipe looks amazing! Can't wait to try it.
Comments are stored locally in your browser. Server comments are displayed alongside your local comments.

Join to receive our email series which contains a round-up of some of our quick and easy family favorite recipes.
