
>>

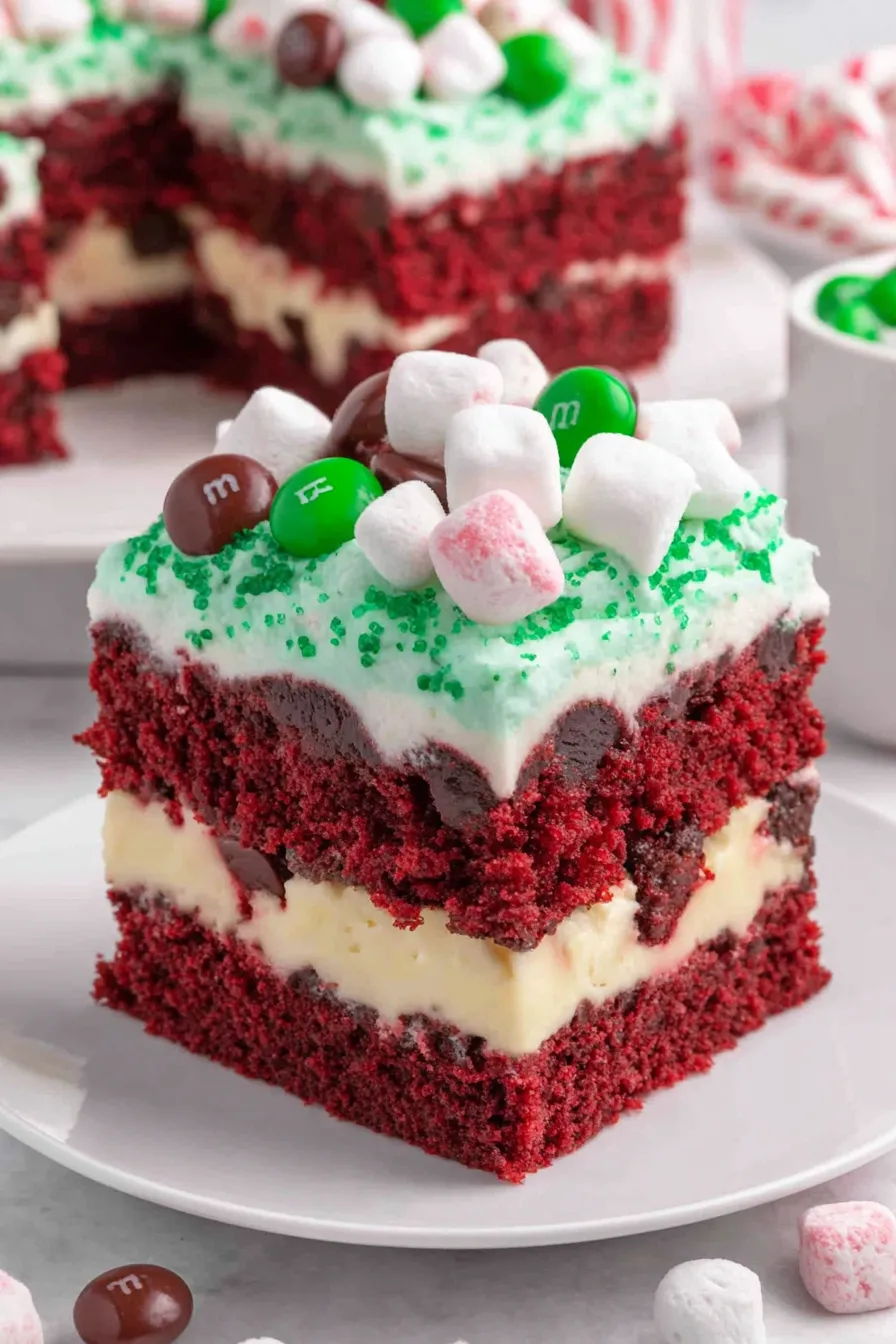
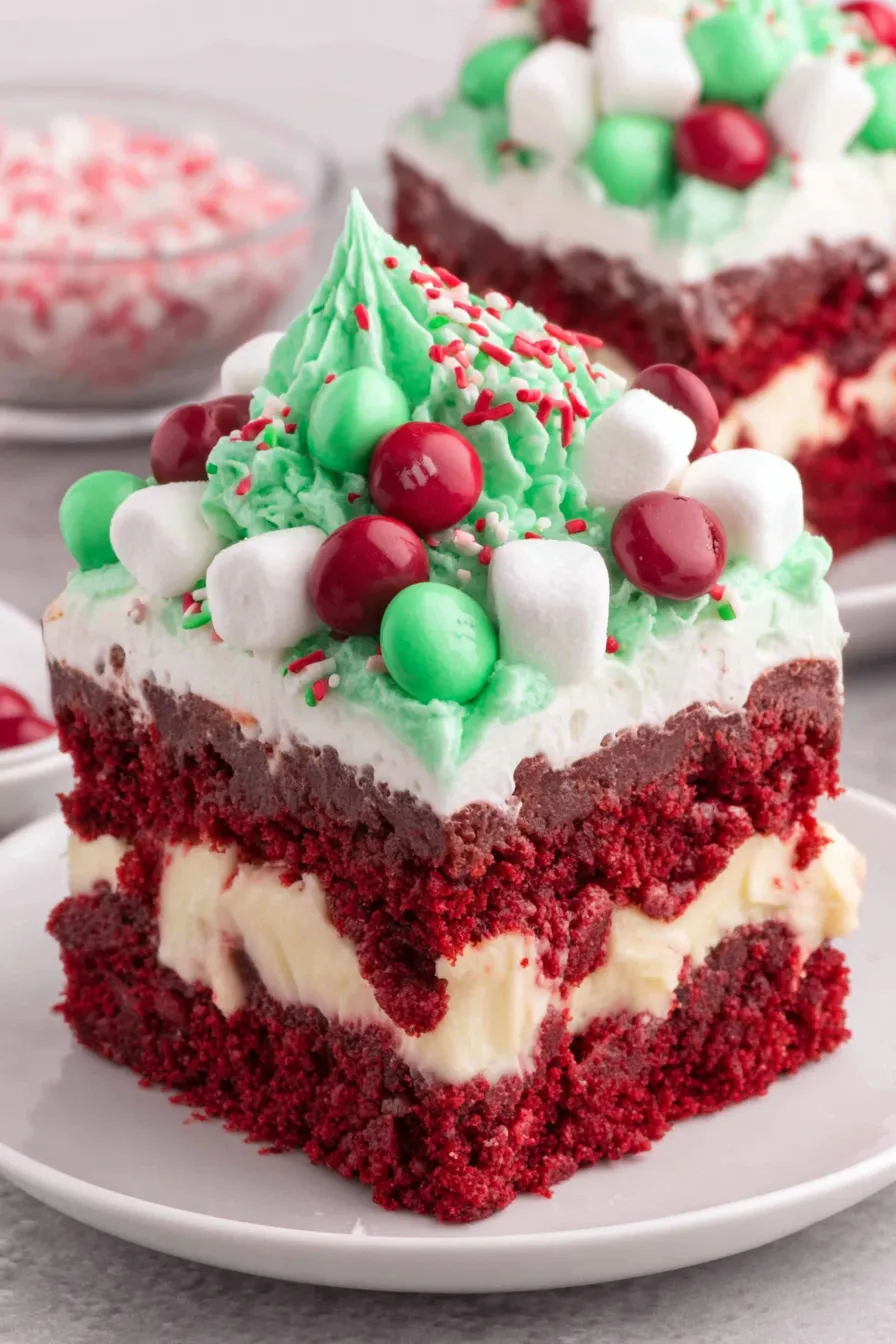
A festive and easy holiday poke cake: tender red velvet layered with cheesecake pudding, topped with green whipped cream, mini marshmallows and red & green candies.
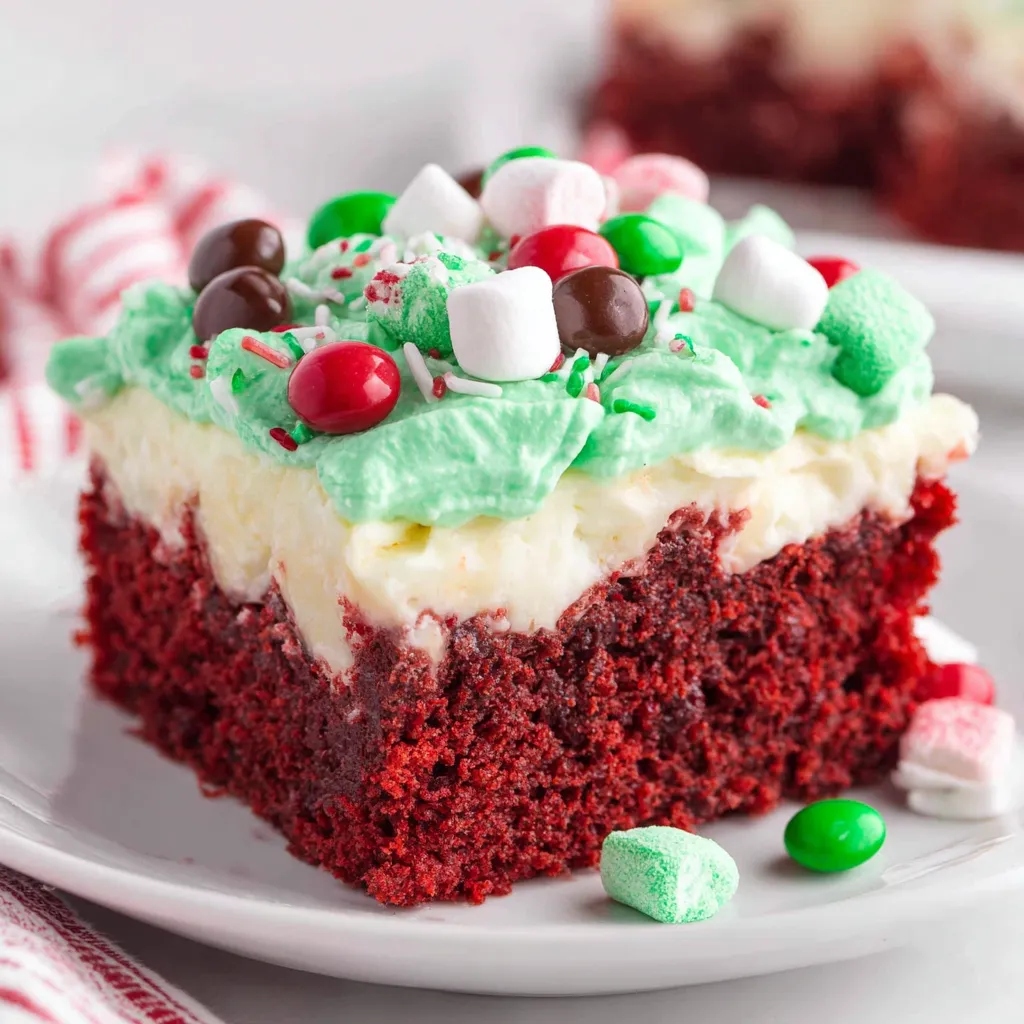
This Christmas Red Velvet Poke Cake has been my go-to holiday treat for years. I first discovered the idea on a snowy December evening when I wanted something that looked elaborate but was actually simple enough to make between holiday errands. The contrast of the tender, cocoa-tinged red cake with a creamy cheesecake pudding layer is the sort of comforting balance that prompts everyone at the table to ask for a second piece. Texture is key here: moist crumbs from the cake soak up the pudding, while the whipped topping and mini marshmallows add fluffy, light contrast. The visual impact is just as satisfying — the red base with green whipped topping graced by red and green candies is unmistakably festive.
I remember bringing this to a family cookie swap the first year I made it; it became the unofficial centerpiece. People complimented the bright colors and the clean square cuts — each piece felt like a holiday present. Because most of the components are pantry staples and ready-made mixes, this is a recipe you can pull together in a short window of time and still impress a crowd. It’s also forgiving: if you need to simplify or swap an ingredient, the structure of the cake holds up. That reliability makes it a favorite for busy holiday cooks who want delicious results without fuss.
I always appreciate how guests react when I cut clean squares and the red crumb shows under the whipped green topping. My youngest niece calls it the "Christmas cake with the green snow," and that memory keeps me making it every year. It’s one of those crowd-pleasers that travels well to gatherings and still feels like a thoughtful homemade dish.
My favorite aspect of this pan is how forgiving it is — the boxed mix and instant pudding are reliably consistent, yet the finished product reads as homemade and special. Family members always remark on the bright, festive look, and I love that I can prepare it the day before and relax on the day of the party. Over the years I’ve learned simple tweaks that make a big difference, like using room-temperature eggs for better rise and choosing a whipped topping brand that holds color well.
Store covered in the refrigerator for up to three days. Use an airtight lid or wrap the pan tightly in plastic wrap to prevent the whipped topping from absorbing fridge odors. For longer storage, cut into individual squares and freeze in a single layer on a sheet pan until firm, then stack with parchment between layers in a freezer-safe container for up to three months. To reheat slightly, thaw overnight in the fridge and let stand at room temperature 20 minutes before serving. Avoid microwaving the decorated top to preserve marshmallow texture and color.
If you prefer a homemade approach, you can bake a red velvet from scratch using cocoa, buttermilk, vinegar, and red food coloring; just keep the final pan size and bake time similar. Swap whole milk for 2 percent for a lighter filling, though the pudding will set a touch softer. Use whipped cream stabilized with a tablespoon of powdered sugar and gelatin if you prefer a dairy-free alternative; in that case use a dairy-free instant pudding and whipped topping to keep the same set. For a nut-free option, check M&M labeling; choose plain candies rather than peanut M&M’s.
Serve chilled as a festive finish to holiday dinners or at parties alongside coffee, hot cocoa, or an espresso bar. Garnish individual squares with a fresh mint leaf for contrast or a small dusting of powdered sugar for a snowy effect. For a plated dessert, add a drizzle of warm chocolate sauce and a spoonful of vanilla ice cream. This pan also works well on a dessert table next to cookies and bars; the green topping adds a strong visual element among other treats.
Red velvet as a concept became widely popular in North American baking traditions in the early 20th century, especially in the American South where the deep red cake is often paired with cream cheese frosting. The vivid color and soft crumb have made it a holiday favorite because it evokes festive colors and celebratory flavors. The poke method emerged later as home cooks began modifying cakes with condensed milk, pudding, or flavored syrups to add moisture and richness, turning a simple sheet cake into a layered, almost trifle-like dessert.
For winter holidays, keep the red and green theme with traditional candies and tinted cream. In other seasons, you can adapt the color scheme: use pastel food coloring for spring or no coloring and fresh berries for summer. Substitute peppermint-flavored pudding or add a teaspoon of peppermint extract to the whipped topping for a candy-cane twist. For Thanksgiving, swap green topping for caramel-colored whipped topping and use toasted pecans instead of M&M’s.
Make the cake and pudding layer up to 24 hours ahead and chill. Tint and add whipped topping, marshmallows, and candies on the day of serving for the brightest presentation. If transporting, place the pan on a flat, rigid base and keep chilled; use an insulated bag and cool packs if the trip is long. Label portions with a marker on the lid to help guests pick their preferred piece and to keep track of servings for leftovers.
This red velvet poke pan is simple, festive, and reliably delicious — a dessert that both the busy host and the celebratory baker can make with confidence. Give it a try at your next holiday gathering and make it your own with personal touches that reflect family favorites.
Allow the pan to chill at least 4 hours so the pudding sets deeply into the cake for the best texture.
Use room-temperature eggs when mixing the batter to help it emulsify and rise evenly.
If using gel food coloring, start with a small amount and add more to reach the desired shade to avoid over-coloring.
Add candies and sprinkles just before serving if you want them to remain crisp and vibrant.
This nourishing christmas red velvet poke cake recipe is sure to be a staple in your kitchen. Enjoy every moist, high protein slice — it is perfect for breakfast or as a wholesome snack any time.
This Christmas Red Velvet Poke Cake recipe makes perfectly juicy, tender, and flavorful steak every time! Serve with potatoes and a side salad for an unforgettable dinner in under 30 minutes.
Preheat oven to 350 degrees F. Spray a 9x13-inch pan with baking spray or grease and set aside to ensure even browning and easy release.
Combine cake mix, water, oil, and eggs in a medium bowl. Beat on medium until smooth and uniform, about 1 to 2 minutes, scraping the bowl as needed.
Pour batter into the prepared pan and bake at 350 degrees F for around 25 minutes, until a toothpick shows moist crumbs but no raw batter.
Using the rounded end of a wooden spoon handle, poke holes about 1/2 inch apart across the warm cake. Cool 10 to 15 minutes to allow pudding to sink in without setting on the surface.
Whisk cheesecake pudding mix with 3 3/4 cups cold whole milk for 1 to 1 1/2 minutes until beginning to thicken, then pour evenly over the cake to fill the holes.
Cover the pan tightly and refrigerate for at least 4 hours so the pudding sets and integrates into the crumb for maximum moisture.
Stir 10 to 12 drops of green food coloring into the thawed whipped topping until evenly colored. Adjust with small additional drops for desired shade.
Spread the tinted whipped topping evenly over the chilled pudding layer, then sprinkle mini marshmallows, red and green M&M's, and red sprinkles to decorate.
Cut into twelve 3-inch by 3-inch squares and serve chilled. Store leftovers covered in the fridge up to three days.
Last Step: Please leave a rating and comment letting us know how you liked this recipe! This helps our business to thrive and continue providing free, high-quality recipes for you.
Leave a comment & rating below or tag
@epicula on social media!

Ultra-fudgy brownies crowned with toasted mini marshmallows and warm cocoa icing, with molten chocolate pockets in every bite.

Buttery shortbread crust topped with a gooey brown sugar pecan filling. Just 10 minutes to prep for bakery-worthy bars with irresistible crunch.

Ultra-creamy pumpkin cheesecake with a graham crust, bakes without cracks, and shines with caramel and rum-kissed whipped cream.
Leave a comment & rating below or tag @epicula on social media!
Enjoyed this recipe? Share it with friends and family, and don't forget to leave a review!
This recipe looks amazing! Can't wait to try it.
Comments are stored locally in your browser. Server comments are displayed alongside your local comments.

Join to receive our email series which contains a round-up of some of our quick and easy family favorite recipes.
