
Christmas Sugar Cookie Bars

Soft, buttery sugar cookie bars topped with a cream cheese buttercream and festive sprinkles — easy to make, perfect for holiday gatherings and cookie exchanges.
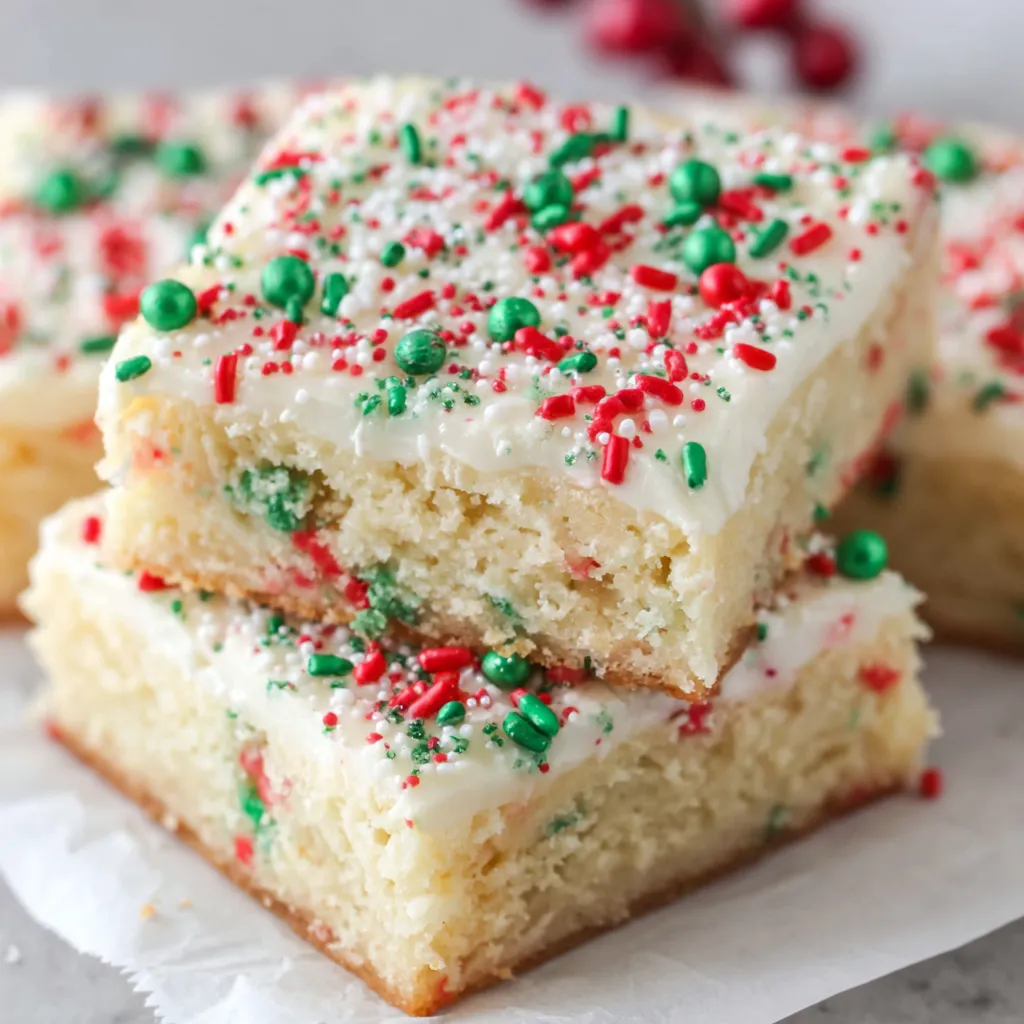
This recipe for Christmas Sugar Cookie Bars is my go-to during the holidays when I want something that tastes like a classic sugar cookie but is faster to make and easier to share. I discovered this bar version during a chaotic December when I needed a dessert that could be sliced, stacked, and transported without crumbling. The result is a tender, slightly chewy interior with a golden edge and a buttery, sweet flavor that every family member, from toddlers to grandparents, reaches for first. Because the dough is thicker than typical cookie dough, spreading it into a pan gives a uniform bake and an ideal canvas for a glossy, slightly tangy buttercream.
What makes these bars special is the balance between the buttery cookie base and the cream cheese-enriched frosting — the frosting softens the top while the cookie underneath stays delightfully firm. I first made these for a neighborhood cookie swap, and they disappeared in minutes. The festive sprinkles folded into the dough add color and a slight crunch, while the frosting with a touch of cream cheese keeps the sweetness from becoming cloying. This version is forgiving, approachable for beginners, and scales easily for larger gatherings.
Why You'll Love This Recipe
- Easy to make in one 9" x 9" pan, saving time and hands-on effort—ready to bake in about 20 minutes of active prep.
- Uses pantry staples and common baking ingredients, which means you can usually pull it together without a special trip to the store.
- Portable and stackable: bars travel better than cut cookies, making them ideal for potlucks, cookie swaps, and classroom treats.
- Make-ahead friendly: prepare the cookie base a day ahead or bake and frost the next morning; the flavor actually improves after a short rest.
- Kid-friendly decorating—sprinkles folded into the dough and sprinkled on top make this a fun project for little hands without the mess of piping bags.
- Flexible frosting texture: spread immediately for soft frosting or let it set for a firmer bite, depending on your preference.
I remember my neighbor handing me a plate of these at dusk on a cold evening; the warm kitchen light and the scent of butter turned a quick snack into something memory-making. My family always requests an extra pan for the freezer because warming a slice for a few seconds in the microwave brings back that bakery-fresh feeling. Over the years I’ve simplified the steps so the recipe stays approachable while delivering consistent, comforting results.
Ingredients
- Salted butter: 1 stick (1/2 cup) for the dough and 1 stick (1/2 cup) for the frosting. Use real butter, not spreadable margarine; it gives the dough structure and a rich flavor. I prefer Plugrá or Land O'Lakes for a reliable, creamy result.
- Sugar: 1 cup granulated sugar for the dough and 2 cups powdered sugar for the frosting. Granulated sugar helps create a tender crumb while powdered sugar yields a silky frosting.
- Egg: 1 large egg for binding and lift. Use room temperature for better emulsion when creaming with butter.
- Vanilla extract: 1 teaspoon in the dough and 1 teaspoon in the frosting. Pure vanilla extract adds depth—avoid artificial vanilla for superior aroma.
- All-purpose flour: 2 cups. Measure by spooning into the cup and leveling with a knife to avoid dense bars; King Arthur or Gold Medal work well.
- Baking powder: 1 teaspoon to give a gentle rise so the bars are tender, not cakey.
- Festive sprinkles: 1/4 cup folded into the dough and additional for the top. Choose sturdier nonpareils or jimmies that hold their color and shape while baking.
- Cream cheese: 3 tablespoons softened for the frosting. The small amount adds tang and softens the sweetness—use full-fat cream cheese for best texture.
- Milk: 2 tablespoons in the frosting to thin and achieve spreadable consistency; whole milk gives the richest mouthfeel.
Instructions
Preheat and prepare: Preheat the oven to 350°F and line a 9" x 9" baking pan with parchment paper, leaving an overhang on two sides for easy removal. Proper lining prevents sticking and allows you to lift the entire slab out for cleaner cutting. Cream butter and sugar: In a large mixing bowl, beat 1 stick (1/2 cup) softened salted butter with 1 cup granulated sugar until light and fluffy, about 2 to 3 minutes with a handheld mixer on medium speed. Scrape the sides once to ensure even aeration; this step traps tiny air bubbles that help create a tender bite. Add egg and vanilla: Beat in 1 large room-temperature egg and 1 teaspoon vanilla extract until fully incorporated. If your butter was too cold, warm the bowl slightly to avoid curdling; if too warm, chill briefly to firm up before adding dry ingredients. Incorporate dry ingredients: Whisk together 2 cups all-purpose flour and 1 teaspoon baking powder, then add to the butter mixture a little at a time on low speed until a thick dough forms. Overmixing develops gluten and will toughen the texture, so stop as soon as the flour disappears. Fold in sprinkles and spread: Gently fold in 1/4 cup festive sprinkles with a spatula. Transfer the dense dough to the prepared pan and press evenly into the corners; a lightly oiled offset spatula or dampened hands can help spread without compressing the dough too much. Bake: Bake at 350°F for 20 minutes or until the surface is set and edges turn lightly golden. A toothpick inserted into the center should come out with a few crumbs attached, not wet batter. Allow the pan to cool on a rack for at least 20 to 30 minutes before removing. Remove and cool completely: Use the parchment overhang to lift the cookie slab from the pan and place it on a cooling rack. Cooling fully ensures the frosting won’t melt and helps you achieve clean slices. Make the frosting: Beat together 2 cups powdered sugar, 1 stick (1/2 cup) softened salted butter, 3 tablespoons softened cream cheese, 1 teaspoon vanilla extract, and 2 tablespoons milk until smooth and spreadable. Adjust milk by a teaspoon if you prefer a looser or stiffer finish. Frost and decorate: Spread the frosting over the cooled slab with an offset spatula and sprinkle additional festive sprinkles. For a firm top, chill for 30 minutes before slicing; for a softer bite, cut immediately and serve.
You Must Know
- These bars keep well refrigerated for up to 5 days in an airtight container, or freeze up to 3 months—slice before freezing for easiest thawing.
- Because the dough is thick, spreading slowly and evenly prevents thin edges and ensures a consistent bake across the pan.
- Use room-temperature ingredients for smooth creaming; cold butter or cold egg can cause separation and an uneven texture.
- Make the frosting slightly thinner with milk if you plan to pipe or drizzle; keep it thicker for spreading so sprinkles adhere.
- These treats are high in calories and sugar—enjoy in moderation or share at gatherings as a special seasonal indulgence.
My favorite part of this recipe is how it bridges nostalgia and convenience: the flavor of a classic sugar cookie with the ease of baking a single pan. I’ve served these at school parties, holiday brunches, and family movie nights; each time someone asks for the recipe. The cream cheese touch in the frosting is a subtle trick I learned from a baker friend—just enough tang to cut the sweetness and make each bite feel balanced. Seeing the rows of colorful squares cooling on my counter is a small but consistent holiday joy.
Storage Tips
Store cooled bars in an airtight container in the refrigerator for up to five days to keep the frosting stable and the texture fresh. For short-term storage at room temperature, keep them covered for up to 24 hours, away from heat and direct sunlight. To freeze, cut into individual squares and place them in a single layer on a baking sheet until firm, then transfer to a resealable freezer bag with parchment between layers to prevent sticking—freeze up to three months. Thaw in the refrigerator or on the counter for 30 to 60 minutes before serving; warming a slice for 8 to 12 seconds in the microwave revives the soft texture without melting the frosting if slightly chilled.
Ingredient Substitutions
If you need to adapt ingredients, swap salted butter for unsalted butter and add a pinch of salt (about 1/8 teaspoon) to the dough. For a dairy-free version, use a stick of vegan butter and a dairy-free cream cheese alternative; note that texture and flavor will be slightly different. To make them gluten-free, use a cup-for-cup gluten-free flour blend that contains xanthan gum—bake time may increase a few minutes. If you prefer less sugar, reduce the granulated sugar in the dough to 3/4 cup and taste the frosting as you add powdered sugar to adjust sweetness. Keep proportions and mixing techniques consistent to preserve structure.
Serving Suggestions
Serve these squares on a festive platter with a dusting of extra sprinkles or edible glitter for holiday sparkle. They pair beautifully with hot beverages—mulled cider, hot chocolate, or strong coffee—to balance the sweetness. For a party, arrange different colored sprinkles on top to match a theme, or cut into smaller bite-sized pieces for a dessert buffet. Garnish with a light zest of orange or a tiny mint leaf for a contrast in color and aroma. These are great for gifting when wrapped individually in parchment and tied with ribbon.

Seasonal Adaptations
Change the sprinkles to match seasons—pastel jimmies for Easter, red and pink for Valentine’s, or orange and brown for autumn. Add 1/2 teaspoon ground cinnamon and a pinch of nutmeg to the dough for a warm winter variation, or fold in 1/2 cup finely chopped candied ginger for a spicy-sweet twist. For holiday gatherings, press crushed peppermint candies into the frosting after spreading for a Peppermint Bark-style finish. Adjust frosting by folding in 1 teaspoon of finely grated lemon zest for a bright spring version that pairs well with berries.
Meal Prep Tips
For efficient meal prep, bake two pans at once and refrigerate one un-frosted slab to frost the day of the event; the unfrosted slab keeps slightly longer in the fridge. Pre-measure dry ingredients into labeled zip-top bags, and soften butter and cream cheese in advance so assembly is quick. When packing for an outing, place paper doilies between layers to prevent sticking and keep them chilled in an insulated cooler if traveling long distances. These bars are ideal for assembling a grab-and-go dessert box for a week of festive treats.
Success Stories
Readers have told me they used this recipe for cookie swaps and bake sales with huge success; one friend sold out within an hour at a school fundraiser. Another family made these for a neighbor care package after a new baby arrived—the portability and ease of slicing made sharing simple and thoughtful. I once substituted red velvet sprinkles and delivered a tray to a holiday choir rehearsal—several singers later told me they saved these for a late-night snack after a performance. Small tweaks like frosting texture and sprinkle choice often create big smiles.
These cookie bars are a holiday staple in my kitchen: simple, forgiving, and endlessly adaptable. I hope you make them your own and share a pan with friends and family—there’s something deeply comforting about slicing into a warm, buttery bar and watching others enjoy it as much as you do.
Pro Tips
Use room-temperature butter and egg for smooth creaming and even texture.
Line the pan with parchment and leave an overhang for easy removal and clean cutting.
If frosting is too thick, add milk one teaspoon at a time until spreadable; if too thin, add a little more powdered sugar.
This nourishing christmas sugar cookie bars recipe is sure to be a staple in your kitchen. Enjoy every moist, high protein slice — it is perfect for breakfast or as a wholesome snack any time.
FAQs about Recipes
Can I freeze these bars?
Yes. You can freeze baked and unfrosted bars for up to 3 months. Freeze in single layers on a sheet first, then stack with parchment between layers in a sealed bag.
How do I get clean slices?
Let the pan cool fully before lifting with parchment. If frosting melts, chill the slab for 20 to 30 minutes to firm up before slicing.
Tags
Christmas Sugar Cookie Bars
This Christmas Sugar Cookie Bars recipe makes perfectly juicy, tender, and flavorful steak every time! Serve with potatoes and a side salad for an unforgettable dinner in under 30 minutes.
Ingredients
For the sugar cookie bars
For the frosting
Instructions
Prepare the pan and preheat
Preheat oven to 350°F and line a 9" x 9" pan with parchment, leaving an overhang for easy removal.
Cream butter and sugar
Beat 1/2 cup softened butter with 1 cup sugar until light and fluffy, then add egg and vanilla until combined.
Add dry ingredients
Slowly add 2 cups flour and 1 teaspoon baking powder on low speed until a thick dough forms; fold in 1/4 cup sprinkles.
Spread and bake
Press dough evenly into the prepared pan and bake at 350°F for 20 minutes or until edges are lightly golden.
Cool and frost
Cool completely, then lift from pan and spread frosting made by beating powdered sugar, butter, cream cheese, vanilla, and milk; top with sprinkles.
Last Step: Please leave a rating and comment letting us know how you liked this recipe! This helps our business to thrive and continue providing free, high-quality recipes for you.
Nutrition
Did You Make This?
Leave a comment & rating below or tag
@epicula on social media!
Categories:
You might also like...

Mississippi Mud Brownies
Ultra-fudgy brownies crowned with toasted mini marshmallows and warm cocoa icing, with molten chocolate pockets in every bite.

Buttery Pecan Pie Bars
Buttery shortbread crust topped with a gooey brown sugar pecan filling. Just 10 minutes to prep for bakery-worthy bars with irresistible crunch.

Crack-Free Pumpkin Cheesecake
Ultra-creamy pumpkin cheesecake with a graham crust, bakes without cracks, and shines with caramel and rum-kissed whipped cream.
Did You Make This?
Leave a comment & rating below or tag @epicula on social media!
Rate This Recipe
Share This Recipe
Enjoyed this recipe? Share it with friends and family, and don't forget to leave a review!
Comments (1)
This recipe looks amazing! Can't wait to try it.
Comments are stored locally in your browser. Server comments are displayed alongside your local comments.

Hi, I'm Olivia!
What's Popular

30-Minute Meals!
Join to receive our email series which contains a round-up of some of our quick and easy family favorite recipes.