
>>

A time-honored, buttery stuffing made with stale white bread, fragrant herbs, and slow-sautéed aromatics — perfect for holidays and weeknight comforts.
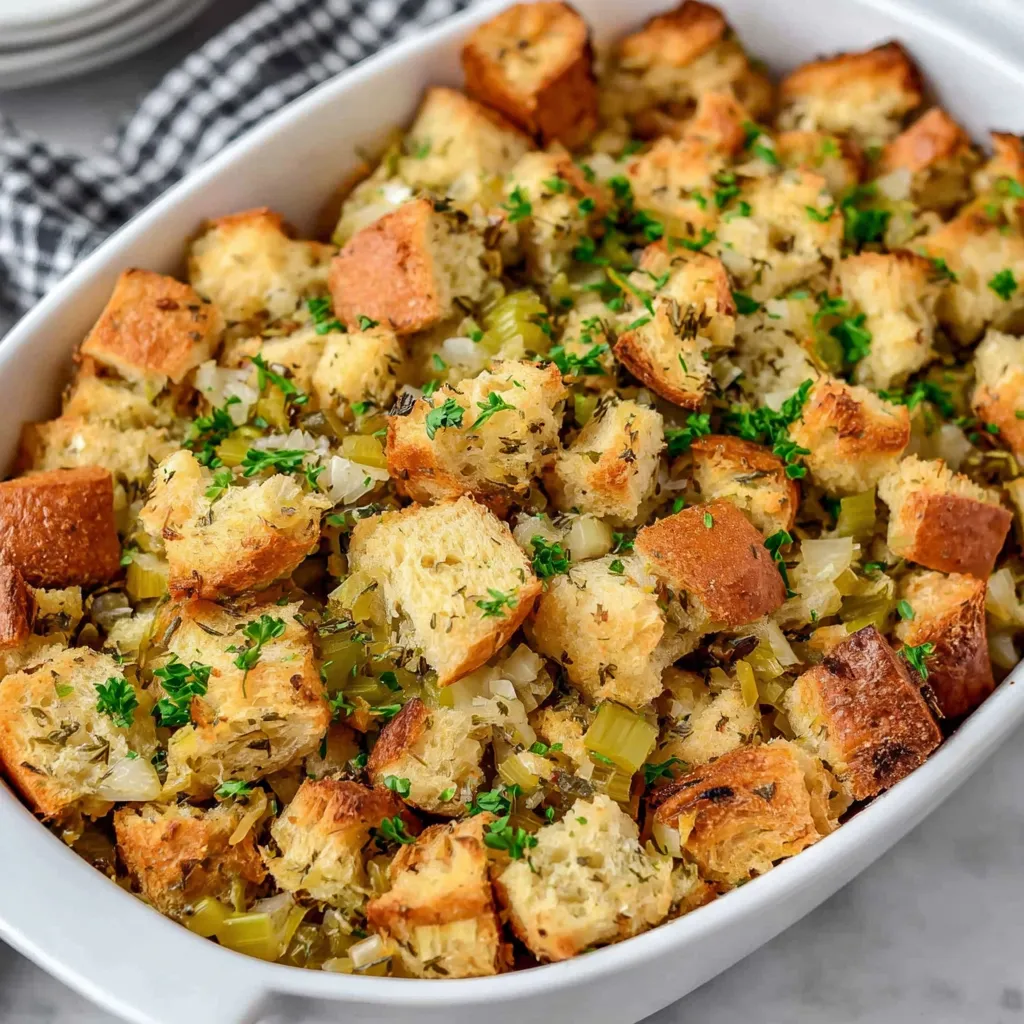
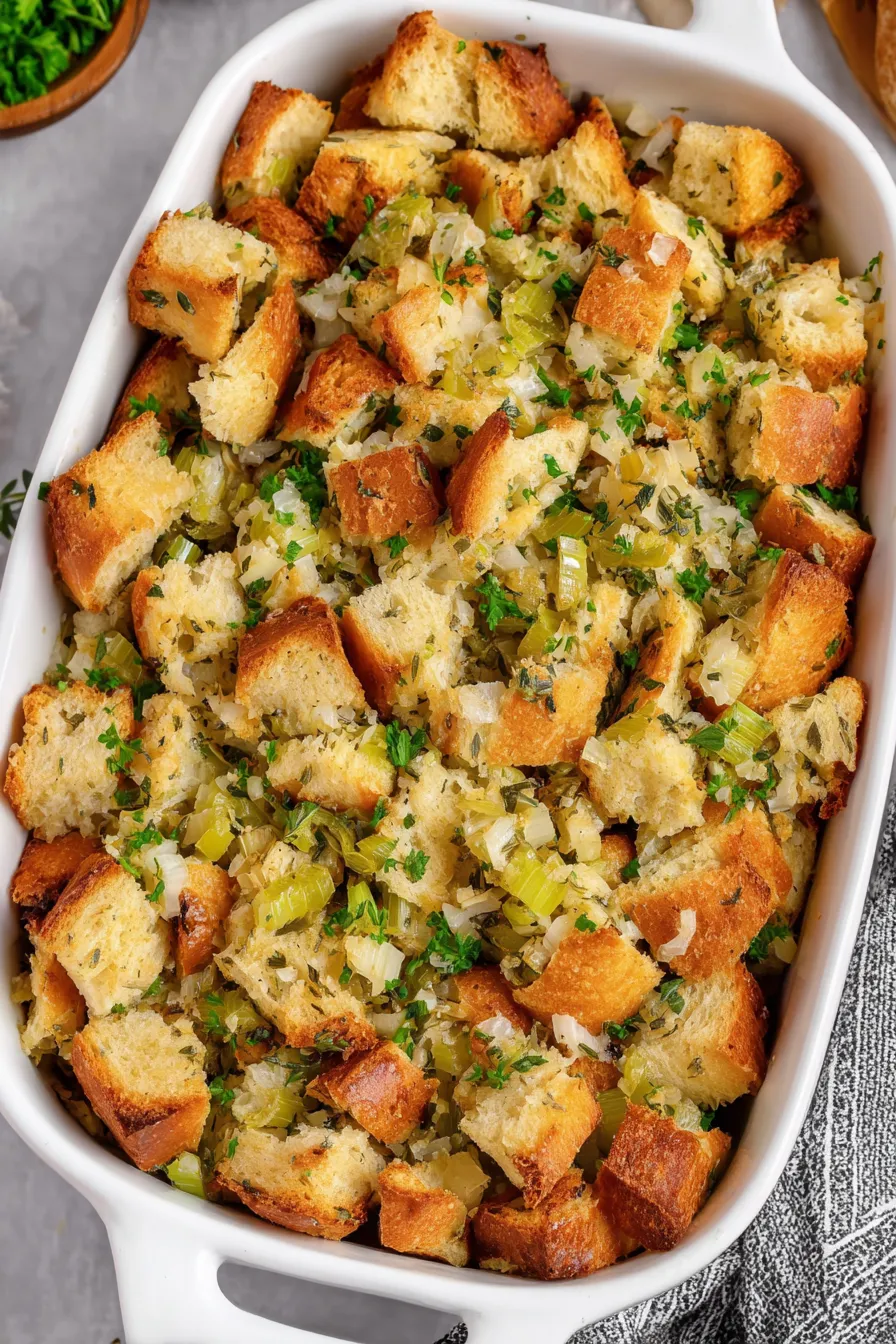
This homemade stuffing has been a fall and holiday staple in my family for as long as I can remember. I first learned this version from my grandmother, who insisted that the secret wasn’t just the herbs but the slow, patient cooking of onion and celery in real butter. I discovered how transformative that step was one November when I hurried through it and ended up with bland, soggy bread — from then on I always give the aromatics their full time to soften and caramelize. The result is a dish that balances tender, saturated bread with pockets of crunchy top, a deeply savory herb profile, and the comfort of butter and warm spices in every bite.
What makes this preparation special is its forgiving nature and the little rituals that elevate it: make the bread stale for better texture, use fresh sage whenever possible, and take the extra 5–10 minutes to let the onions turn translucent and sweet. I usually start the day before if I have time, laying bread cubes out to dry so they soak up the aromatics and broth slowly rather than collapsing into a mush. Family members request this alongside roast turkey, but I also find it shines next to simple roasted chicken and a crisp green salad for an uncomplicated Sunday dinner.
In my house this dish reliably brings everyone to the table. One Thanksgiving my cousin stopped to ask for the recipe between bites and later admitted she’d had seconds and thirds — the slow-cooked onions and the fresh sage always win people over. When I ran out of time one year and used day-old store-bought rolls, it still tasted fantastic: the technique matters more than the fanciest ingredients.

My favorite aspect is the slow-sauté step — when the onions reach that soft, jammy stage the whole dish transforms. One winter I kept stirring and tasting for twenty minutes until they were perfect, and the stuffing that year was singled out by every guest. It’s a simple technique that rewards patience and improves each time you make it.
Store leftovers in an airtight container in the refrigerator for up to 4 days. To freeze, cool completely, transfer to a freezer-safe container, and freeze for up to 3 months. When reheating from frozen, thaw overnight in the fridge, then warm in a 350°F oven covered with foil for 20–30 minutes until heated through; remove foil for the last 10 minutes to re-crisp the top. For stovetop reheating, add a tablespoon of butter or oil to a skillet and toast portions over medium heat until the crust revives.
To make this meatless, swap the chicken broth for vegetable stock and the eggs for an egg replacer if needed — though eggs add silk and structure. For a gluten-free version, use a gluten-free white sandwich loaf dried in the same way and confirm your broth is GF. Swap butter for clarified butter or a neutral oil to prevent burning, understanding that butter provides the richest flavor. Add cooked breakfast sausage or diced apple for a sweeter, heartier twist; reduce broth slightly if adding extra moist mix-ins.
This preparation pairs beautifully with roast turkey or chicken, balsamic-glazed carrots, and a crisp winter green salad. For a festive table, spoon into a warmed hollowed pumpkin for a rustic presentation. Garnish with extra chopped parsley and a few fresh sage leaves fried quickly in butter for a crunchy, aromatic topper. Serve family-style in the baking dish so guests can appreciate the crisp edges and tender center.
Stuffing has deep roots in many Western culinary traditions, originally referring to mixtures used to fill poultry and other meats. In American holiday culture it evolved into both an interior stuffing and a separately baked side. Regional variations range from cornbread-based versions common in the South to Italian-influenced recipes with pancetta and fennel. This white-bread approach is classic and familiar, reflecting the simplicity of post-war American home cooking that prized thrift, comfort, and readily available ingredients.
In autumn, fold in roasted butternut squash and toasted pumpkin seeds for a sweet, nutty accent. Winter calls for dried cranberries and toasted pecans to add texture and color contrast. For spring, add lemon zest and tarragon with lighter stock to brighten the dish. Adjust baking time slightly when adding moist vegetables: roast additions first to concentrate their flavors and avoid excess moisture in the final dish.
Assemble the bread-herb mixture a day ahead and refrigerate covered. Bring to room temperature before baking and add the egg-broth binder just before transferring to the baking dish. If preparing for a large gathering, assemble into single-serving ramekins and freeze; bake directly from frozen with an extra 10–15 minutes covered, then finish uncovered for crispness. Label containers with the date and contents for easy holiday coordination.
This stuffing is as much a memory-maker as it is a side dish. Whether it’s for a holiday feast or a quiet family dinner, the simple combination of butter, herbs, and stale bread turns humble ingredients into something celebratory. I hope you make it your own and pass along small adjustments that become your family’s traditions.
Dry the bread thoroughly so it absorbs the aromatic mixture without turning gummy; use the low oven method if short on time.
Cook onion and celery slowly until jammy to develop natural sweetness and depth of flavor that seasonings can build on.
Use low-sodium broth to control final salt; adjust salt at the end after tasting the assembled mixture.
For crisp edges, bake covered then uncover for the final 15 minutes; broil 1–2 minutes if you want extra crunch — watch closely.
If adding moist mix-ins like fruit or roasted vegetables, roast them first to concentrate flavors and prevent excess moisture.
This nourishing classic homemade stuffing recipe is sure to be a staple in your kitchen. Enjoy every moist, high protein slice — it is perfect for breakfast or as a wholesome snack any time.
Yes — dry the bread overnight at room temperature or bake cubes at 250°F for 30 minutes, tossing occasionally until dry but not browned.
Store in an airtight container in the refrigerator for up to 4 days or freeze for up to 3 months. Thaw overnight and reheat at 350°F covered, then uncover to crisp.
This Classic Homemade Stuffing recipe makes perfectly juicy, tender, and flavorful steak every time! Serve with potatoes and a side salad for an unforgettable dinner in under 30 minutes.
Slice the loaf into 1-inch cubes until you have about 12 cups. Spread on a sheet pan if drying overnight or before toasting.
Option A: Leave cubes out overnight on a sheet pan to dry. Option B: Bake at 250°F for 30 minutes, tossing every 5–10 minutes until dry but not browned.
Preheat oven to 350°F and generously grease a 9x9 baking dish with butter or oil; use a larger pan if doubling.
Melt 3/4 cup butter in a large sauté pan over medium heat. Add onion and celery and cook for 20–30 minutes until fully softened and slightly jammy.
Off the heat, stir salt, pepper, poultry seasoning, marjoram, fresh sage, and parsley into the cooked vegetables to preserve bright herb flavors.
In a small bowl whisk together 2 eggs and 1 cup chicken broth until smooth to form the liquid binder.
Combine dried bread cubes with the aromatic herb mixture, then pour the egg-broth over the cubes and gently mix until evenly moistened.
Transfer to the prepared dish, dot with the remaining 2 tablespoons of butter, cover with foil and bake 30 minutes at 350°F. Remove foil and bake 15 minutes more; broil 1–2 minutes for extra crispness if desired.
Let rest 5 minutes after baking, then serve warm. Leftovers reheat well in the oven or a skillet to restore crisp edges.
Last Step: Please leave a rating and comment letting us know how you liked this recipe! This helps our business to thrive and continue providing free, high-quality recipes for you.
Leave a comment & rating below or tag
@epicula on social media!

Ultra-fudgy brownies crowned with toasted mini marshmallows and warm cocoa icing, with molten chocolate pockets in every bite.

Buttery shortbread crust topped with a gooey brown sugar pecan filling. Just 10 minutes to prep for bakery-worthy bars with irresistible crunch.

Ultra-creamy pumpkin cheesecake with a graham crust, bakes without cracks, and shines with caramel and rum-kissed whipped cream.
Leave a comment & rating below or tag @epicula on social media!
Enjoyed this recipe? Share it with friends and family, and don't forget to leave a review!
This recipe looks amazing! Can't wait to try it.
Comments are stored locally in your browser. Server comments are displayed alongside your local comments.

Join to receive our email series which contains a round-up of some of our quick and easy family favorite recipes.
