
>>

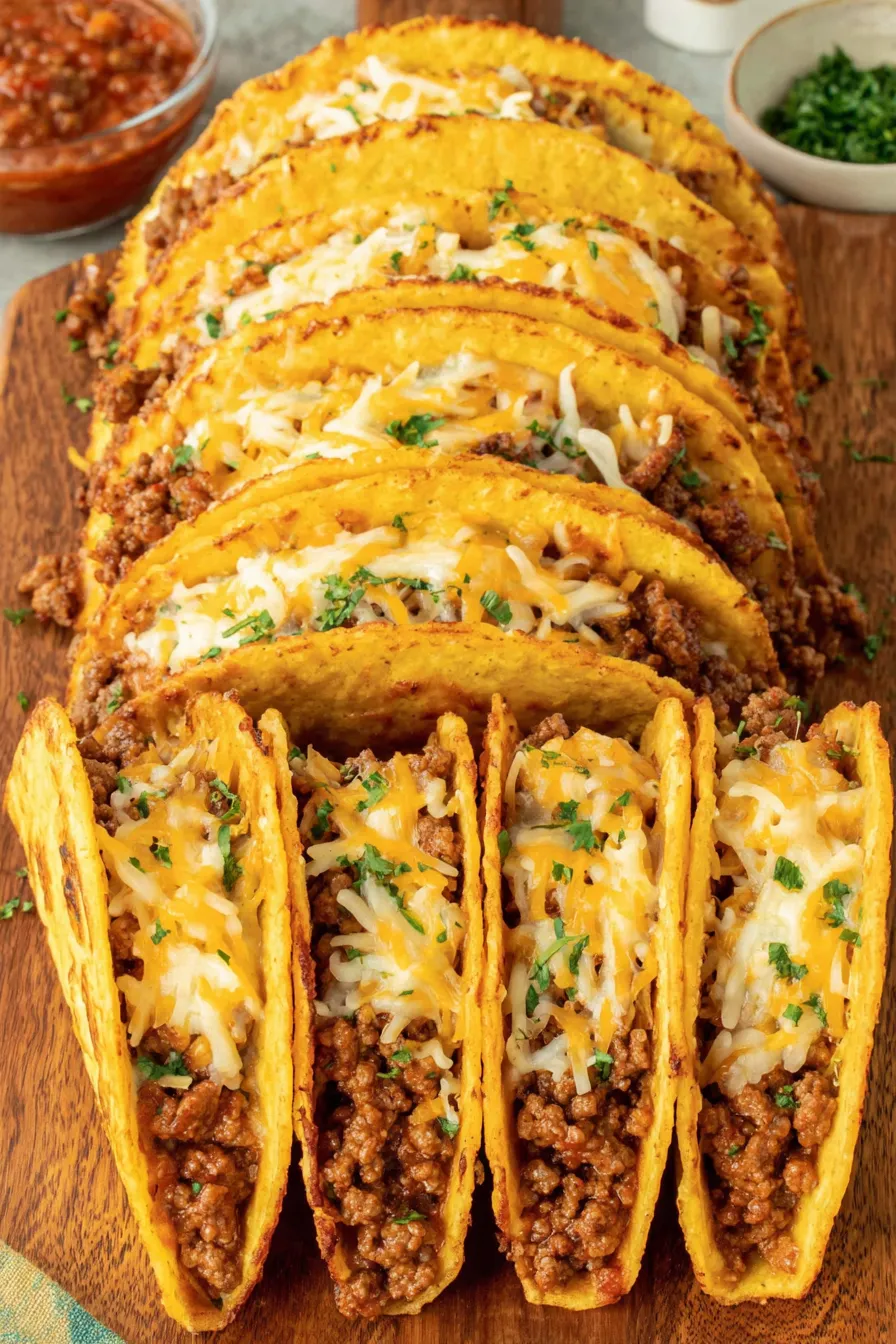
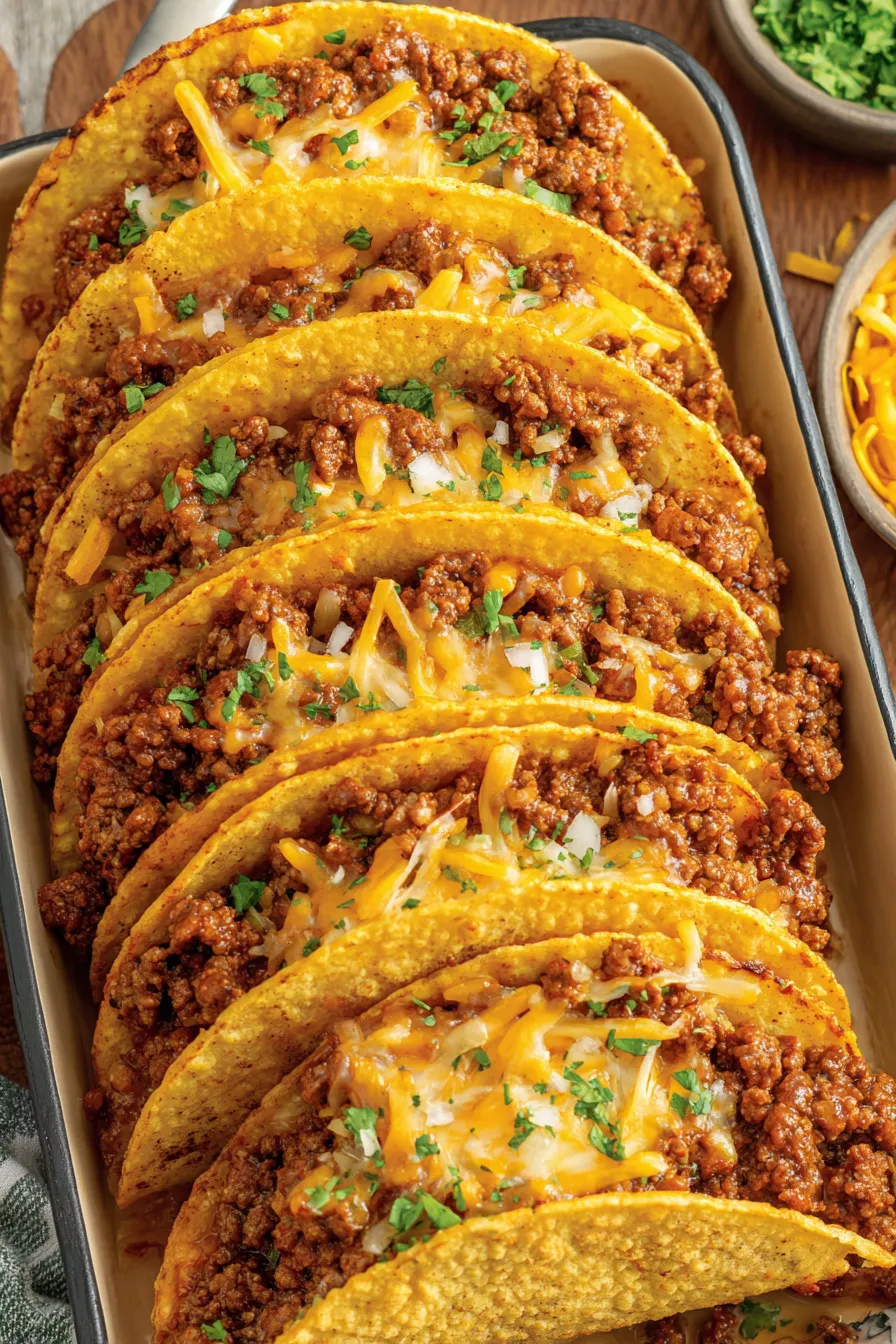
Wide-bottom hard corn shells filled with seasoned beef and melted cheddar-jack cheese, baked until perfectly crisp — a fast, family-friendly weeknight favorite.

This recipe for baked tacos has been one of my go-to weeknight dinners for years, especially on evenings when I want something comforting, crunchy, and quick. I first arrived at this version during a busy September when I had a pack of wide, flat-bottomed hard corn shells in the pantry and a craving for something that felt a little more finished than tacos straight from the skillet. The result — browned seasoned beef tucked into upright shells and finished in the oven until the cheese melts — became an instant household favorite because it combines the crisp texture of fried tacos with the simplicity of oven baking.
What makes these stand out is the balance of textures and flavors. The beef is cooked until nicely browned, absorbing tomato sauce and taco seasoning so each bite is savory and slightly saucy without making the shell soggy. The wide shells give you room to pack in generous portions, and the short bake crisps the shell even more while melting the shredded cheddar-jack into a gooey top. I love how easily they travel from pan to plate, and that even picky eaters at my table—teenagers included—ask for seconds.
In my house these tacos became the unofficial game-day meal because they’re sturdy and easy to eat standing up around the TV. I remember the first time I served them at a small family gathering — within minutes the 9x13-inch pan was nearly empty and someone asked for the recipe. It’s one of those simple combinations that tastes like effort, even on nights when you don’t have much time.
What I love most is the reliability: browned beef, bright tomato, and melty cheese create a familiar flavor profile that appeals to all ages. Over the years I've learned small refinements — like preheating the rack and draining grease thoroughly — that keep the shells crunchy and the filling full-flavored. They’re a dependable, crowd-pleasing option for casual dinners and impromptu guests.
Store cooled tacos in an airtight container in the refrigerator for up to 3 days. If you've baked them fully, allow them to cool slightly then layer with parchment paper between tacos to prevent sticking. Reheat in a 350°F oven for 6–8 minutes to preserve crispness — microwaving tends to soften the shells. To freeze, wrap individual tacos tightly in plastic wrap and place in a freezer bag; they’ll keep for up to 3 months. Reheat from frozen at 350°F for 12–15 minutes, checking that the center reaches a safe temperature before serving.
For a lighter filling, substitute 1 1/2 pounds ground turkey or chicken and increase the onion slightly for flavor. Vegetarian options work well: swap the beef for 2 cans (15 oz each) of drained black beans mixed with 1 cup cooked corn and extra spices for texture. If you prefer lower sodium, use a low-sodium taco seasoning or make your own blend (chili powder, cumin, paprika, garlic powder, onion powder, salt to taste). Swap cheddar-jack for pepper jack for heat, or for a dairy-free version use a plant-based shredded cheese alternative, though melting textures will vary.
Serve with fresh lime wedges, pico de gallo, thinly sliced radishes, or sliced avocado for contrast. A simple shredded cabbage slaw dressed with lime and a pinch of salt adds a refreshing crunch. For a heartier meal, pair with Mexican-style rice, refried beans, or a bright corn salad. Garnish with a drizzle of crema or a dollop of Greek yogurt for tang, and scatter chopped cilantro and diced tomatoes for color and freshness.
These baked tacos are a Tex-Mex adaptation that blends traditional Mexican ingredients like corn tortillas and seasoned meat with American convenience and baking techniques. The idea of baking assembled tacos in a pan became popular as a way to serve filled shells easily to crowds while ensuring uniform crispness and melted cheese. While not an authentic regional Mexican dish, they reflect the evolving cross-border culinary traditions that emphasize hearty flavors and practicality.
Adapt this dish to the seasons: in summer, fold in grilled corn and charred bell peppers to the filling; in fall, add a handful of roasted butternut squash cubes for sweetness and texture. For winter gatherings, serve with warm toppings like chipotle crema and roasted poblano slices. Swap cilantro for fresh parsley or scallions in winter when cilantro is less available; dried oregano can add depth when fresh herbs are out of season.
Prepare the filling up to 2 days in advance and refrigerate; when ready to serve, reheat gently and assemble into shells just before baking to keep them crisp. For grab-and-go lunches, bake tacos, cool completely, and wrap individually in foil — they reheat well in a small toaster oven. Measure and shred cheese in advance into small containers so assembly is fast, and keep garnishes like cilantro and lime separate until serving.
These baked tacos are a small ritual of comfort: quick to make, full of satisfying textures, and endlessly adaptable. I hope you make them your own with favorite toppings and enjoy the same warm feedback my family always gives when I bring this to the table.
Drain excess grease and simmer the filling briefly so it’s moist but not wet to keep shells crisp.
Use freshly shredded cheese for better melting and a creamier finish.
Stand shells upright in a 9x13-inch pan so they heat and crisp evenly without tipping over.
Assemble just before baking if preparing the filling ahead to maintain shell crunch.
This nourishing crispy baked tacos recipe is sure to be a staple in your kitchen. Enjoy every moist, high protein slice — it is perfect for breakfast or as a wholesome snack any time.
Drain excess grease after browning the beef to prevent soggy taco bottoms; simmering briefly with the tomato sauce helps the filling cling to the meat.
Bake at 400°F for 5–7 minutes — just until the cheese melts and shells feel crisp. Keep an eye on them to avoid over-browning.
This Crispy Baked Tacos recipe makes perfectly juicy, tender, and flavorful steak every time! Serve with potatoes and a side salad for an unforgettable dinner in under 30 minutes.
Preheat oven to 400°F and position the rack in the center to ensure even crisping.
Place 10 wide hard taco shells upright in a 9x13-inch baking dish without overcrowding so they can crisp evenly.
In a large skillet over medium-high heat, warm 1 tablespoon olive oil, add 3/4 cup diced onion and cook briefly. Add 1 1/2 pounds ground beef with 1/2 teaspoon salt and 1/4 teaspoon black pepper. Brown for 8–10 minutes, breaking up the meat; drain excess grease.
Stir in 3/4 cup tomato sauce and the 1-ounce taco seasoning packet. Cook 2–3 minutes until the mixture thickens and most liquid is absorbed.
Divide the filling evenly among the shells, about 1/3 to 1/2 cup each, pressing gently so the meat settles without overfilling.
Sprinkle 1 1/2 cups shredded cheddar-jack cheese evenly over the filled shells. Bake at 400°F for 5–7 minutes until cheese melts and shells are crisp.
Remove from oven, sprinkle with 1 tablespoon chopped cilantro if desired, and serve immediately with lime wedges or your favorite toppings.
Last Step: Please leave a rating and comment letting us know how you liked this recipe! This helps our business to thrive and continue providing free, high-quality recipes for you.
Leave a comment & rating below or tag
@epicula on social media!

Ultra-fudgy brownies crowned with toasted mini marshmallows and warm cocoa icing, with molten chocolate pockets in every bite.

Buttery shortbread crust topped with a gooey brown sugar pecan filling. Just 10 minutes to prep for bakery-worthy bars with irresistible crunch.

Ultra-creamy pumpkin cheesecake with a graham crust, bakes without cracks, and shines with caramel and rum-kissed whipped cream.
Leave a comment & rating below or tag @epicula on social media!
Enjoyed this recipe? Share it with friends and family, and don't forget to leave a review!
This recipe looks amazing! Can't wait to try it.
Comments are stored locally in your browser. Server comments are displayed alongside your local comments.

Join to receive our email series which contains a round-up of some of our quick and easy family favorite recipes.
