
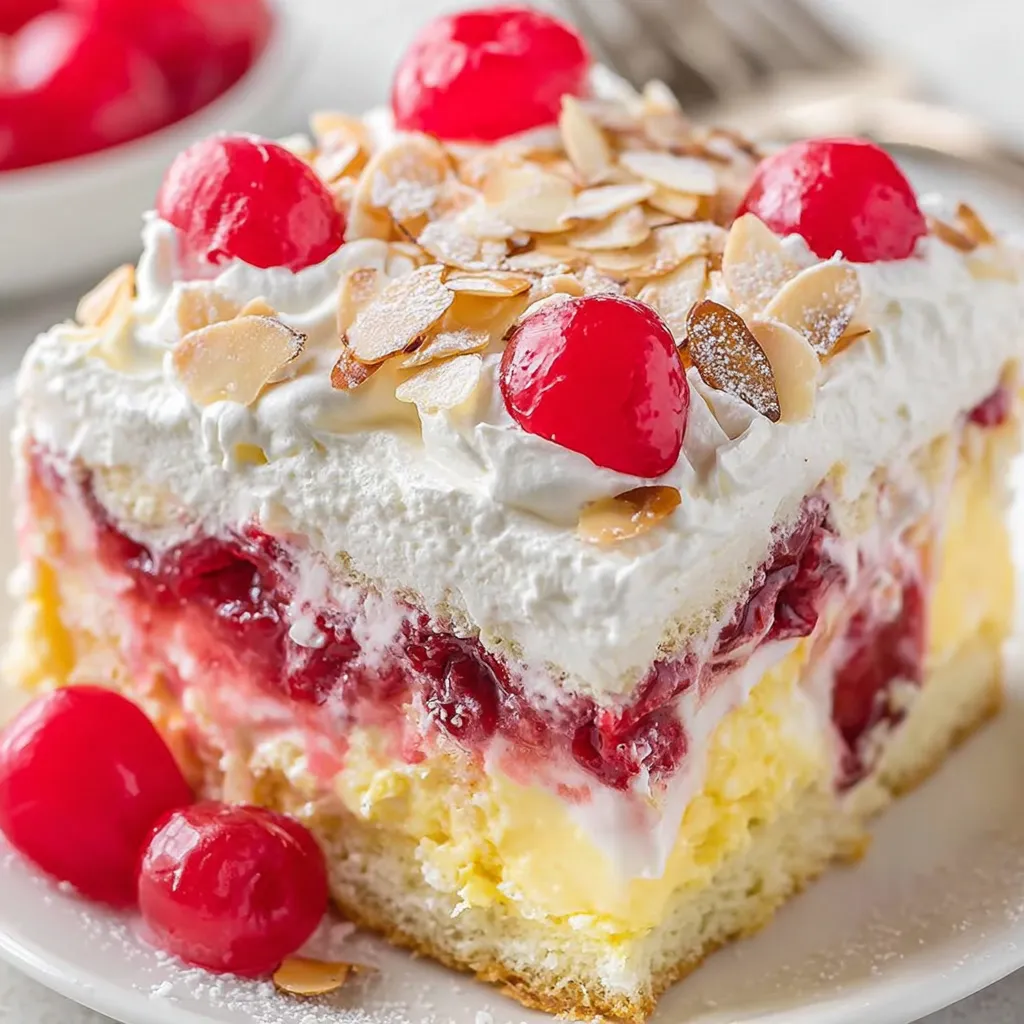
Heaven on Earth Cake

A no-bake, layered dessert of angel food cake, cherry pie filling and a silky vanilla cream that chills into a light, crowd-pleasing treat.
This dessert has been my go to for family gatherings and potlucks ever since I first assembled it on a hectic Sunday afternoon. I discovered this combination in an old church cookbook and immediately fell in love with the contrast between the airy cake and the bright cherry topping. The texture is the real star here. Soft cubes of angel food cake soak up the vanilla cream without becoming soggy while the pockets of cherry filling provide bursts of tangy sweetness. It is the kind of dish that invites second helpings and quiet compliments.
I keep the components on hand because the assembly is straightforward yet the result feels celebratory. It is especially useful when you need a dessert that travels well and can be made a day ahead. The finished dish has a cool, creamy mouthfeel from the pudding and whipped topping, a light chew from the cake, and a glossy, jewel like cherry layer that makes it look as good as it tastes. Every time I bring this to a gathering someone will quietly ask for the recipe and then come back later for a second piece.
Why You'll Love This Recipe
- Quick assembly in about 20 minutes of hands on time which makes it perfect for busy hosts or last minute desserts.
- Uses pantry and fridge staples including store bought cake and canned cherries so you do not need special shopping trips.
- Make ahead friendly since chilling for at least four hours blends flavors and improves texture so it is ideal for potlucks.
- Family friendly with bright cherry flavor that appeals to kids and an elegant appearance that satisfies adult tastes.
- Minimal equipment required: a mixing bowl, whisk and a 9 by 9 baking dish so cleanup is fast.
- Flexible to dietary tweaks; swapping dairy components can make it lighter or more indulgent depending on preference.
When I first served this to my extended family we were surprised how quickly it disappeared. My mother loved that it resembled an old fashioned trifle but required far less time and fewer dishes. Friends have said they appreciate how it feels special while still being forgiving of quick substitutions. Over the years I have learned a few small techniques to keep the top glossy and the cream silky which I include in the steps below.
Ingredients
- 14 ounce store bought angel food cake: Choose a fresh, unsliced cake if possible or slice your own from a loaf style cake. The airy structure is important because it soaks up the cream without collapsing. Brands like Sara Lee or local bakeries work well.
- 21 ounce canned cherry pie filling: Look for a good quality filling with whole cherries and glossy syrup. This provides both sweetness and bright color that contrasts with the cream layers.
- 1 cup whole milk: Use full fat milk to ensure the pudding sets with a smooth, rich texture. Cold milk helps the instant mix bloom properly.
- 1/2 cup heavy cream: Adds silkiness and body to the cream layer. If you want a lighter version use half and half but texture will be slightly less luxurious.
- 1 cup sour cream: Gives subtle tang which balances the sweet cherries. Full fat sour cream yields the best mouthfeel.
- 3.4 ounce instant French vanilla pudding mix: The instant mix brings thickening power and vanilla flavor. Opt for French vanilla for a richer profile.
- 8 ounce container whipped topping, thawed: Use a thawed container of stabilized whipped topping for a consistent texture that layers well.
- 1 1/2 tablespoons thinly sliced almonds: Toast lightly if you prefer extra crunch. Sprinkle on the surface for a subtle nutty finish.
Instructions
Step 1: Prepare the cake: Slice the angel food cake into approximately 1 inch cubes. If your cake came pre sliced, separate gently so pieces stay intact. Use a serrated knife and a light sawing motion to avoid compressing the cake. Arrange half of the cubes evenly in the bottom of a 9 by 9 baking dish to create the first layer. Step 2: Add the first cherry layer: Spoon roughly two thirds of the canned cherry pie filling over the cake cubes. Spread gently with the back of a spoon to cover the surface but do not press down. You want the syrup to contact the cake so it soaks in without compacting the structure. Step 3: Top with remaining cake: Evenly distribute the remaining angel food cake cubes over the cherry layer. This creates alternating pockets of cake and fruit which makes every bite balanced. Keep the cubes fairly even in size so chilling and soaking are uniform. Step 4: Whisk the cream base: Combine the whole milk, heavy cream and sour cream in a medium bowl. Whisk by hand or use a handheld mixer on low speed until smooth. Chill liquids will help the instant pudding set properly when added. Step 5: Add instant pudding: Sprinkle the instant French vanilla pudding mix evenly over the cream mixture. Whisk thoroughly until the mixture begins to thicken to a yogurt like consistency which usually takes one to two minutes. If you overbeat it can become too stiff so stop once thickened. Step 6: Assemble cream layer: Spread the pudding mixture carefully over the top layer of cake cubes, using a spatula to avoid disturbing the cake. The pudding should fill small gaps and begin to bind the layers together. Step 7: Add whipped topping and cherries: Gently spread the thawed whipped topping over the pudding layer. Dollop the remaining cherry pie filling on top of the whipped topping. Use a spoon or a skewer to swirl the cherries into the topping lightly, creating a marbled pattern without fully mixing. Step 8: Finish and chill: Sprinkle the thinly sliced almonds over the cherries. Cover the dish with plastic wrap and refrigerate for at least four hours. Longer chilling enhances flavor melding and improves slicing for serving.
You Must Know
- Store refrigerated and serve chilled for the best texture. The dish will hold well for up to three days when covered.
- This is not freezer friendly because thawing will change the cream and cake texture; however you can freeze individual cherry topping separately.
- High in calcium from the dairy elements and moderate in calories depending on portion size; slices are richer than a plain cake slice.
- Allergens include dairy, gluten and tree nuts if almonds are used. Skip nuts for nut free serving.
My favorite thing about this assembly is how forgiving it is. On a busy weekend I assemble it while dinner is cooking and by the time we finish the evening meal the cherries and cream have already begun to harmonize. Family members always remark that it looks more complicated than it is which makes it a low stress win for dinner parties. I have taught this method to several friends and each one tailors the layers slightly to suit their guests often swapping different pie fillings or toasted toppings.
Storage Tips
Keep the dessert covered in the refrigerator to prevent it from absorbing other flavors and to maintain the whipped topping texture. Use an airtight lid or press a layer of plastic wrap directly onto the surface before sealing with a lid. It will keep well for three days; after that the cake will continue to soften and the topping may weep. For serving later, remove from the fridge about 10 minutes before slicing to make cutting cleaner, and use a sharp, warmed knife for neat squares.
Ingredient Substitutions
If you need a lighter version, substitute light sour cream and reduced fat whipped topping, keeping in mind the final texture will be less luxurious. For a non dairy version try coconut milk plus a stabilized coconut based whipped topping, and select a vegan instant pudding if available. If you want to change fruits, switch cherries for blueberry or strawberry pie filling using the same quantities. For nut free serving omit the sliced almonds and add toasted coconut flakes for a different crunch.
Serving Suggestions
Serve chilled in squares straight from the 9 by 9 dish for casual events or use a wide spatula to lift neat portions onto dessert plates for a more elegant presentation. Garnish with a dusting of powdered sugar or additional whole cherries and a sprig of fresh mint. Pair with strong coffee or a late harvest wine for a contrast to the sweet, creamy layers. This dessert also makes a festive centerpiece for summer picnics and holiday gatherings.
Cultural Background
This layered chilled dessert is a descendant of classic American trifle traditions that emphasize alternating layers of cake, fruit and custard. The use of instant pudding and canned pie filling reflects a mid twentieth century home economics practicality that prized convenience without sacrificing flavor. Over time home cooks adapted trifle ideas into simpler assemblies that use readily available packaged components and remain popular for their reliability and nostalgia.
Seasonal Adaptations
In summer, swap the cherry filling for a mixed berry pie filling and add a scattering of fresh berries on top just before serving. For fall, use a spiced apple pie filling combined with a pinch of cinnamon in the pudding mixture. At holidays consider using red and green garnishes or adding a splash of brandy to the cherries for an adult friendly version. Small adjustments like toasted pecans or a citrus zest can shift the profile seasonally.
Meal Prep Tips
Assemble the dessert up to one day in advance and refrigerate. If making several pans for a crowd, prepare the cream mix in batches and keep chilled until ready to spread. Transport in a cooler if you must take it to a picnic to maintain the whipped topping texture. For portion control, line the pan with parchment and partially freeze for 30 minutes before slicing so pieces cut cleaner. Use small airtight containers to portion for individual lunches or dessert boxes.
Success Stories
One of my favorite memories with this dish was serving it at my sister s backyard rehearsal dinner. Guests loved the way it looked on the dessert table and many remarked they had childhood memories of similar layered desserts. Another time a neighbor used the method to create a lemon curd version that guests declared better than store bought lemon bars. These small successes remind me that simple techniques can produce memorable moments.
This recipe invites personalization and generosity. Whether you are making it for a weeknight treat or a festive gathering, its simplicity and bright flavor make it a reliable favorite. I hope you enjoy assembling and sharing this light, creamy dessert as much as my family does.
Pro Tips
Cut the angel food cake with a serrated knife using a gentle sawing motion to keep cubes airy.
Spread layers gently to avoid compressing the cake which preserves the light texture.
Chill for at least four hours so the pudding sets and the flavors meld for cleaner slices.
Warm the knife under hot water and dry between cuts for neat serving portions.
Toast almonds briefly to enhance their flavor before sprinkling on top.
This nourishing heaven on earth cake recipe is sure to be a staple in your kitchen. Enjoy every moist, high protein slice — it is perfect for breakfast or as a wholesome snack any time.
FAQs about Recipes
How long can the dessert be stored?
Yes. Cover and refrigerate for up to three days. For best texture serve within 48 hours.
Can I freeze the assembled dessert?
No. Freezing changes the texture of the whipped topping and the cake once thawed.
Tags
Heaven on Earth Cake
This Heaven on Earth Cake recipe makes perfectly juicy, tender, and flavorful steak every time! Serve with potatoes and a side salad for an unforgettable dinner in under 30 minutes.
Instructions
Prepare the cake
Slice the angel food cake into 1 inch cubes and layer half of them evenly in the bottom of a 9 by 9 baking dish.
Add cherry layer
Spoon about two thirds of the canned cherry pie filling over the first cake layer, spreading gently without compressing.
Top with cake
Evenly distribute the remaining cake cubes over the cherry filling to create alternating layers.
Mix creams
Combine the whole milk, heavy cream and sour cream in a medium bowl and whisk until smooth.
Add pudding
Sprinkle the instant French vanilla pudding mix over the milk mixture and whisk until the mixture thickens to yogurt consistency.
Assemble cream layer
Spread the pudding mixture over the top cake layer using a spatula, filling gaps and binding the layers.
Finish topping
Spread the thawed whipped topping over the pudding and dollop the remaining cherry filling on top, gently swirling for a marbled look.
Garnish and chill
Sprinkle sliced almonds on the surface, cover with plastic wrap and refrigerate for at least four hours before serving.
Last Step: Please leave a rating and comment letting us know how you liked this recipe! This helps our business to thrive and continue providing free, high-quality recipes for you.
Nutrition
Did You Make This?
Leave a comment & rating below or tag
@epicula on social media!
Categories:
You might also like...

Mississippi Mud Brownies
Ultra-fudgy brownies crowned with toasted mini marshmallows and warm cocoa icing, with molten chocolate pockets in every bite.

Buttery Pecan Pie Bars
Buttery shortbread crust topped with a gooey brown sugar pecan filling. Just 10 minutes to prep for bakery-worthy bars with irresistible crunch.

Crack-Free Pumpkin Cheesecake
Ultra-creamy pumpkin cheesecake with a graham crust, bakes without cracks, and shines with caramel and rum-kissed whipped cream.
Did You Make This?
Leave a comment & rating below or tag @epicula on social media!
Rate This Recipe
Share This Recipe
Enjoyed this recipe? Share it with friends and family, and don't forget to leave a review!
Comments (1)
This recipe looks amazing! Can't wait to try it.
Comments are stored locally in your browser. Server comments are displayed alongside your local comments.

Hi, I'm Olivia!
What's Popular

30-Minute Meals!
Join to receive our email series which contains a round-up of some of our quick and easy family favorite recipes.