
>>

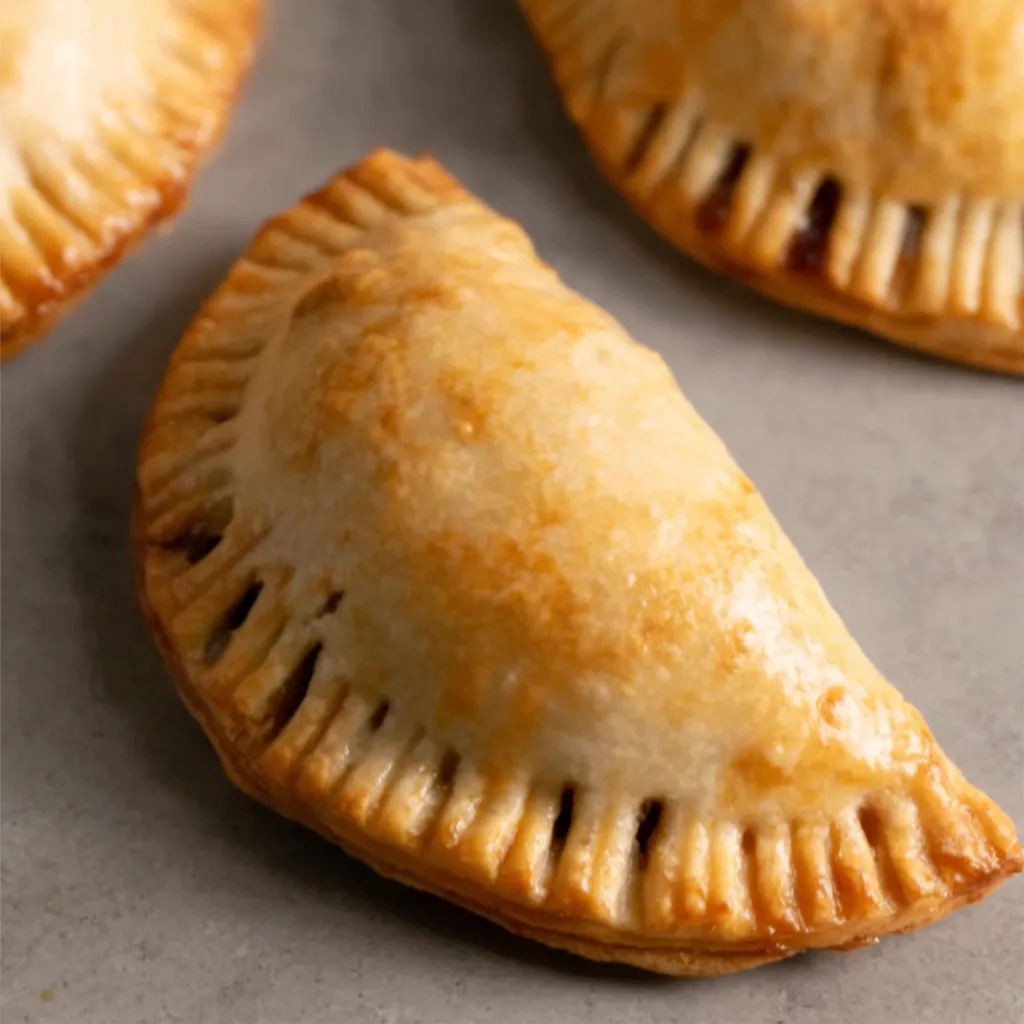
Individual handheld apple pastries with a flaky homemade crust and a warmly spiced apple filling—perfect for gatherings, lunchboxes, or cozy afternoons.
This recipe for Mini Apple Pies has been a small-but-mighty staple in my kitchen for years. I first developed it the autumn I wanted something portable and nostalgic for a school bake sale: the flavor of a classic apple pie, but in a neat, single-serve package. The result was better than I expected—flaky, buttery crust that yields a tender crumble and a filling that balances bright apple sweetness with warm cinnamon and allspice. These little pies are bite-sized comfort, and I often find myself reaching for a second one with a cup of tea.
I discovered that using a cold butter technique and minimal handling keeps the crust exceptionally tender and flaky. Rolling the dough to a thin, even 1/6-inch thickness creates a delicate shell that crisps up beautifully in the oven without becoming tough. The filling calls for just two apples and a modest amount of sugar so the fruit’s natural texture and flavor can shine—there’s a real contrast between the warm, slightly syrupy interior and the golden exterior. Over the years, friends and family have asked for the recipe repeatedly after tasting these; they’re the kind of pastry that evokes memories and quick smiles.
I still remember taking a tray of these to a fall potluck and watching them disappear within minutes. People always comment on how delicate the crust is—everyone assumes they’re made by a professional. They’re surprisingly forgiving, too: small imperfections in crimping only add to the rustic charm.

One of my favorite things about these is how they brighten a simple coffee break—people often mention the contrast between the crisp edges and the tender apple interior. The little slits on top let out a fragrant steam that fills the kitchen with fall aromas while they bake; it’s a small sensory delight that always brings back memories of baking with my grandmother.

For short-term storage, cool completely and place in an airtight container at room temperature for up to 48 hours. For longer storage, wrap individually in plastic wrap and freeze on a tray until firm, then transfer to a resealable bag for up to 3 months. Reheat from frozen at 325°F for 12–15 minutes or until warmed through—this prevents the crust from over-browning. If you’ve assembled but not baked them, freeze the assembled pies on a sheet pan, then store in a bag; bake from frozen, adding a few extra minutes to the bake time.
If you need to swap ingredients, try a 50/50 mix of butter and shortening for a slightly flakier, less flavorful crust—shortening keeps texture tender but lacks butter’s richness. For a dairy-free version, use a plant-based butter substitute that is solid when cold. To reduce sugar, cut the filling sugar to 2 tablespoons and add a teaspoon of lemon juice to brighten flavor. Gluten-free flour blends can work, but expect a denser crust; add a teaspoon of xanthan gum if your blend lacks binding agents.
Serve warm with a small scoop of vanilla ice cream or a drizzle of heavy cream for a classic pairing. For a breakfast twist, warm and spread lightly with cream cheese and a sprinkle of toasted walnuts. Garnish with a dusting of confectioners’ sugar or a tiny sprig of fresh thyme for an elegant presentation. These are excellent at fall gatherings and pair well with cider, coffee, or a small glass of port for dessert.
Miniature fruit pastries are a universal comfort across many cuisines—these American-inspired handheld pies are a portable adaptation of the traditional family pie. Individual pies date back to when cooks made small hand pies for portability and personal portions; the technique of cold butter cutting to create flakiness is a staple of European pastry making that traveled to North America and merged with local fruit harvests like apples.
Swap apples for other firm fruits in season: chopped pears with ginger in winter, or small berry compotes in summer with a touch of lemon zest. For holiday versions, add 1 tablespoon of finely chopped crystallized ginger or a splash of rum to the filling. In spring, try apple-berry combinations with a teaspoon of vanilla extract to lift the flavor.
Make the dough in advance and keep it chilled; it will save 20–30 minutes when you plan to assemble later. Pre-chop and toss apples in sugar and spices up to a day ahead to shorten assembly time—store in an airtight container in the refrigerator. Assemble pies and freeze them unbaked on a tray for grab-and-bake convenience; they make quick desserts and are perfect for unexpected guests.
These mini pies are a small project with big rewards: a flaky crust, a warmly spiced filling, and a nostalgic appeal that makes them worth the few extra steps. I hope you make them your own and pass them along to someone who’ll smile after the first bite.
Keep butter and water ice-cold to ensure a flaky crust; chill the dough if it becomes too warm while working.
Roll dough to an even 1/6-inch thickness to get a delicate, tender shell that crisps in the oven.
Cut the crust circles and chill assembled pies briefly if the butter softens, this helps them hold shape while baking.
This nourishing mini apple pies recipe is sure to be a staple in your kitchen. Enjoy every moist, high protein slice — it is perfect for breakfast or as a wholesome snack any time.
Yes—assemble the pies and freeze them on a sheet pan until firm, then transfer to a freezer bag. Bake from frozen, adding 3–6 minutes to the bake time.
Use a firm apple like Granny Smith or Honeycrisp. Softer apples will break down and yield a mushier filling.
This Mini Apple Pies recipe makes perfectly juicy, tender, and flavorful steak every time! Serve with potatoes and a side salad for an unforgettable dinner in under 30 minutes.
Whisk the flour and salt in a medium bowl. Use a pastry cutter, two knives, or fingertips to cut the cold butter into the flour until pea- to lentil-sized pieces form. Keep ingredients cold to create a flaky texture.
Drizzle the 4 tablespoons of ice water over the flour mixture a little at a time, tossing with a fork until the dough begins to clump. Turn out onto a lightly floured surface and gently bring together, avoiding over-kneading. Form into a disk and refrigerate at least 30 minutes.
Roll the chilled dough to about 1/6-inch thickness on a floured surface. Cut twelve 4-inch circles, rerolling scraps once. If the dough gets soft, chill for 10–15 minutes.
Preheat oven to 425°F and line a baking sheet with parchment. Toss apples with sugar, cinnamon, and allspice. Place about 1 tablespoon filling on one side of each circle, brush edges with eggwash, fold, crimp with a fork, brush tops, and slit vents.
Arrange pies 2 inches apart and bake 18–20 minutes until golden and bubbling. Cool on the pan 5 minutes, then transfer to a wire rack to cool completely.
Last Step: Please leave a rating and comment letting us know how you liked this recipe! This helps our business to thrive and continue providing free, high-quality recipes for you.
Leave a comment & rating below or tag
@epicula on social media!

Ultra-fudgy brownies crowned with toasted mini marshmallows and warm cocoa icing, with molten chocolate pockets in every bite.

Buttery shortbread crust topped with a gooey brown sugar pecan filling. Just 10 minutes to prep for bakery-worthy bars with irresistible crunch.

Ultra-creamy pumpkin cheesecake with a graham crust, bakes without cracks, and shines with caramel and rum-kissed whipped cream.
Leave a comment & rating below or tag @epicula on social media!
Enjoyed this recipe? Share it with friends and family, and don't forget to leave a review!
This recipe looks amazing! Can't wait to try it.
Comments are stored locally in your browser. Server comments are displayed alongside your local comments.

Join to receive our email series which contains a round-up of some of our quick and easy family favorite recipes.
