
>>

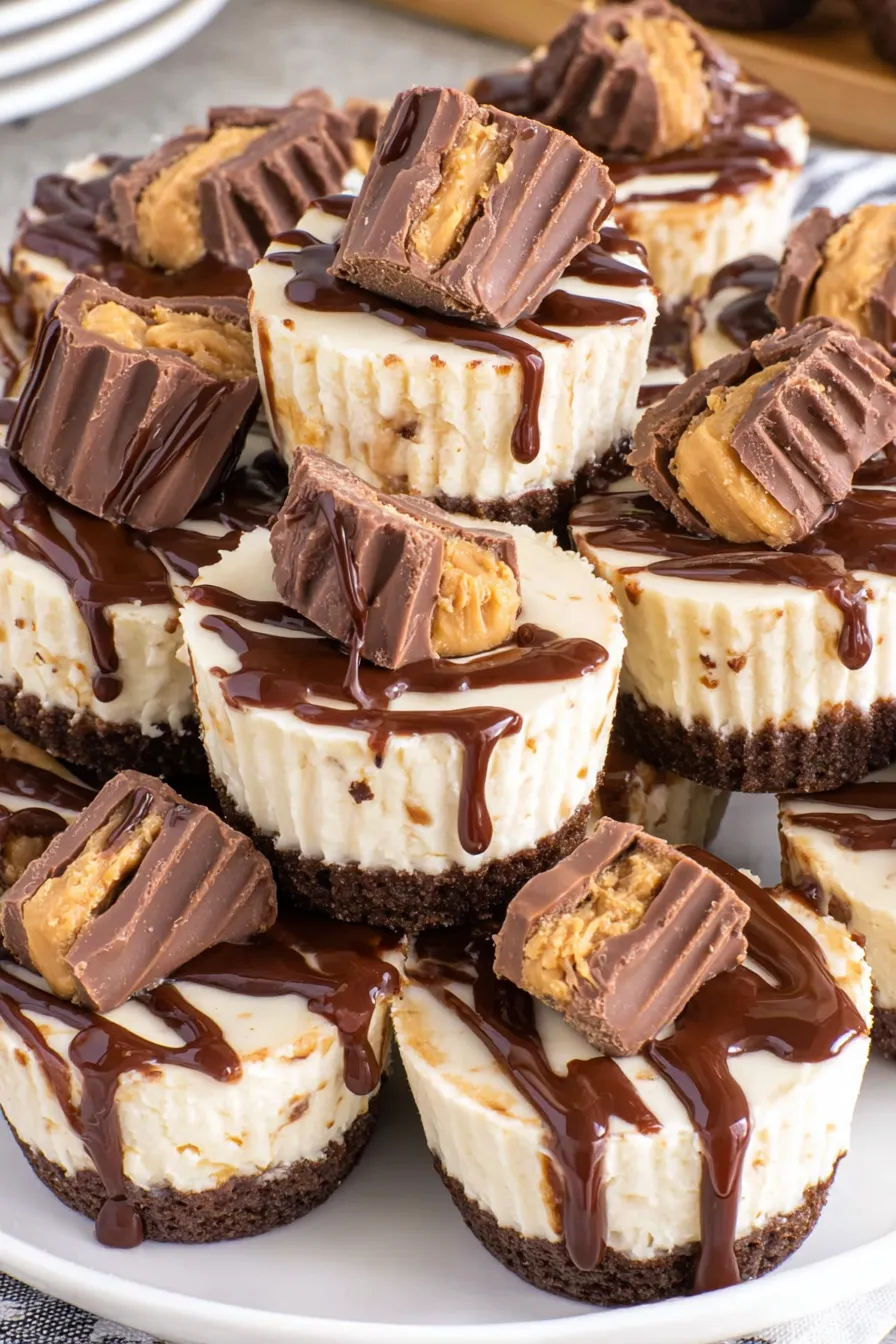
Tiny, decadent no-bake treats layered over a Reese's cup base — creamy peanut butter cheesecake with a melty mini peanut butter cup center and chocolate drizzle.
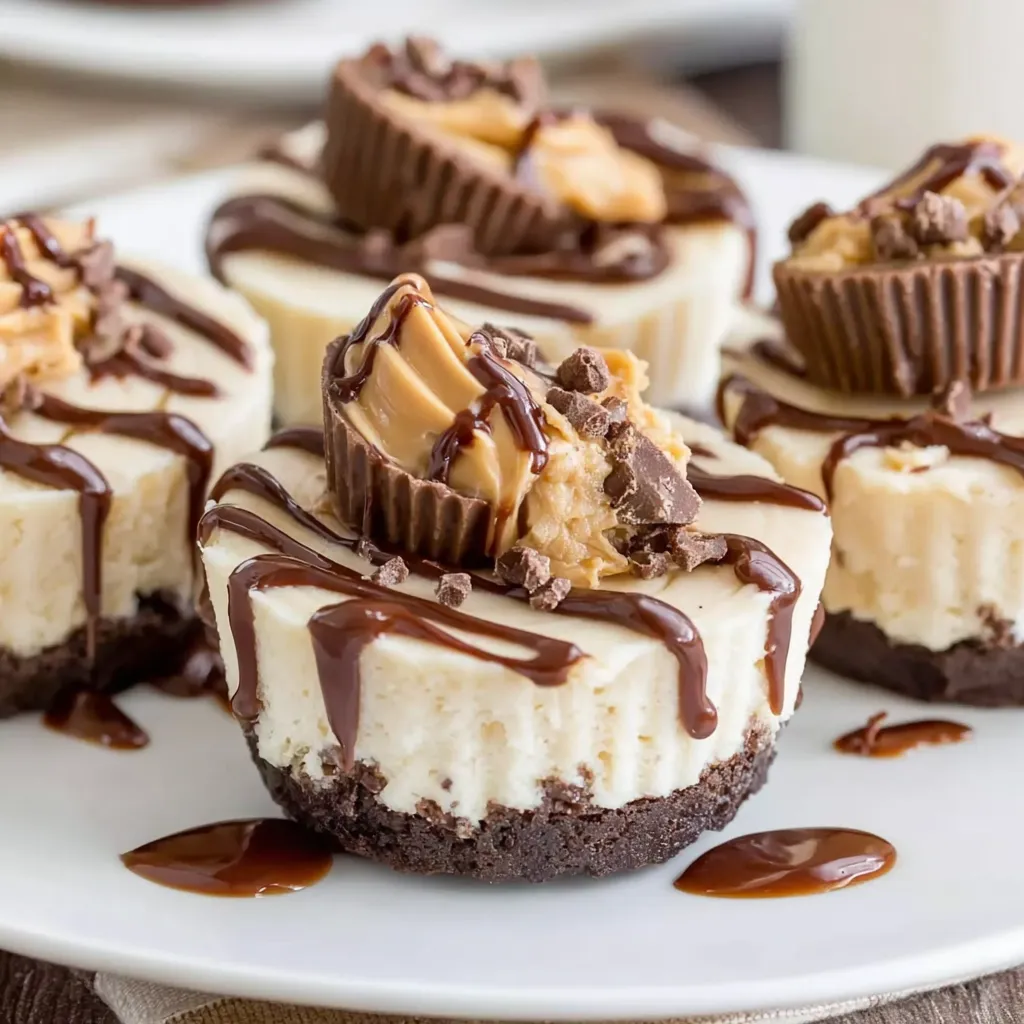
This recipe for mini peanut butter cheesecakes began as a small experiment the first time I wanted to combine two of my favorite comforts: rich cream cheese and classic peanut butter cup candy. I discovered the assembly while prepping treats for a casual get-together, and the instant hit they became convinced me they belonged in the permanent rotation. Each bite gives you a crisp candy base, a cloudlike peanut butter filling, and a pocket of melted chocolate at the center when you press in the mini cup — it is pure nostalgia reimagined in a bite-sized format.
What makes these particularly special is how effortlessly they balance texture and flavor. The standard Reese's cup at the base provides an instant, familiar crunch and chocolate-peanut-butter flavor, while the whipped cream cheese filling adds tang and silkiness that keeps them from being cloying. They are perfect for parties, holiday plates, or a thoughtful, homemade gift. I learned early on that chilling them overnight yields the cleanest presentation and the most satisfying slice when you lift them from their liners.
When I first served these at a family barbecue, the plate emptied within minutes. My niece declared them the best cookie-cup hybrid she had ever tasted. I love how easily the recipe scales — double the batch for a larger crowd or halve it for a small treat. The simplicity is deceptive; the texture and presentation read like something from a bakery.
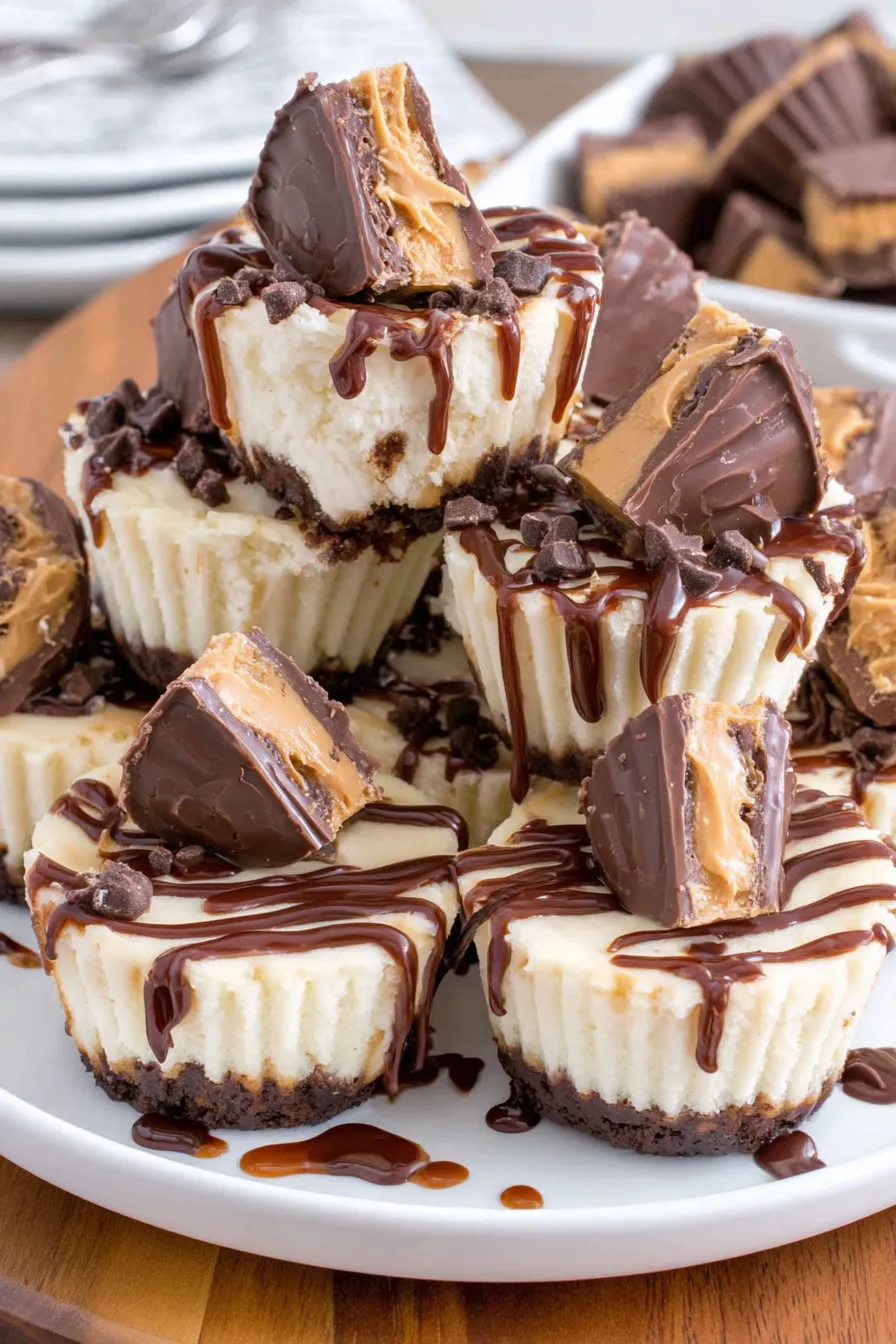
My favorite thing is the visual contrast: glossy chocolate, pale peanut butter filling, and the little exposed candy top. At a holiday cookie swap, a friend told me these tasted like a grown-up candy bar — exactly the reaction I aim for. They travel well when kept cool and have become my go-to when I need to bring something nostalgic yet polished.
Store in an airtight container in the refrigerator for up to four days to maintain texture and taste. Layer parchment between rows if stacking to prevent sticking. For longer storage, place them in a single layer on a tray and freeze until solid, then transfer to a freezer-safe container; they keep for up to three months. To serve from frozen, move them to the fridge and thaw overnight — this protects the texture more than leaving them at room temperature, which can make the filling soft and oily.
If you need dairy-free alternatives, swap the cream cheese and heavy cream for coconut-based cream cheese and coconut cream, keeping in mind the coconut flavor will be noticeable. Use a stabilized vegan buttercream or vegan cream cheese for structure. To make these gluten-free, verify the candy manufacturer labeling, or replace the standard Reese's with certified gluten-free peanut butter cups. For a lower-sugar version, reduce powdered sugar slightly and add a tablespoon of maple syrup to maintain texture, but expect a softer filling.
Serve chilled on a platter with a drizzle of chocolate syrup and flaky sea salt for contrast. Pair with strong coffee or an espresso martini for an adult twist, or offer with cold milk and fresh berries for a family-friendly presentation. Garnish ideas include crushed peanuts, cocoa powder dusting, or a tiny sprinkle of crushed toffee. These bite-sized portions are ideal on dessert boards alongside cookies and fruit.
Peanut butter and chocolate have been a beloved American pairing for over a century, popularized in confections and sandwiches. The Reese's peanut butter cup, introduced in the 1920s, became iconic for marrying sweet milk chocolate with salty-sweet peanut butter. These mini cheesecakes are a contemporary, no-bake adaptation that combines American dessert traditions: the creamy cheesecake filling with candy-based components, reflecting the country’s tendency to innovate comfort foods into party-friendly formats.
In colder months, add a pinch of cinnamon or a teaspoon of espresso powder to the filling to add warmth. For spring and summer, fold in a touch of citrus zest (orange works well) to brighten the peanut butter. Holiday variations include topping with crushed peppermint for a festive twist or swapping the mini cup for holiday-themed candy. For outdoor gatherings in warm weather, keep them chilled in a cooler to prevent the filling from softening.
Assemble up to two days ahead for peak convenience: pipe the filling and add the mini cup, then refrigerate until needed. For longer-term meal prep, freeze finished portions individually on a baking sheet before packing into containers; thaw in the fridge the day before serving. Use sturdy liners to make transport easier and pack with ice packs for catered events. Label containers with the assembly date to track freshness.
These mini peanut butter cheesecakes are joyful to make and even more joyful to share. They strike the right balance between nostalgic candy and refined dessert, and the simple technique means you can produce beautiful results with minimal fuss. Try them once and you’ll find occasions to bring them out again and again.
Soften the cream cheese to room temperature before mixing for the smoothest filling.
Sift powdered sugar to prevent grainy texture and ensure a silky mouthfeel.
Chill the portions for at least 8 hours, preferably overnight, to set properly.
This nourishing mini peanut butter cheesecakes recipe is sure to be a staple in your kitchen. Enjoy every moist, high protein slice — it is perfect for breakfast or as a wholesome snack any time.
This Mini Peanut Butter Cheesecakes recipe makes perfectly juicy, tender, and flavorful steak every time! Serve with potatoes and a side salad for an unforgettable dinner in under 30 minutes.
Line a 12-cup muffin tin with paper liners and place one standard Reese's cup in the bottom of each liner.
In a large bowl, beat 16 ounces softened cream cheese and 3/4 cup creamy peanut butter on medium-high with a handheld mixer until light and fluffy, about 2 to 3 minutes.
Sift in 1 1/2 cups powdered sugar, then add 1 1/2 teaspoons vanilla extract and 1/3 cup cold heavy cream. Beat on high for 1.5 to 2 minutes until airy and smooth.
Transfer filling to a piping bag or zip-top bag with a corner snipped off and pipe into each muffin cup, filling to the top. Alternatively, spoon and smooth with a spatula.
Press a mini Reese's cup into the center of each portion, leaving the top exposed. Refrigerate for at least 8 hours or overnight before serving.
Before serving, drizzle each cheesecake with chocolate syrup and, if desired, sprinkle with crushed peanuts or flaky sea salt.
Last Step: Please leave a rating and comment letting us know how you liked this recipe! This helps our business to thrive and continue providing free, high-quality recipes for you.
Leave a comment & rating below or tag
@epicula on social media!

Ultra-fudgy brownies crowned with toasted mini marshmallows and warm cocoa icing, with molten chocolate pockets in every bite.

Buttery shortbread crust topped with a gooey brown sugar pecan filling. Just 10 minutes to prep for bakery-worthy bars with irresistible crunch.

Ultra-creamy pumpkin cheesecake with a graham crust, bakes without cracks, and shines with caramel and rum-kissed whipped cream.
Leave a comment & rating below or tag @epicula on social media!
Enjoyed this recipe? Share it with friends and family, and don't forget to leave a review!
This recipe looks amazing! Can't wait to try it.
Comments are stored locally in your browser. Server comments are displayed alongside your local comments.

Join to receive our email series which contains a round-up of some of our quick and easy family favorite recipes.
