
No-Bake Christmas Cheesecake Bites

Festive, creamy one-bite treats that combine classic cheesecake flavor with holiday colors — no oven required and ready for gifting or parties.

This little tray of No-Bake Christmas Cheesecake Bites has become my go-to for holiday parties, last-minute gifts, and weekday indulgences when I want something festive without firing up the oven. I first put this combination together one December afternoon when a blizzard trapped us at home and I wanted a sweet, festive treat that would keep for a few days. The creamy, tangy center balanced by a hint of vanilla and the sweet white chocolate coating is simple but feels celebratory. Rolling them into one-inch bites makes them perfect for popping into mouths and cookie boxes alike.
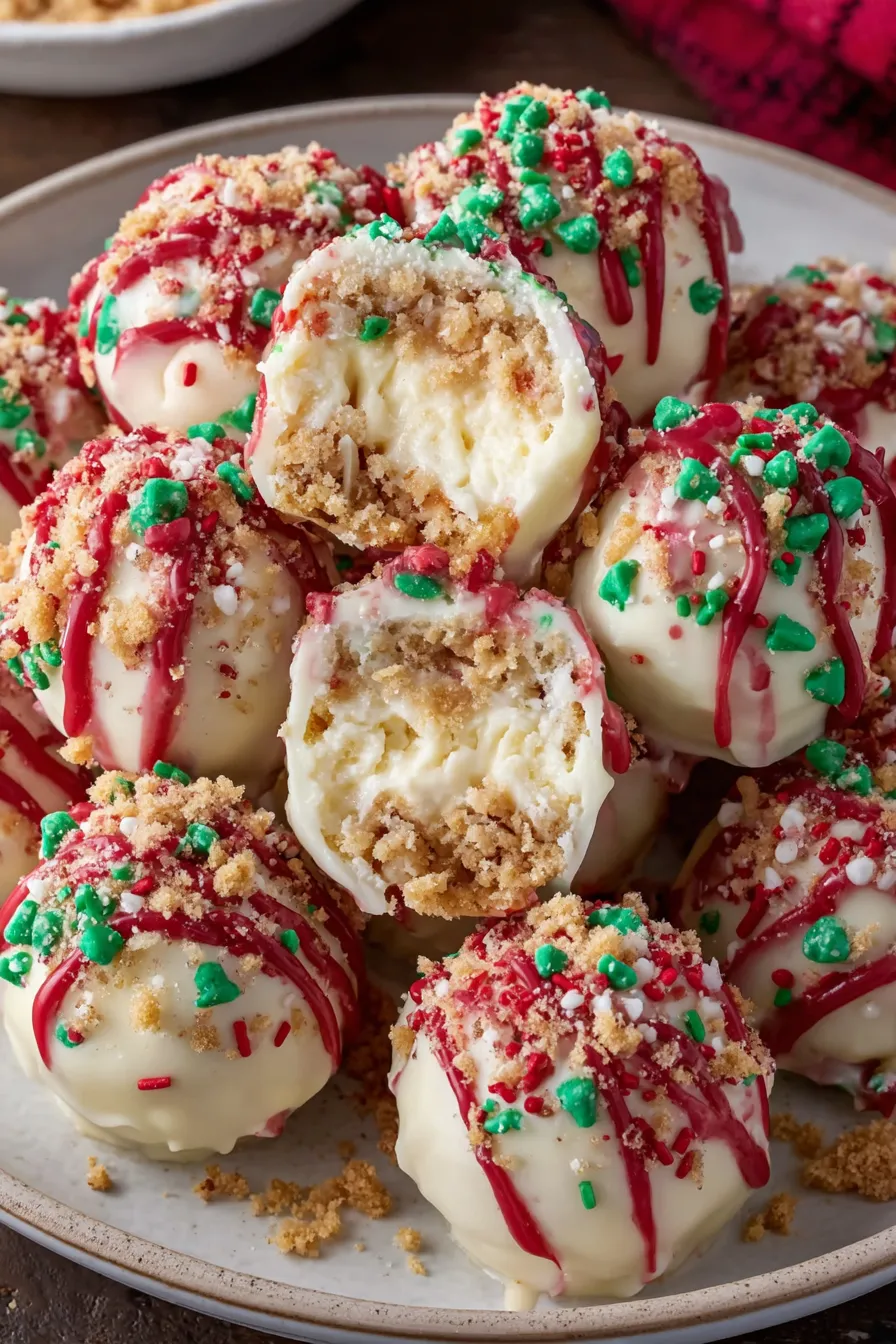
What I love most about these bites is how approachable the technique is: no crust craze, no water bath, just a few bowls and a little chilling time. The texture is pillowy and smooth, with the crushed graham or cookie crumbs adding just enough structure so the filling holds its shape. The red and green candy melts turn ordinary bites into something merry, and the sprinkles add nostalgic crunch. I make a double batch for gatherings and keep a few trays in the freezer for unexpected guests — they thaw perfectly in 15 to 20 minutes.
Why You'll Love This Recipe
- Fast and fuss-free: ready to plate in about 45 minutes with mostly hands-off chilling time and no baking required, perfect for last-minute entertaining.
- Minimal equipment: a mixing bowl, microwave-safe bowls, a baking sheet and parchment cover nearly everything, so clean-up is quick.
- Uses pantry staples: cream cheese, powdered sugar, vanilla and white chocolate chips are common items you likely have or can grab easily.
- Make-ahead friendly: these hold in the refrigerator for a week and freeze well for up to three months, great for holiday gift prep.
- Crowd-pleasing and customizable: change the coating, crumbs, or sprinkles to match any theme — kids love the bright colors and adults love the cheesecake flavor.
- Great for gifting: bite-sized portions are ideal for boxes, tins, or plate assortments at potlucks and cookie exchanges.
When I first served these to neighbors, they asked for the recipe within an hour. My eldest likes them chilled straight from the fridge, while I prefer them just slightly softened at room temperature for a fuller cheesecake mouthfeel. They also travel well; I've wrapped individual bites in parchment and tied with ribbon for close friends and received delighted messages the next morning.
Ingredients
- Cream cheese (8 ounces): Use full-fat brick-style cream cheese, softened to room temperature for the smoothest texture; brands like Philadelphia give reliably tangy and stable results when chilled.
- Powdered sugar (1/2 cup): Fine sugar dissolves quickly into the cream cheese, sweetening without grittiness — sift if it has clumps for an ultra-silk filling.
- Vanilla extract (1 teaspoon): Pure vanilla adds depth; avoid imitation if you can — it elevates the filling’s aroma and pairs beautifully with white chocolate.
- White chocolate chips (1 cup): Choose good-quality chips or couverture for the smoothest melt; they lend sweetness and structure to the filling when cooled slightly before folding in.
- Crushed graham crackers or cookie crumbs (1 cup): Graham gives classic cheesecake notes; swap in vanilla wafer or shortbread crumbs for extra buttery flavor.
- Whipped topping (1/2 cup Cool Whip, thawed): Lightens the texture and makes rolling easier; freshly whipped cream works as an alternative but is less stable long-term.
- Red and green candy melts (amount as needed): Melted for festive coating — 1/2 cup of each color is typically enough for light drizzles; follow package melting instructions.
- Holiday sprinkles (to decorate): Use sturdy sprinkle mixes that won’t bleed color; add immediately after coating for best adhesion.
Instructions
Prepare the Cheesecake Mixture: Beat the softened cream cheese in a large bowl using an electric mixer on medium speed until completely smooth and free of lumps, about 2 to 3 minutes. Scrape down the bowl, then add the powdered sugar and vanilla extract. Beat again until fully incorporated and the texture is silky. Properly softened cream cheese is essential to avoid grainy pockets. Melt the White Chocolate: Place white chocolate chips in a microwave-safe bowl and microwave in 20-second intervals, stirring between bursts, until smooth. Allow the melted chocolate to cool for 1 to 2 minutes so it is warm but not hot — if too hot, it will loosen the cream cheese and make the mixture runny. Stir gently to ensure even temperature. Combine Chocolate with Filling: Pour the slightly cooled white chocolate into the cream cheese mixture in a slow stream while mixing on low speed. This helps emulsify the chocolate without seizing. Mix until uniform and glossy. If the mixture appears too loose, refrigerate briefly to firm up before proceeding. Add Crumbs and Fold in Whipped Topping: Stir in the crushed graham crackers or cookie crumbs until they are evenly distributed. Gently fold in the thawed whipped topping with a spatula, using light strokes to maintain airiness. The crumbs give structure so you can roll the mixture into balls later. Chill and Shape: Cover the bowl and refrigerate the mixture for 30 to 40 minutes until it firms enough to handle. Using a 1-inch scoop or a teaspoon, portion and roll the mixture between your palms into smooth 1-inch balls. Place each on a parchment-lined baking sheet spaced about 1/2 inch apart. Melt and Color the Coating: Melt red and green candy melts in separate microwave-safe bowls following the package directions — typically short bursts with stirring. Thin with a few drops of vegetable oil if too thick for drizzling. Keep the colors in bowls for dipping or drizzling. Coat and Decorate: Dip each chilled bite halfway into a colored coating or use a fork to drizzle the melts over the bites. Immediately add sprinkles while the coating is still wet so they adhere. Return to parchment and refrigerate for at least 15 minutes to set the coating fully.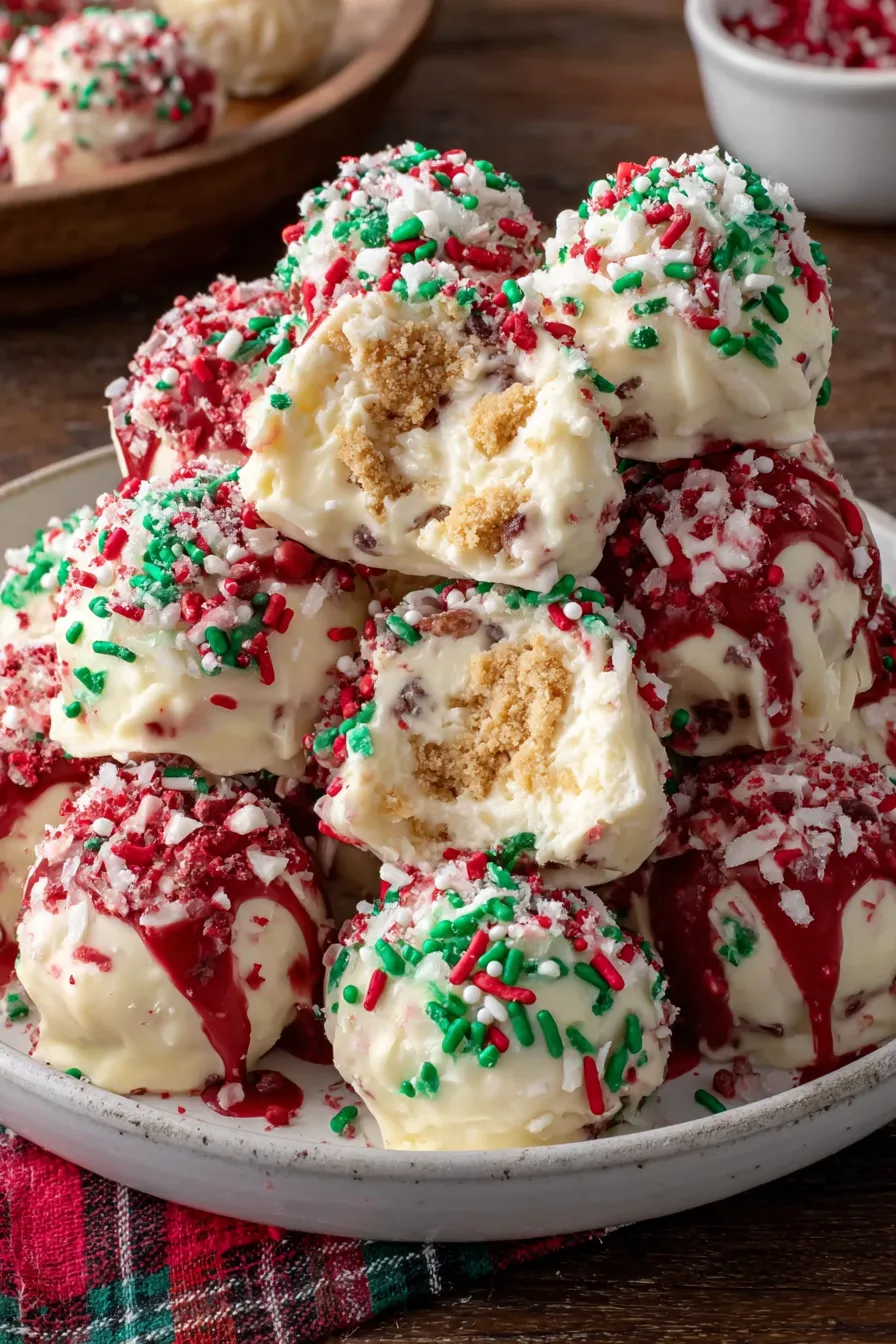
You Must Know
- Store in the refrigerator for up to one week in an airtight container, or freeze for up to three months; thaw in the fridge for 30 minutes before serving.
- High in dairy and sugar: each bite is a small indulgence — approximate calories: 110 per piece depending on coating and crumb choice.
- Use room-temperature cream cheese to ensure a lump-free texture and smooth rolling consistency.
- If using gluten-free crumbs, these can be adapted for gluten-free diets; double-check candy melts and sprinkles for cross-contamination.
- These are freezer-friendly and make excellent make-ahead gifts: freeze on a tray, then transfer to sealed containers to avoid frosting damage.
My favorite part is watching kids decorate the bites — their careful sprinkle placement and chaotic color drizzles are part performance, part art. Once, a neighbor told me their cookie exchange was rescued by a last-minute batch of these; they became the most requested item on the table. The combination of creamy center and glossy coating always earns compliments and makes holiday prep feel more joyful.
Storage Tips
For short-term storage, place the bites in a single layer in an airtight container separated by parchment paper and refrigerate for up to seven days. For longer storage, freeze on a tray until solid, then transfer to a freezer-safe container with parchment layers and keep for up to three months. Thaw frozen portions in the refrigerator for 30 to 60 minutes or at room temperature for 15 to 20 minutes before serving so the texture softens but the coating stays intact. Avoid direct sunlight and keep away from strong odors, as the cream cheese can absorb them.
Ingredient Substitutions
If you prefer a lighter option, swap the Cool Whip for freshly whipped heavy cream (1/2 cup yields similar volume), though fresh cream is less stable over several days. Use gluten-free graham crackers or crushed gluten-free shortbread for a gluten-free version. Replace white chocolate chips with milk chocolate or dark chocolate for a richer flavor, but reduce sugar slightly if using darker chocolate. For a dairy-free version, use vegan cream cheese and dairy-free chocolate chips; note texture and stability may vary and chilling times could increase.
Serving Suggestions
Serve these one-bite treats on a festive platter with fresh cranberries and rosemary sprigs for color contrast. Pair with strong coffee or a dessert wine like Moscato for adult guests. For a more formal presentation, pop each bite into a small paper candy cup and arrange in a tiered display. They also make charming edible gifts — present 6 to 12 in a small tin or box lined with parchment for neighbors and teachers.
Cultural Background
While these bites are a modern, playful take on classic cheesecake, the idea of miniaturizing desserts for sharing has roots in European petit fours and American holiday cookie traditions. Cheesecake itself evolved from ancient Greece but became a holiday staple in American homes when refrigeration and cream cheese became widely available in the early 20th century. These no-bake versions reflect contemporary preferences for convenience and portability while keeping the creamy tang of traditional cheesecake intact.
Seasonal Adaptations
Swap the red and green melts for pastels in spring or orange and brown in autumn to suit seasonal menus. For Valentine’s Day, use pink and white coatings and heart-shaped sprinkles. In summer, fold in a teaspoon of lemon zest and use a light lemon glaze instead of candy melts for a brighter flavor. Holiday spices like a pinch of cinnamon or nutmeg stirred into the crumbs can add warmth for winter gatherings.
Meal Prep Tips
To batch-make for a week of treats, prepare double the filling and shape half, freezing the other half in an airtight container to roll later. Portion the mixture using a small scoop to keep pieces uniform and reduce time. Label containers with date and color coding for coatings. Keep decorating supplies organized in bowls on a tray and work in small batches to prevent coatings from hardening before you’re done. This assembly-line approach makes decorating efficient and fun with helpers.
These festive bites are all about easy celebration: minimal fuss, maximum joy, and plenty of opportunities to make them your own. Whether you hand them out as gifts or serve them at a crowded party, they always disappear fast — which is the true sign of holiday success.
Pro Tips
Always use room-temperature cream cheese to avoid lumps and ensure a silky filling.
Chill the mixture before rolling so bites hold their shape and the coating adheres better.
Use a 1-inch scoop for uniform pieces and quicker coating and freeze times.
If melted candy is too thick for drizzling, thin with a teaspoon of vegetable oil.
Work in small batches when coating to prevent the melts from hardening mid-process.
This nourishing no-bake christmas cheesecake bites recipe is sure to be a staple in your kitchen. Enjoy every moist, high protein slice — it is perfect for breakfast or as a wholesome snack any time.
FAQs about Recipes
Can I freeze these bites?
Yes. Freeze on a tray until solid, then transfer to a sealed container. Thaw in the fridge for 30 to 60 minutes before serving.
How do I prevent a runny filling?
Use room-temperature cream cheese and fold the whipped topping gently to maintain a smooth, airy texture. Refrigerate if mixture looks too loose before shaping.
Tags
No-Bake Christmas Cheesecake Bites
This No-Bake Christmas Cheesecake Bites recipe makes perfectly juicy, tender, and flavorful steak every time! Serve with potatoes and a side salad for an unforgettable dinner in under 30 minutes.
Ingredients
Main
Instructions
Prepare the Cheesecake Mixture
Beat softened cream cheese until smooth, add powdered sugar and vanilla, and beat until silky. Scrape the bowl to ensure even mixing.
Melt the White Chocolate
Microwave white chocolate chips in 20-second bursts, stirring between intervals until smooth; cool 1 to 2 minutes before adding.
Combine Chocolate with Filling
Stream warm melted chocolate into the cream cheese while mixing slowly to emulsify without making the mixture runny.
Add Crumbs and Whipped Topping
Stir in crushed graham crackers, then gently fold in thawed whipped topping until evenly distributed and airy.
Chill and Shape
Refrigerate the mixture for 30 to 40 minutes, then portion with a 1-inch scoop and roll into smooth balls on parchment.
Melt and Color the Coating
Melt red and green candy melts in separate bowls per package instructions; thin with a little oil if needed for drizzling.
Coat and Decorate
Dip or drizzle the bites with colored coatings, add sprinkles while wet, and chill until the coating is fully set, about 15 minutes.
Last Step: Please leave a rating and comment letting us know how you liked this recipe! This helps our business to thrive and continue providing free, high-quality recipes for you.
Nutrition
Did You Make This?
Leave a comment & rating below or tag
@epicula on social media!
Categories:
You might also like...

Mississippi Mud Brownies
Ultra-fudgy brownies crowned with toasted mini marshmallows and warm cocoa icing, with molten chocolate pockets in every bite.

Buttery Pecan Pie Bars
Buttery shortbread crust topped with a gooey brown sugar pecan filling. Just 10 minutes to prep for bakery-worthy bars with irresistible crunch.

Crack-Free Pumpkin Cheesecake
Ultra-creamy pumpkin cheesecake with a graham crust, bakes without cracks, and shines with caramel and rum-kissed whipped cream.
Did You Make This?
Leave a comment & rating below or tag @epicula on social media!
Rate This Recipe
Share This Recipe
Enjoyed this recipe? Share it with friends and family, and don't forget to leave a review!
Comments (1)
This recipe looks amazing! Can't wait to try it.
Comments are stored locally in your browser. Server comments are displayed alongside your local comments.

Hi, I'm Olivia!
What's Popular

30-Minute Meals!
Join to receive our email series which contains a round-up of some of our quick and easy family favorite recipes.